
Two routes, one result. Buy the domain here and it connects itself — no records to copy, no registrar login. Or keep the domain you already own and point it at the site with a single record. Both end with your name in the address bar and HTTPS handled for you.
Settings → DomainGrowth plan or above
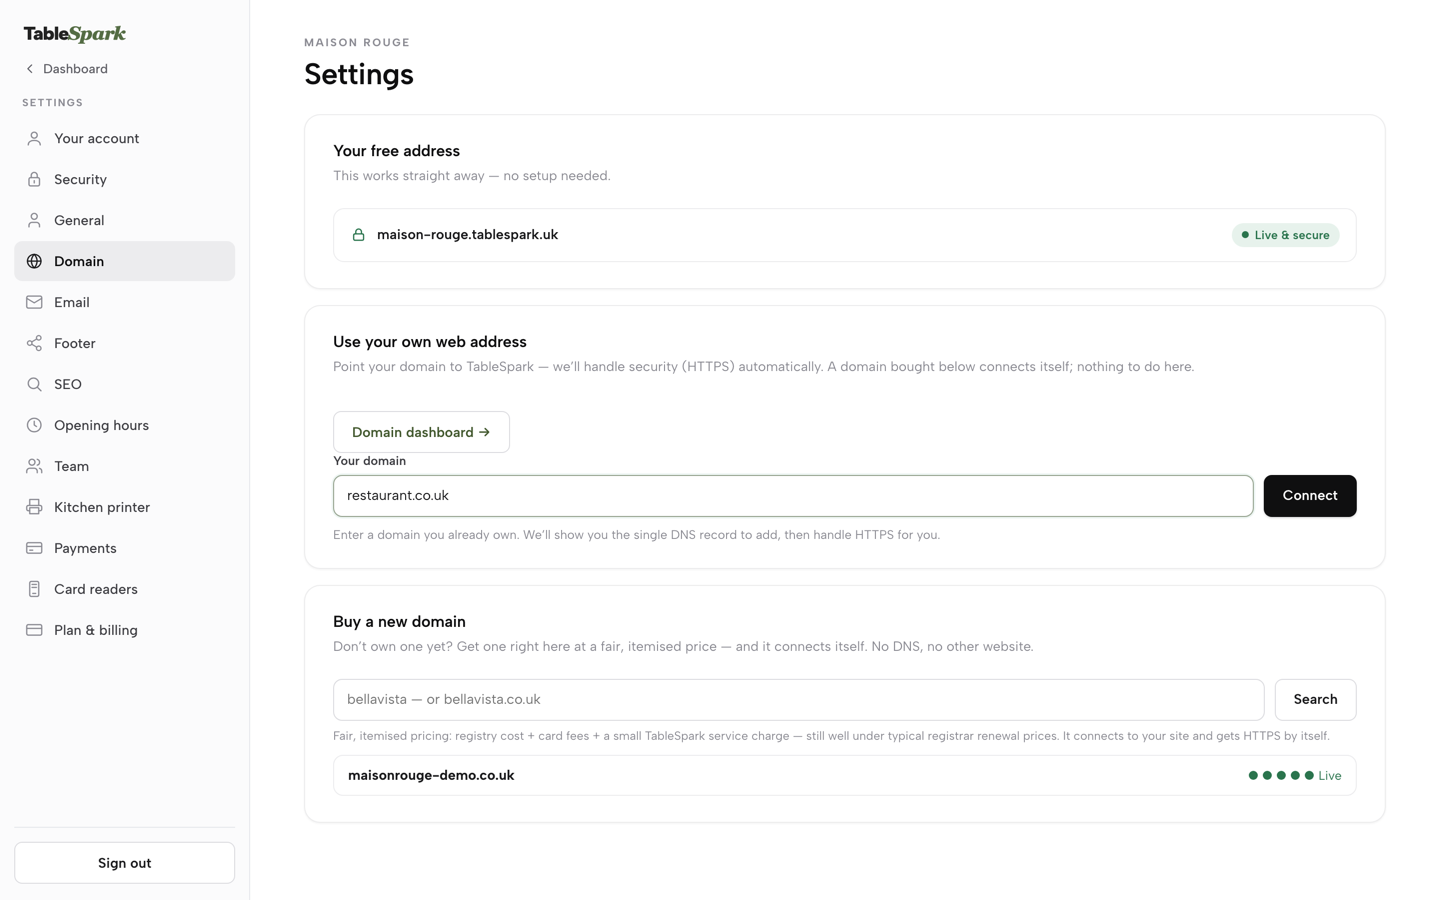
Open Settings from the sidebar, then click Domain in the Settings list — your web-address page opens.
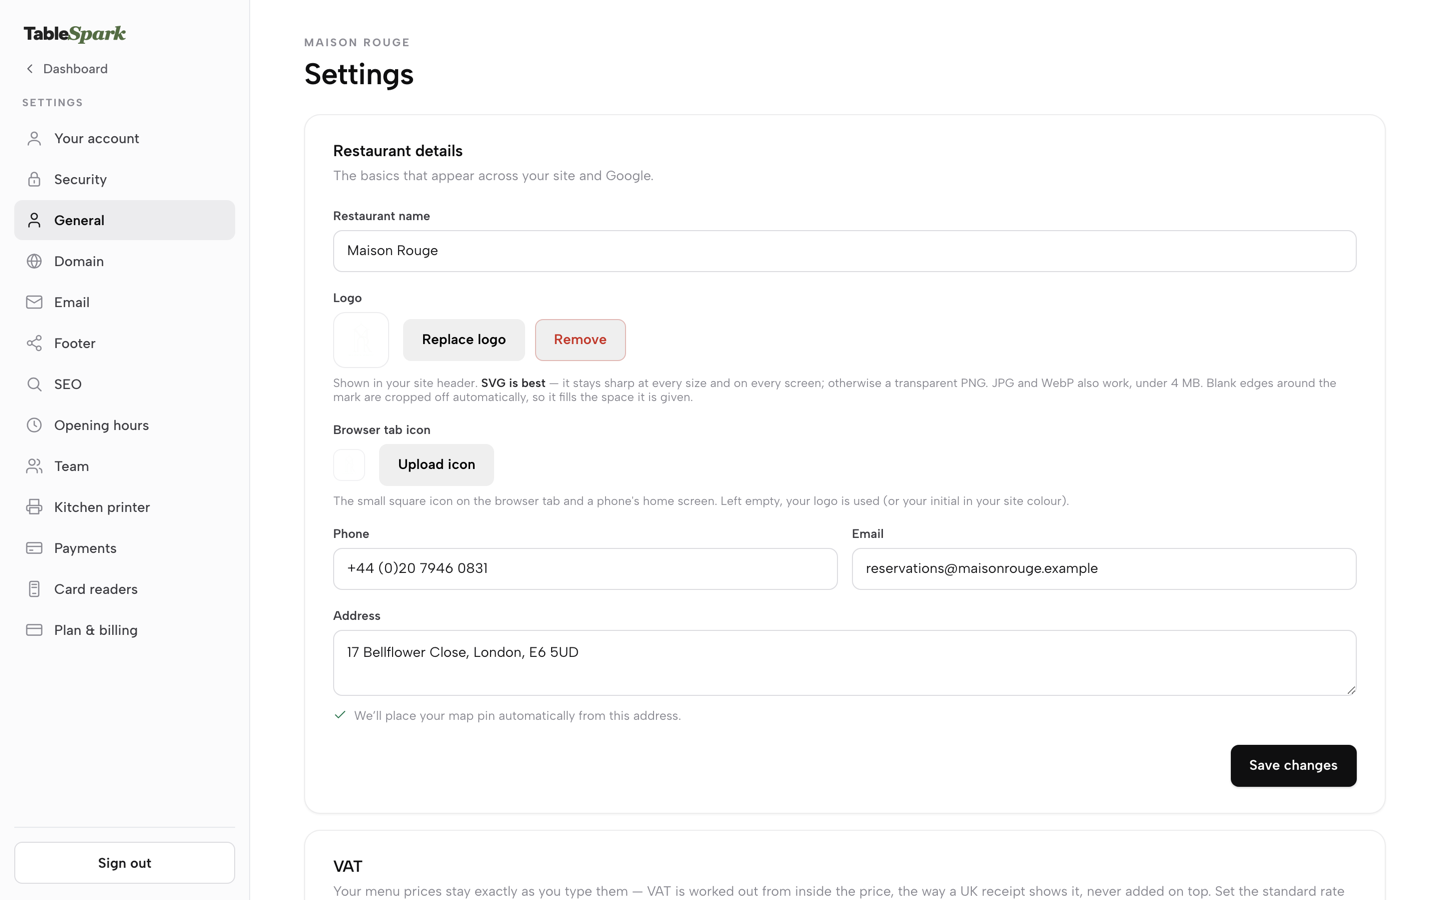
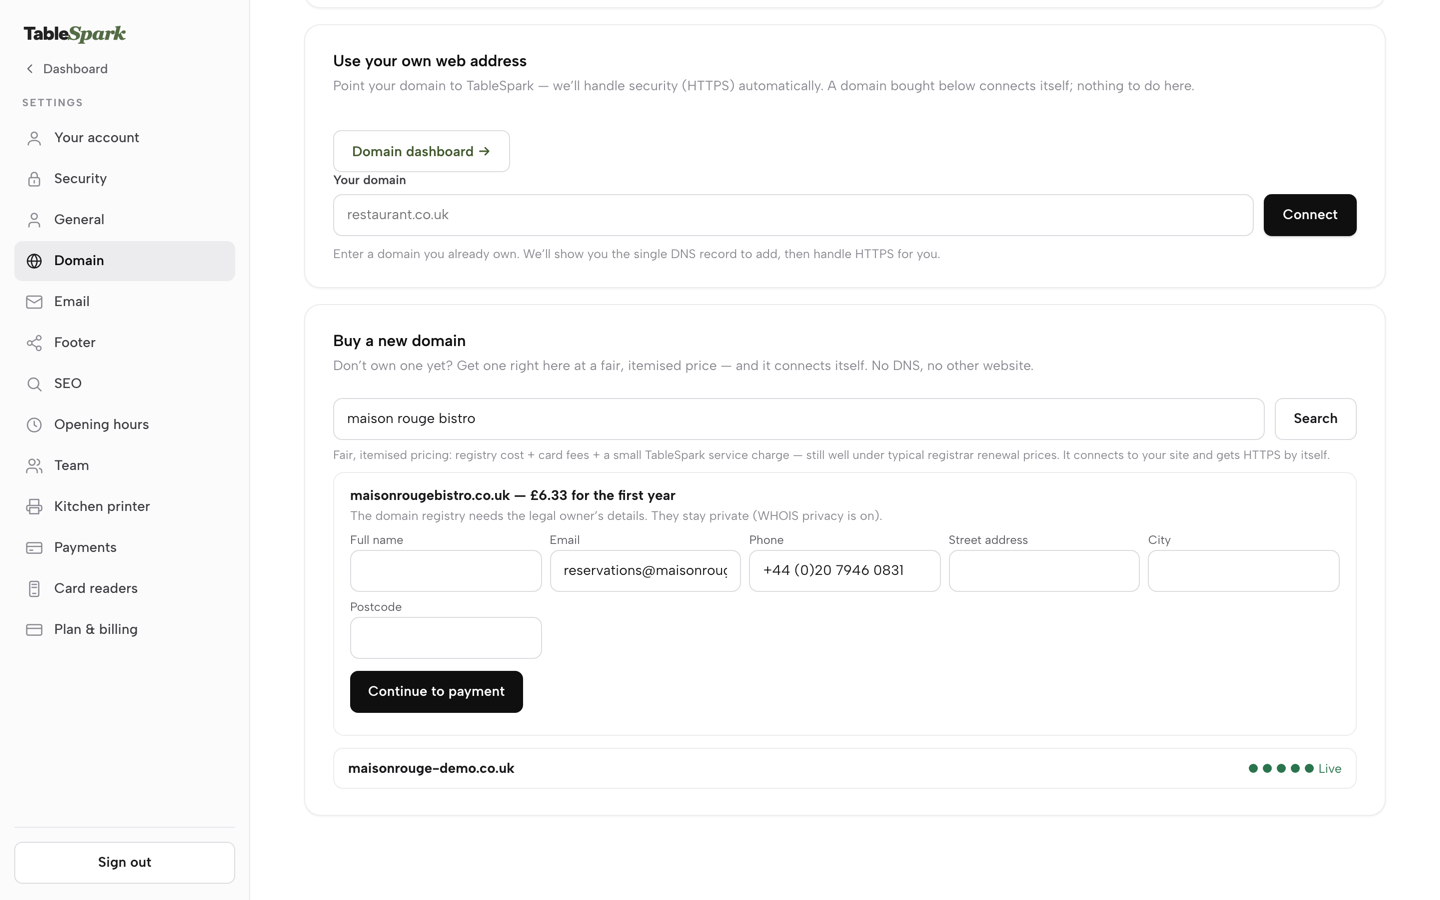
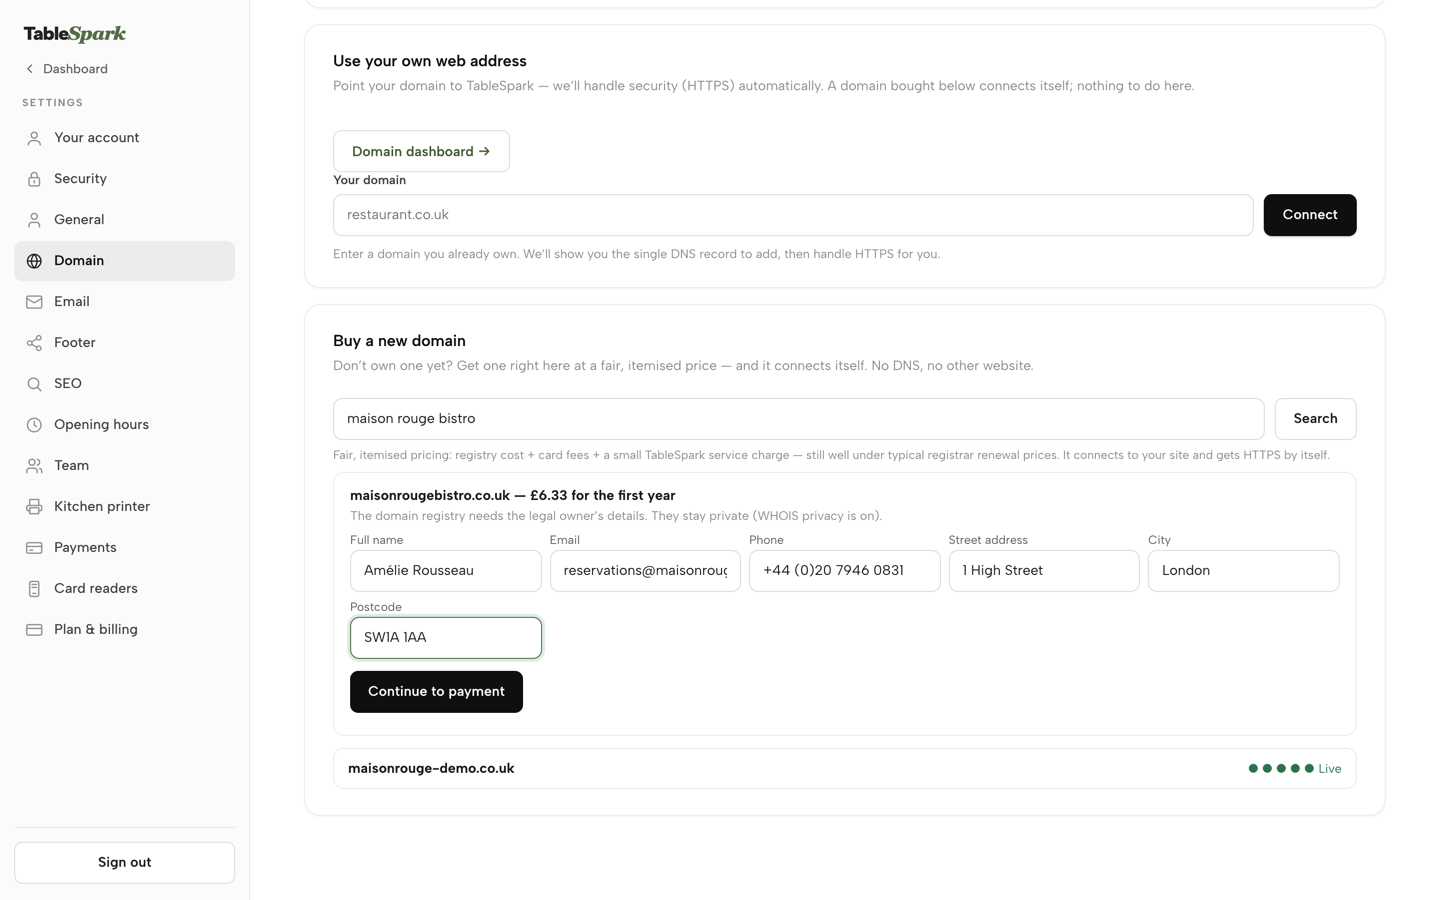
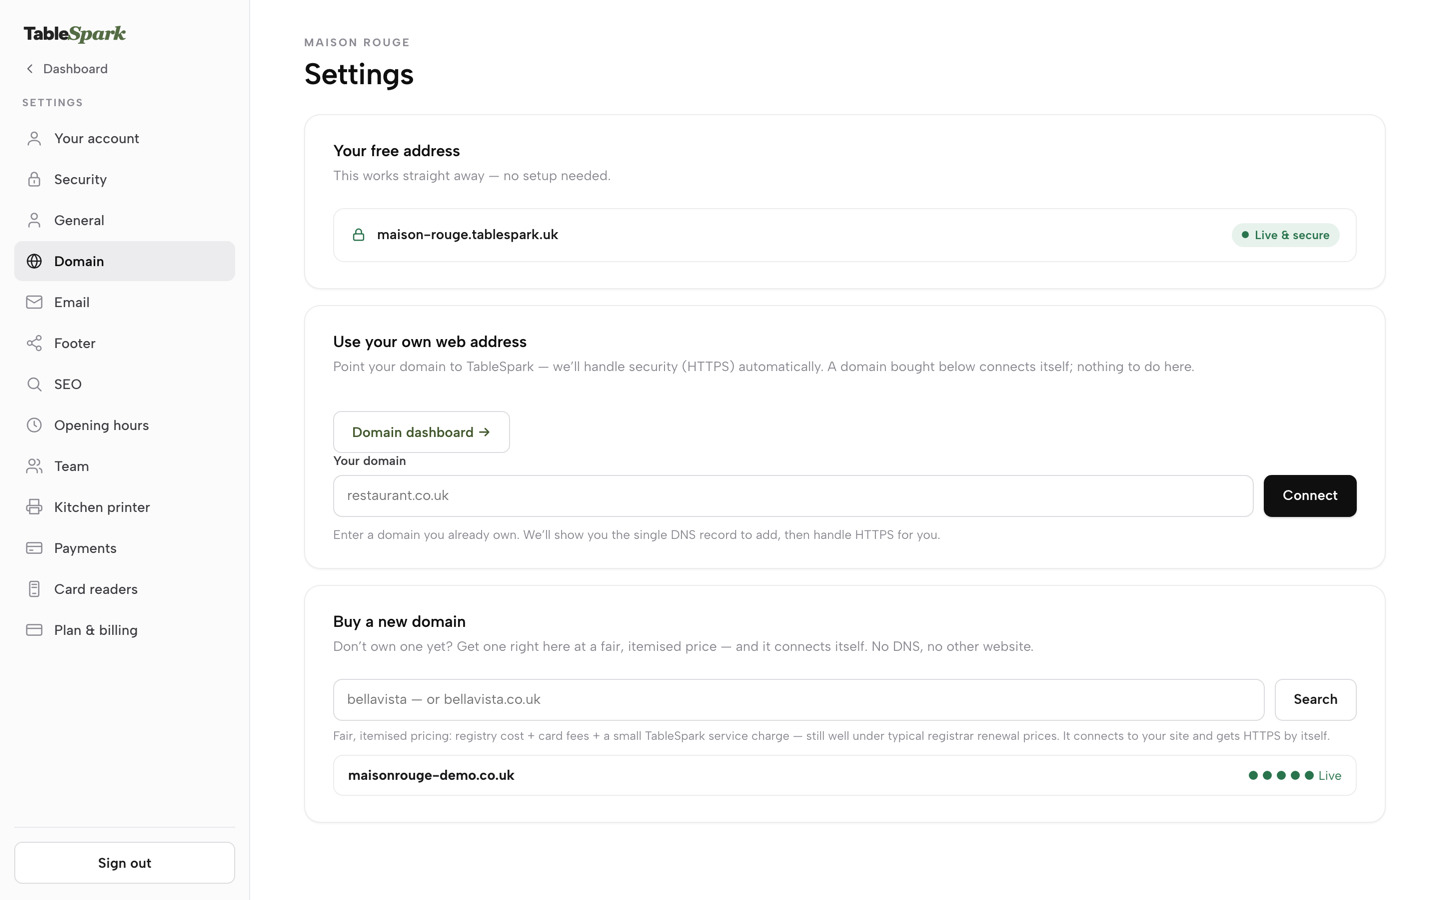
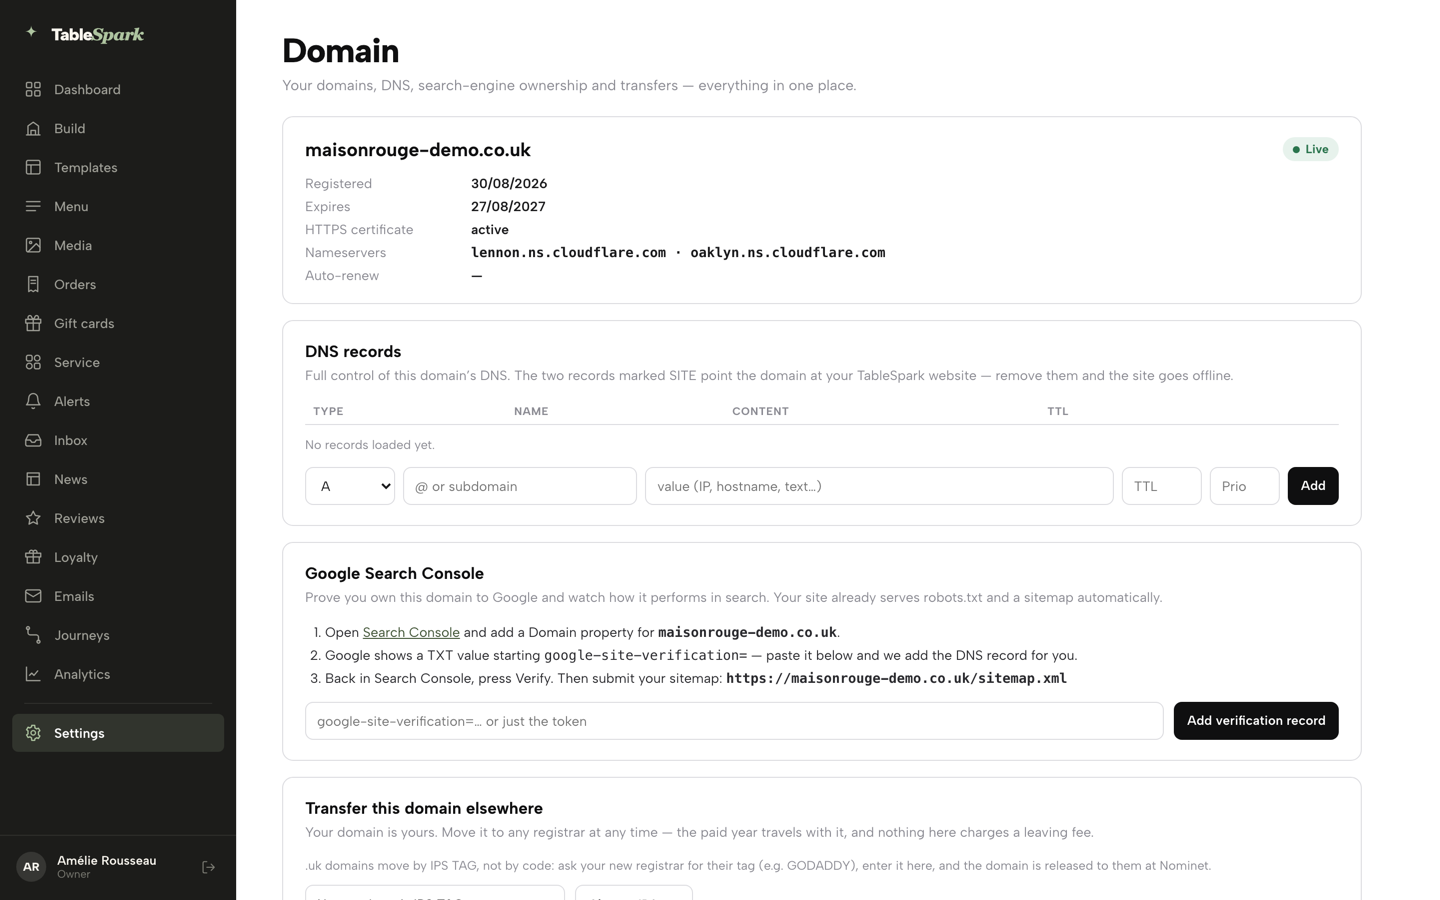
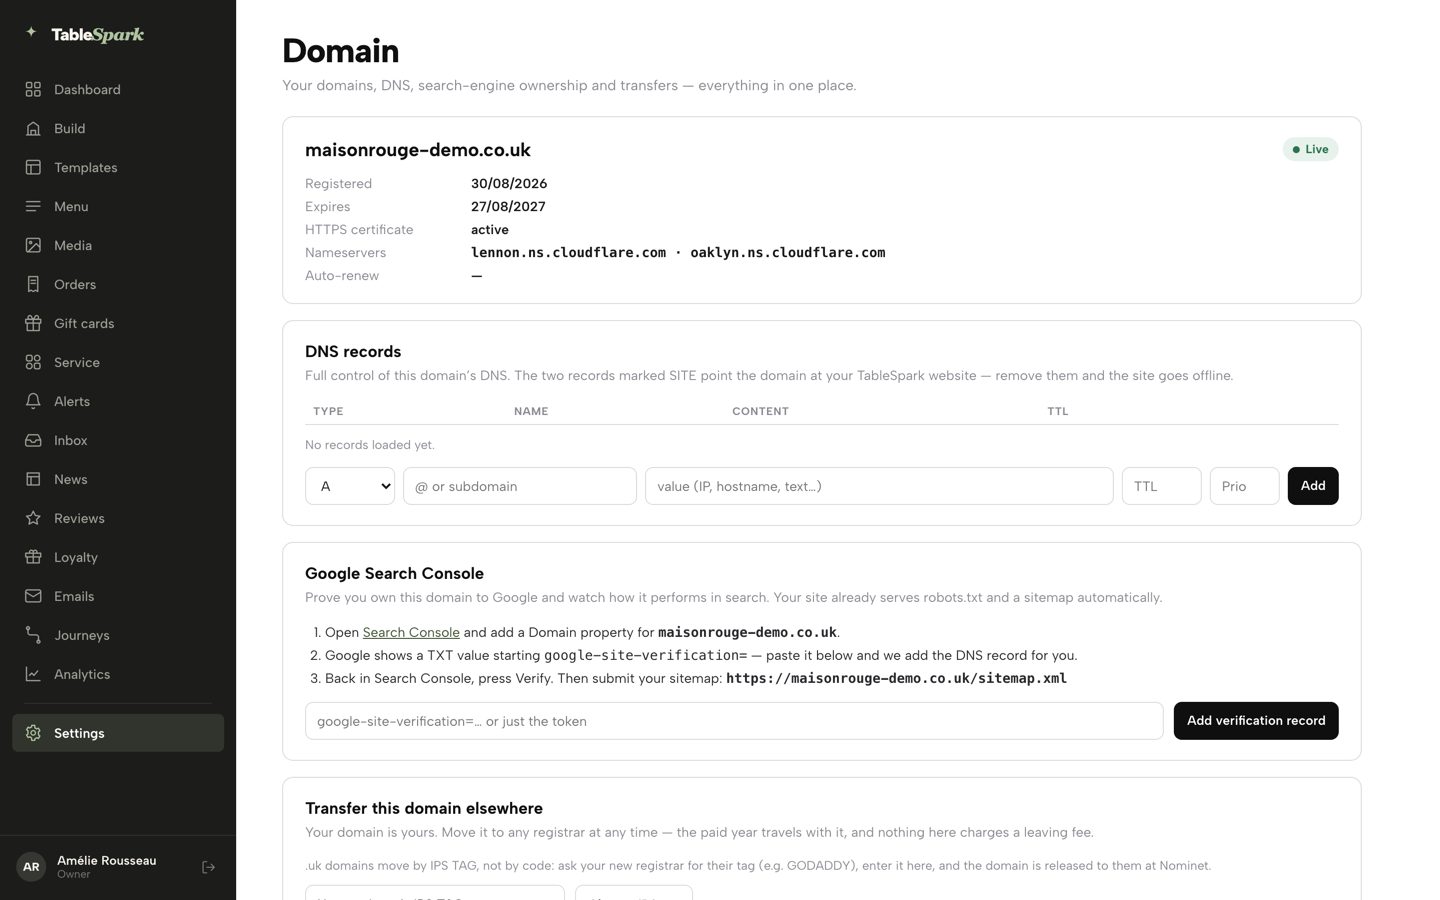
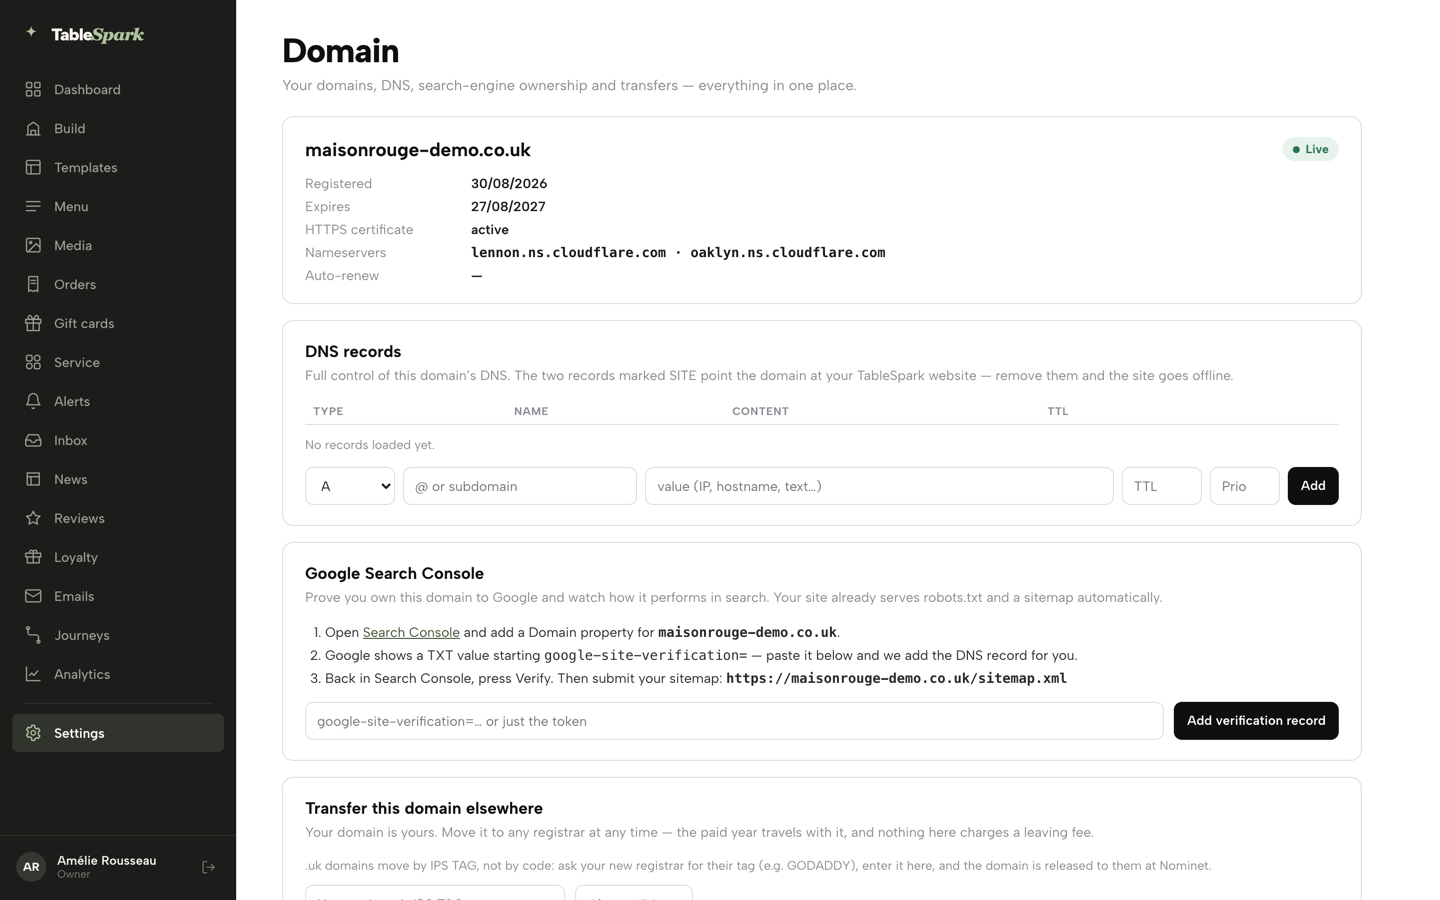
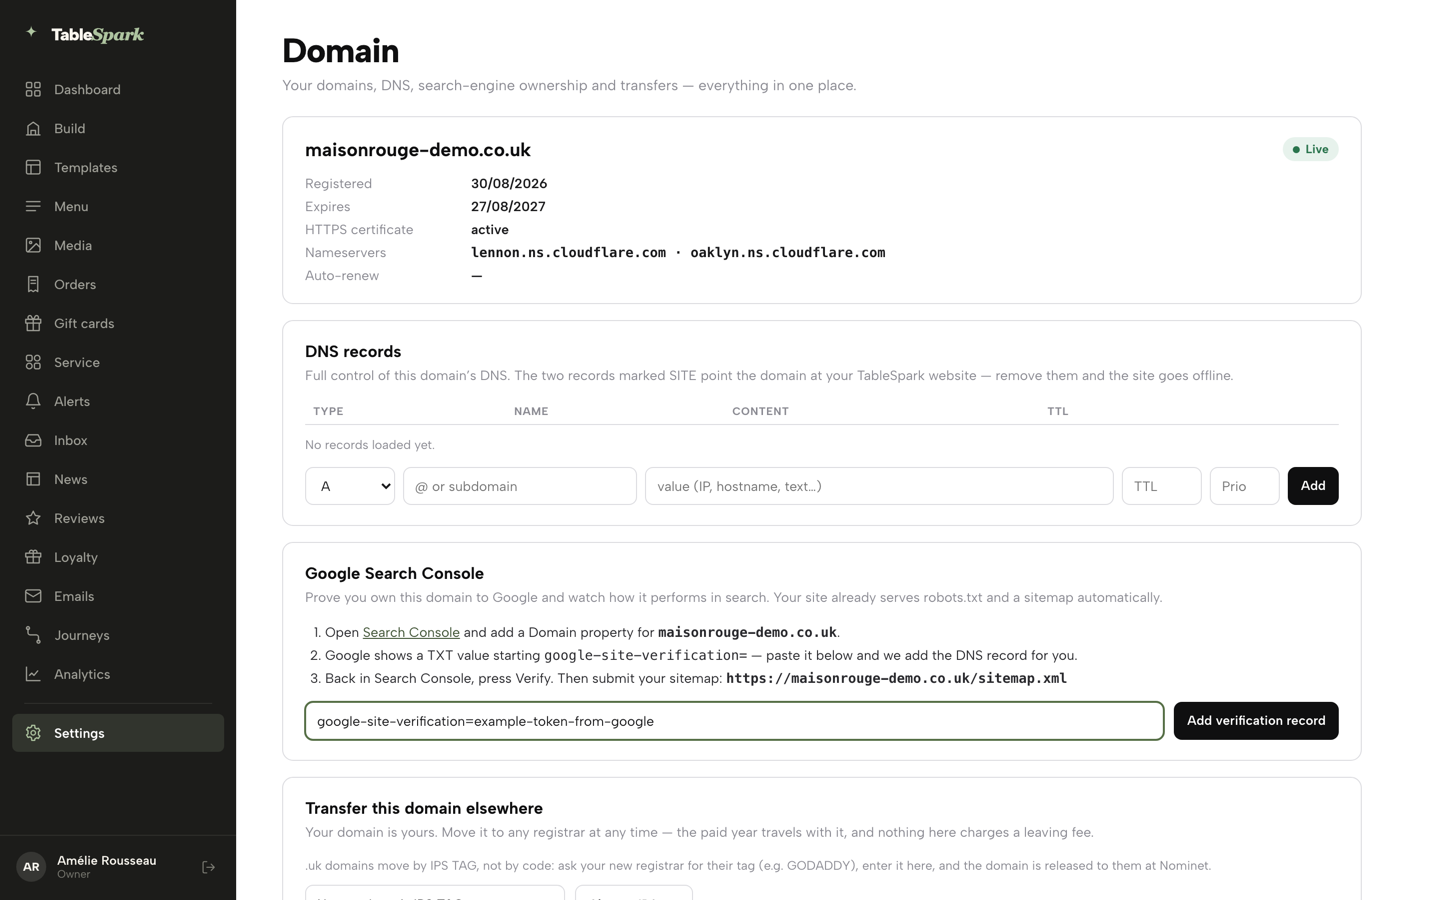
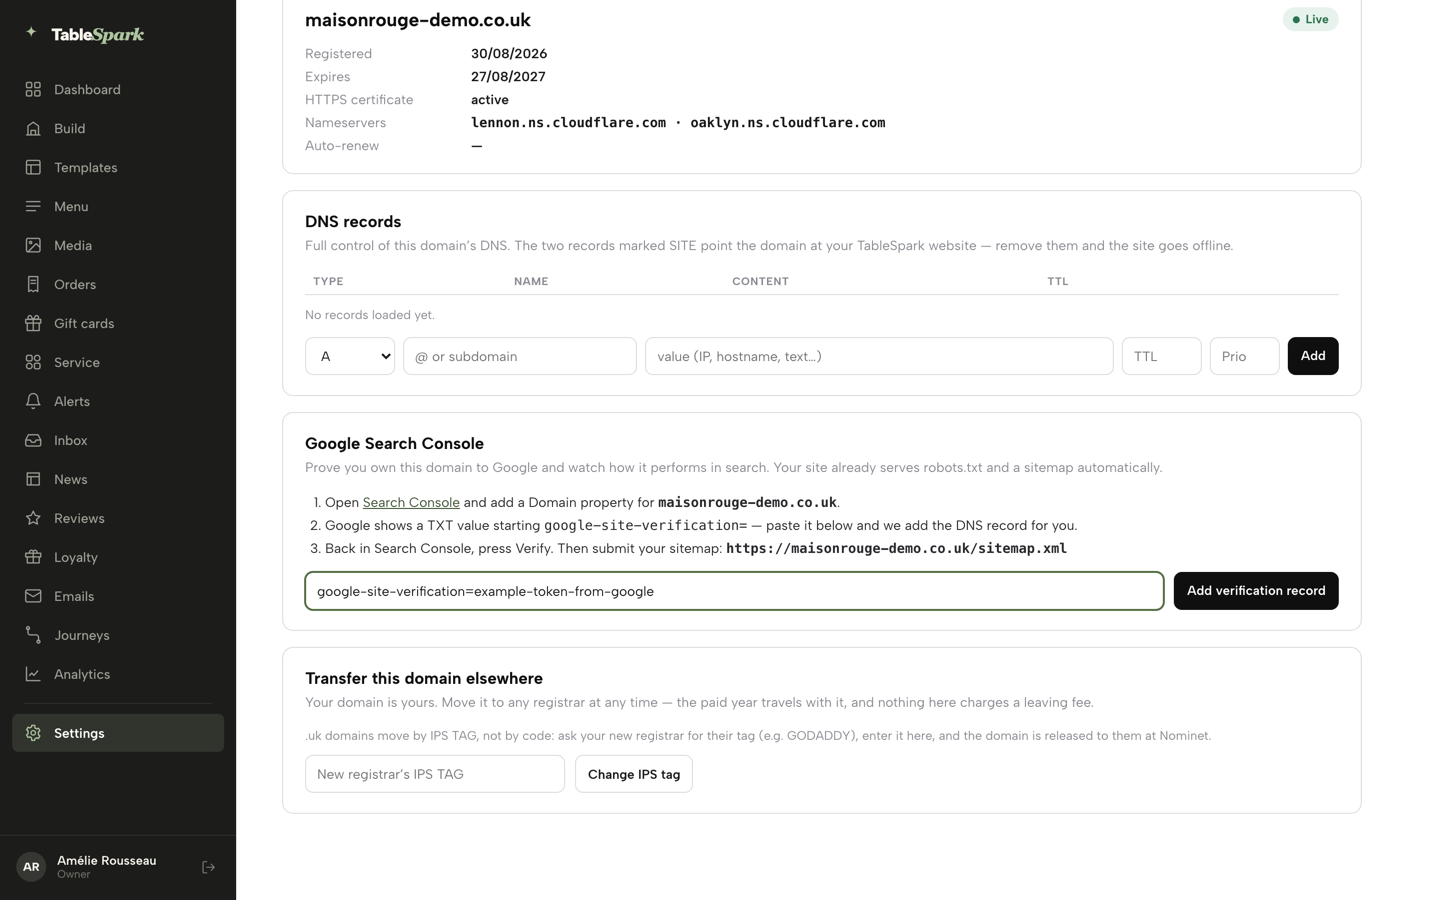
A name searched at its real itemised price, the owner form filled to the payment step, the Domain dashboard with its DNS records and Search Console steps, the transfer card found, and the connect-your-own path ready — all without spending a penny in practice.
- WHAT YOU NEED
- Your restaurant’s name — that’s it
- TIME
- About 7 minutes
- HOW HARD?
- Like buying anything online, no DNS knowledge needed
- CAN I BREAK IT?
- Only the two records marked SITE — leave those
IN PLAIN WORDS / TAP A TERM
What’s “DNS”?
The system that points your domain name at your actual website — a phone book for the internet. Buy a domain through TableSpark and this is set up for you automatically.
What’s a “CNAME record”?
One line of DNS that says “this domain points here.” If you connect a domain you bought elsewhere, this is the single record you copy across — nothing more.
What’s “WHOIS privacy”?
Domain registration legally needs an owner’s name and address on file. WHOIS privacy keeps those details out of public lookup, and it’s switched on by default.
What’s the padlock about?
It means the connection to your site is encrypted — the HTTPS certificate. TableSpark issues and renews it automatically, whether you bought the domain here or connected one you already own.
Search for your restaurant’s name
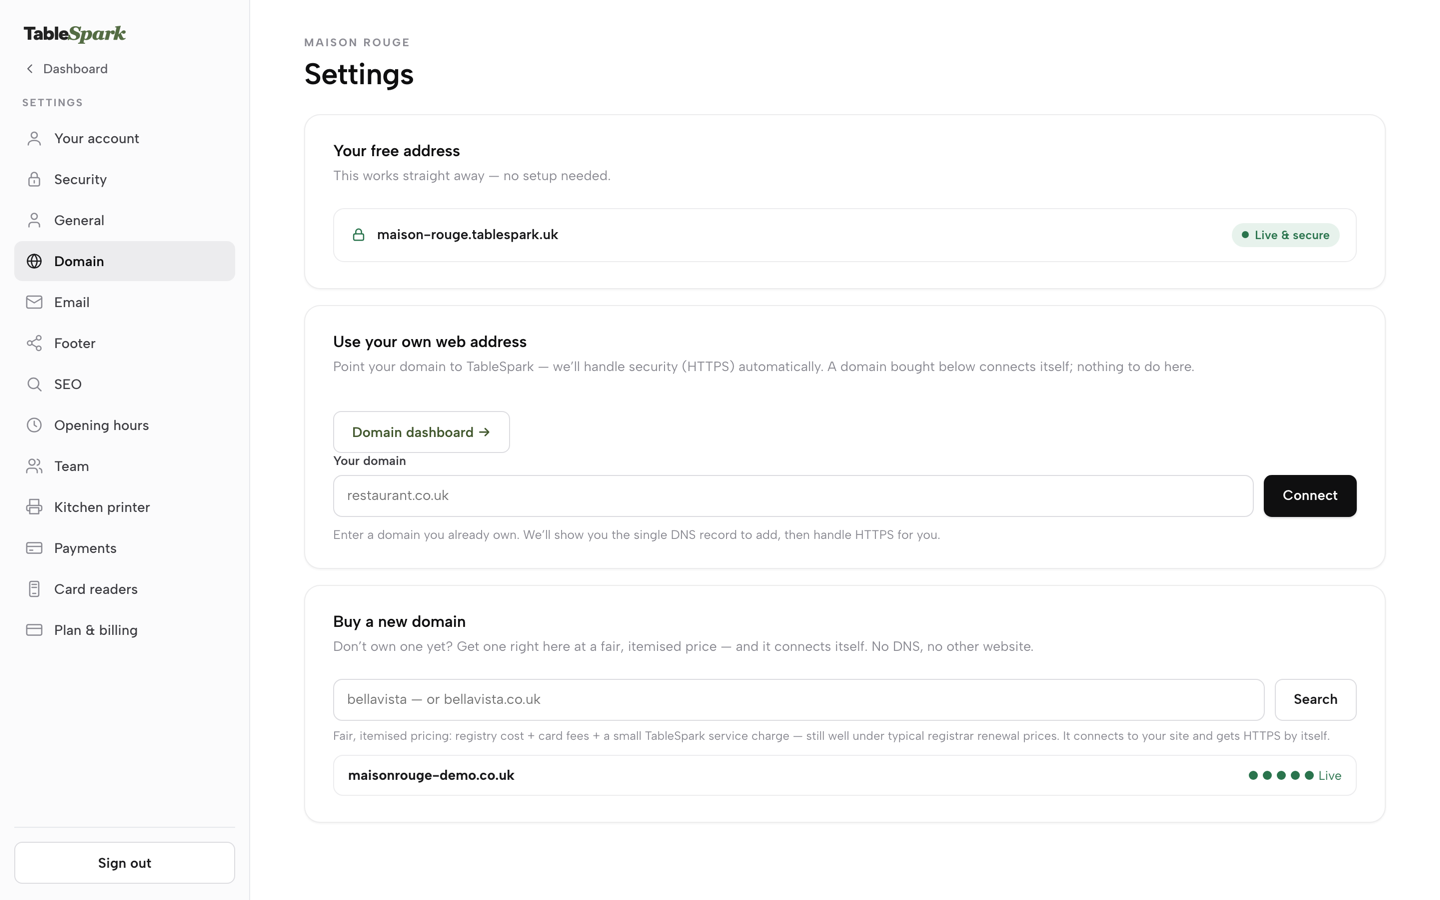
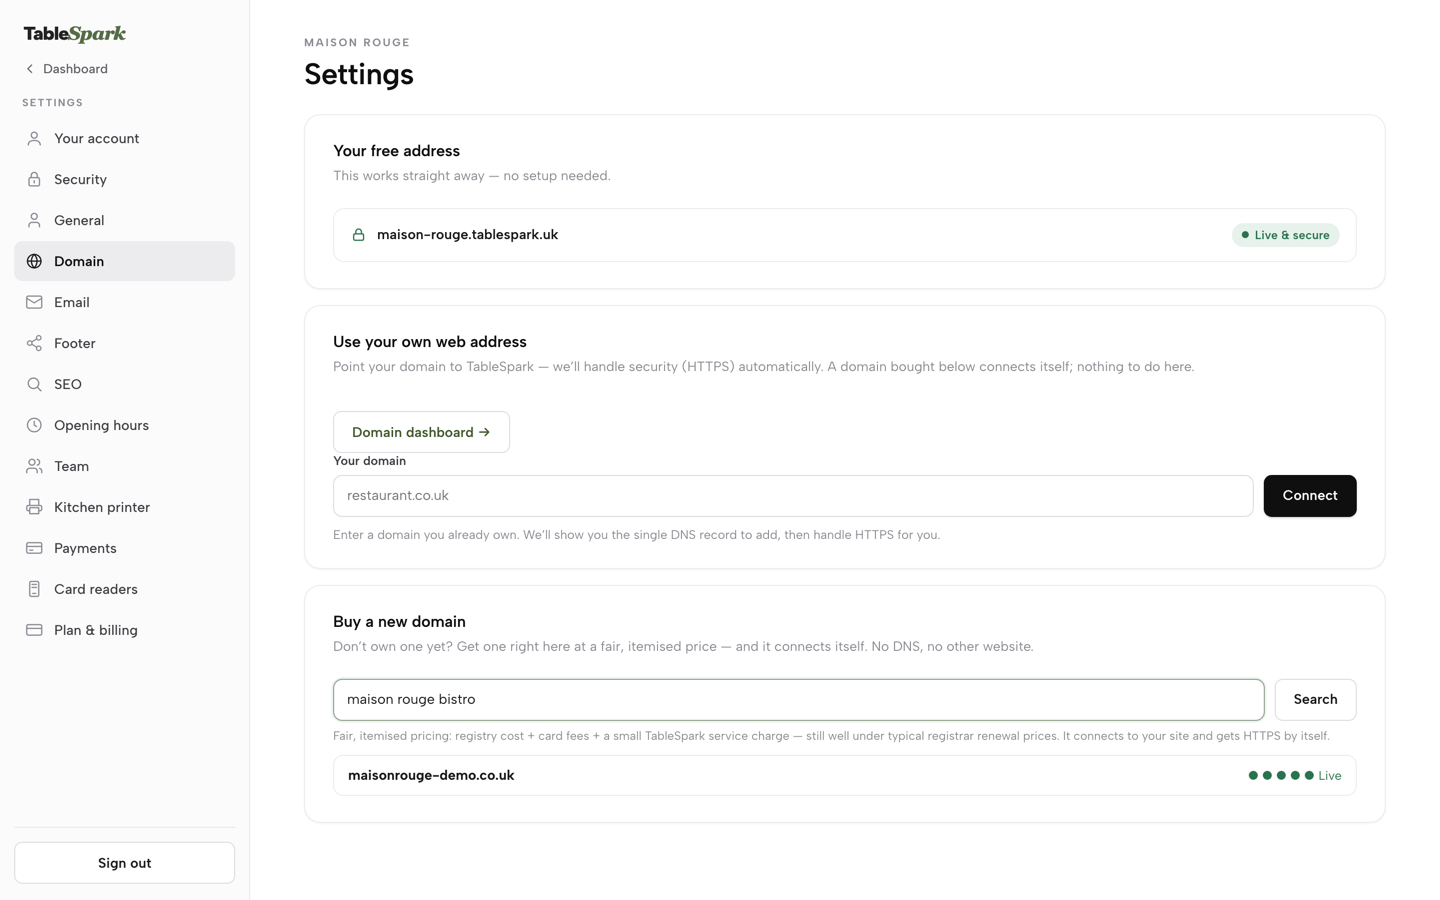
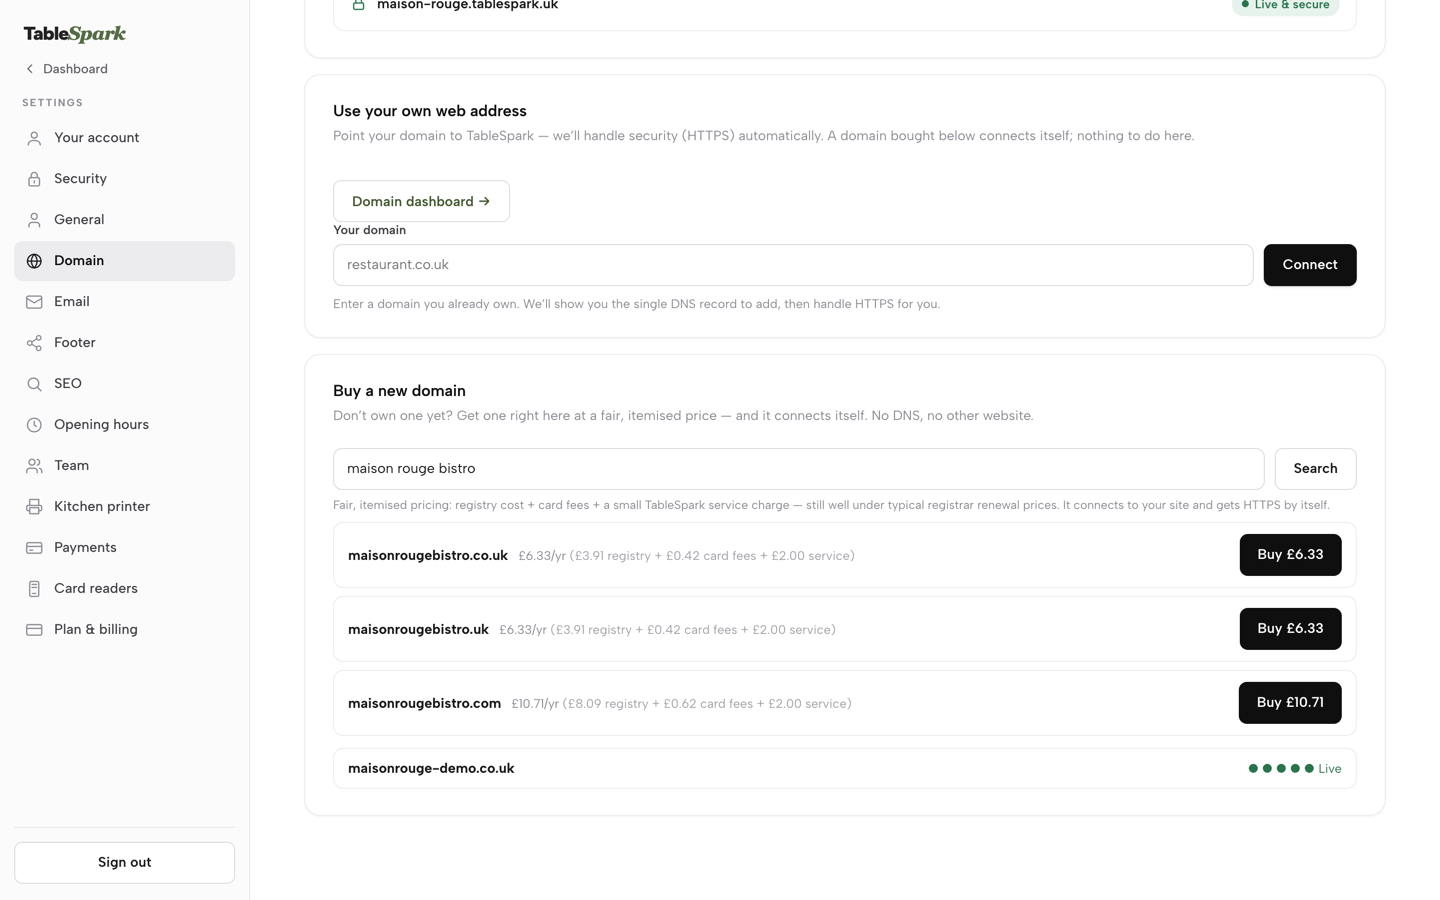
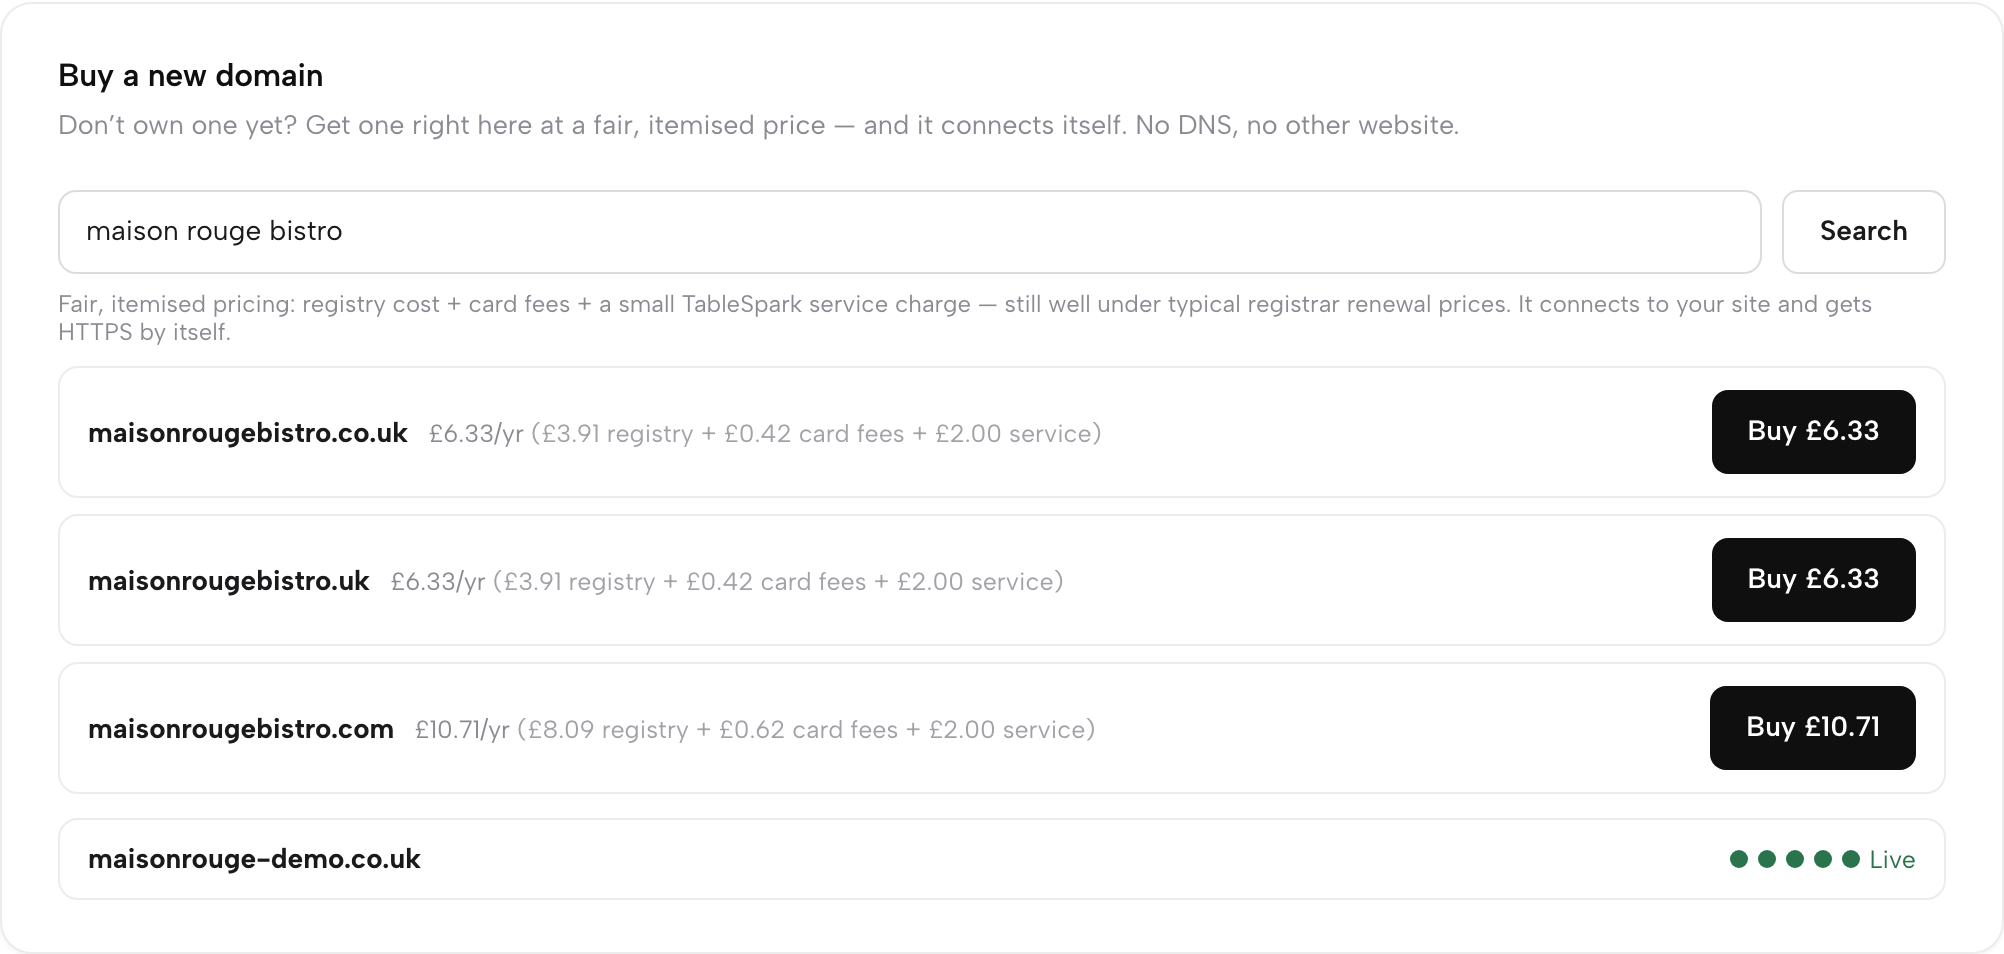
Open Settings → Domain. At the top, Your free address (your-name.tablespark.uk) is already Live & secure, so your site works before you buy anything. When you want your own name, find the card called Buy a new domain at the bottom. Type your restaurant’s name — just the words, no dots needed — and press Search. You get live availability for .co.uk, .uk and .com with the price itemised on the line: the registry’s own cost, the card fees, and a small TableSpark service charge. A .co.uk starts at £6.33 for the year, which is well under what most registrars quote at renewal time.
Register it in your name
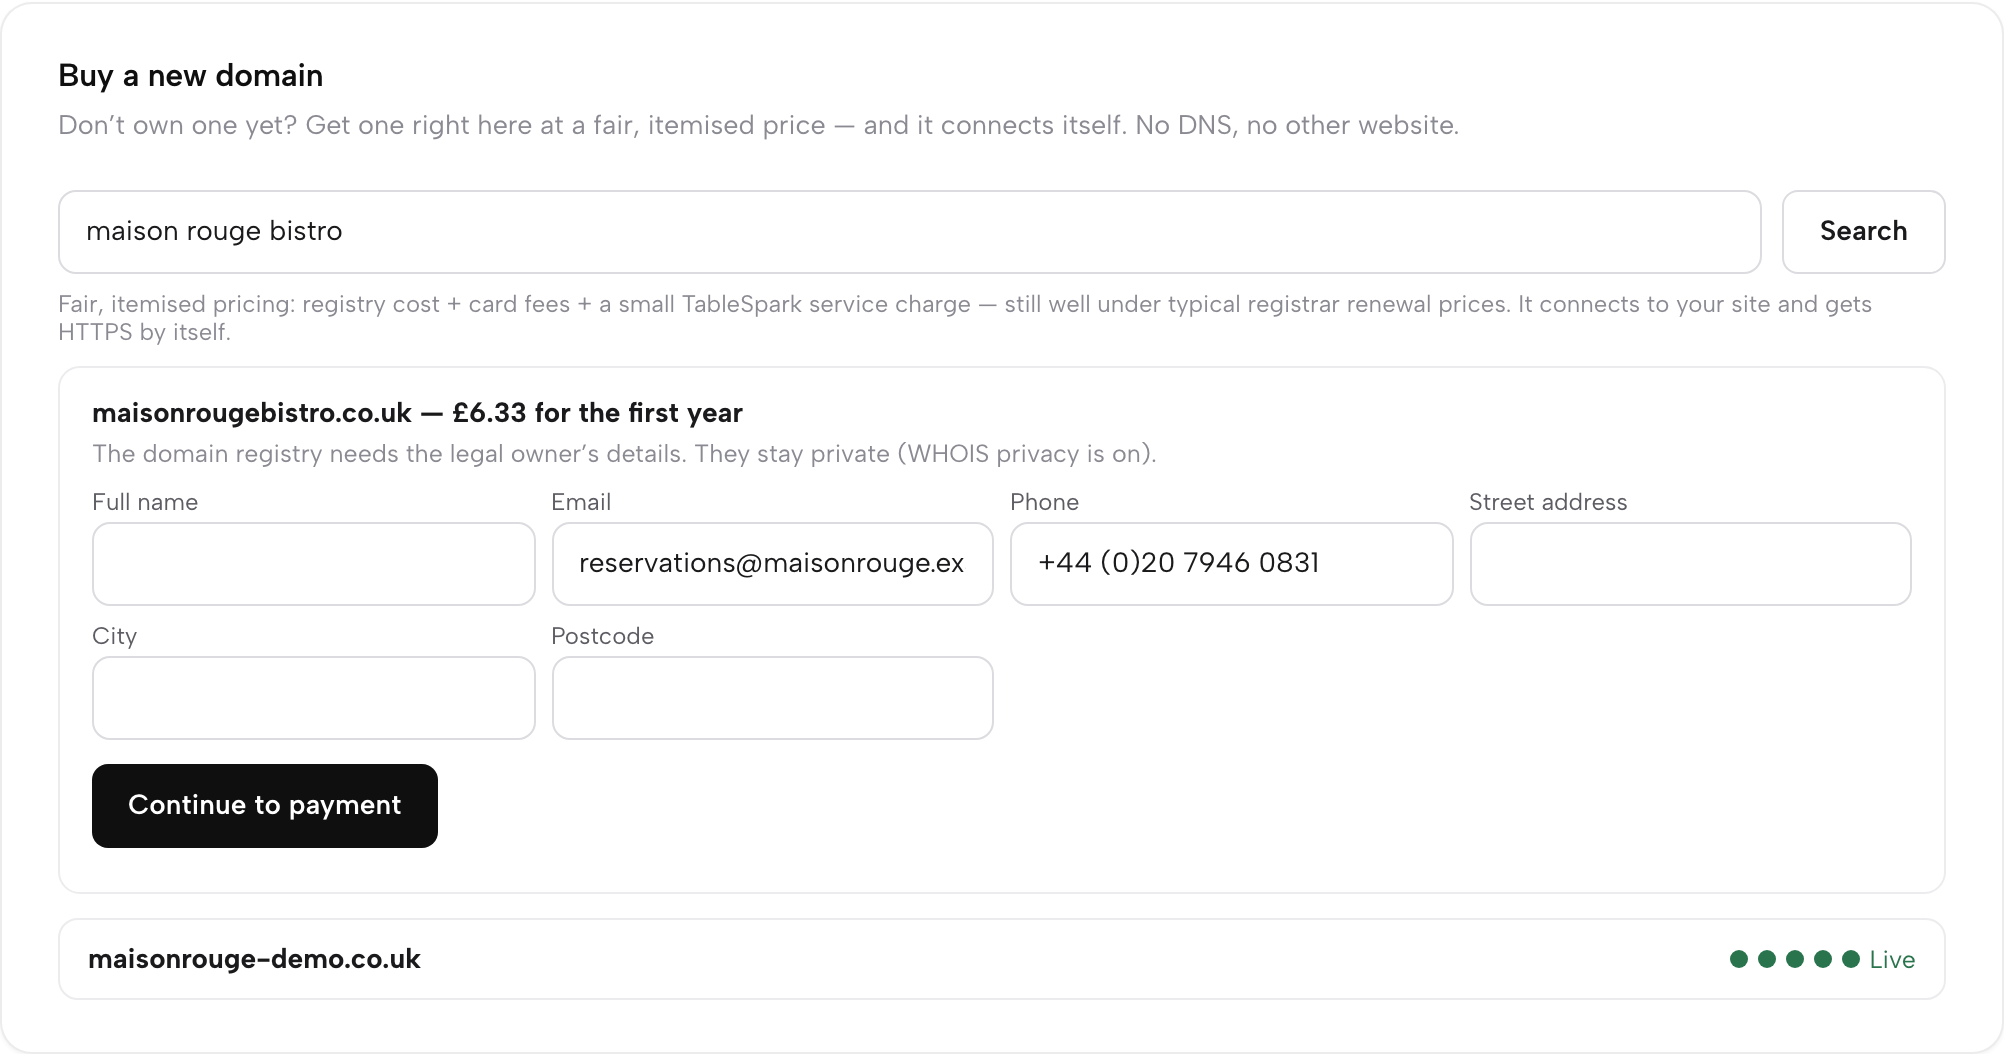
Press Buy on the ending you want. The registry legally requires the owner’s name and address, so a short form appears — fill it once, and note the line above it: WHOIS privacy is on, so these details stay out of public lookup. Continue to payment takes you to a normal card checkout.
Watch it go live
That is the whole job. After payment the domain sets itself up: you can watch the progress dots walk across the card until the badge says Live. It connects to your website and gets HTTPS on its own — there is no record to copy anywhere, no “now log into your registrar” step, nothing to come back and check.
Run it from the Domain dashboard
Once a domain is live, Settings → Domain → Domain dashboard → (the button at the top of Use your own web address) opens its own page — the same controls a technical registrar gives you, laid out so you can actually read them.

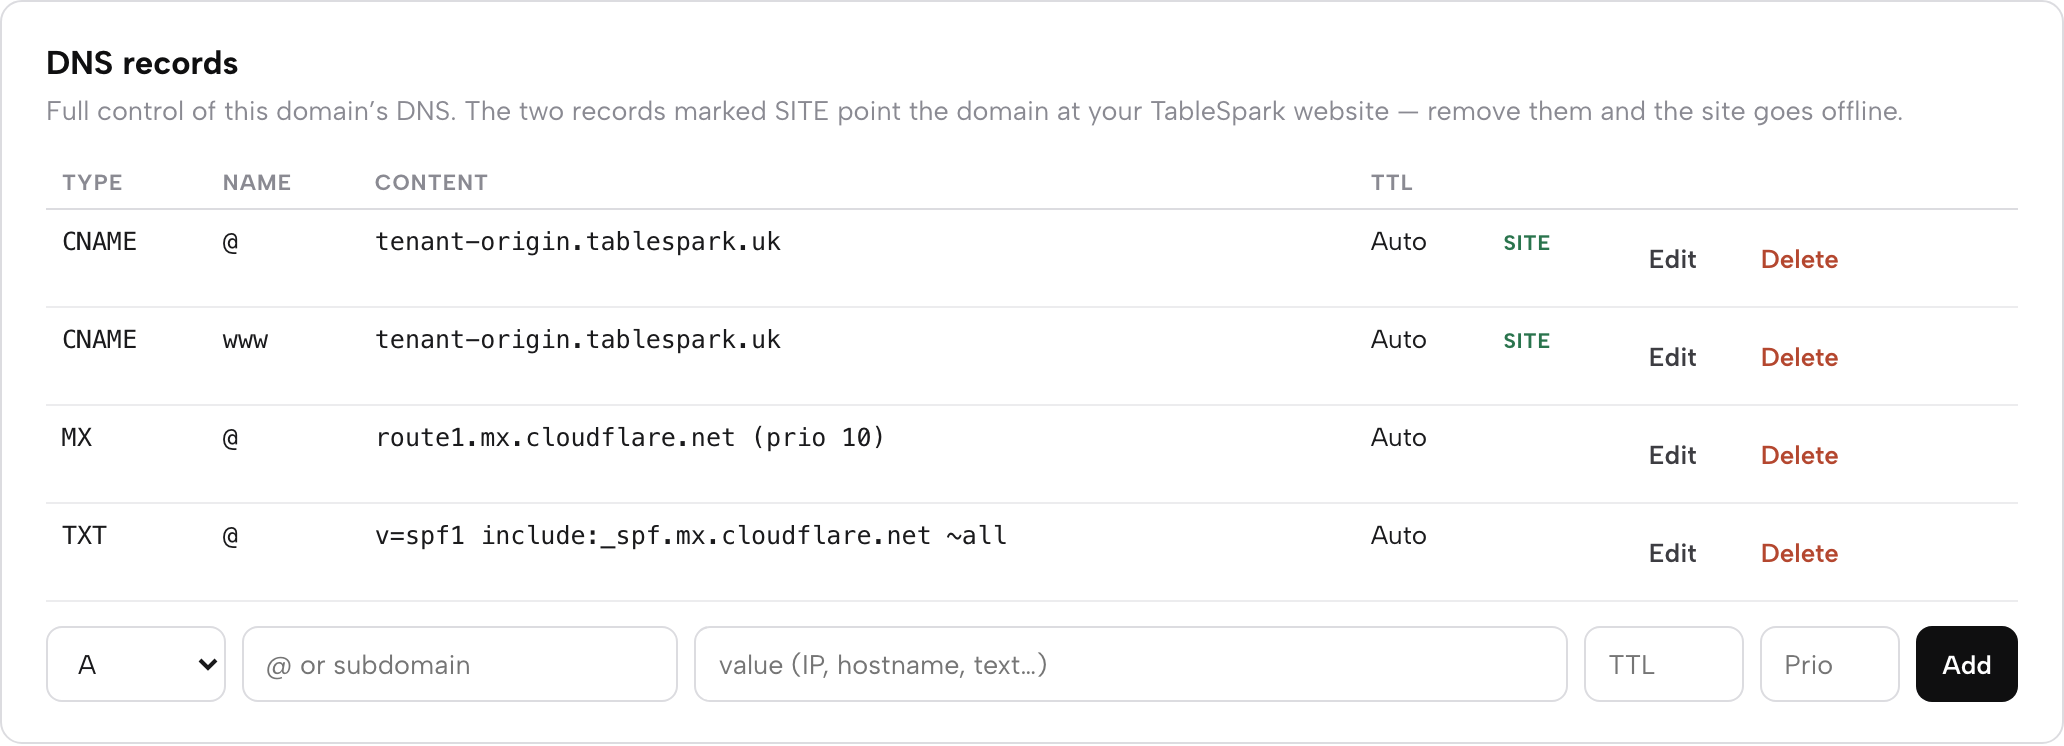
The DNS records table is fully yours — add, edit or delete records for anything you connect later (a mail service, a verification, a subdomain). The two records marked SITE are the ones pointing the domain at your website; the page tells you plainly that removing them takes the site offline, so nobody deletes them by accident.
Prove ownership to Google — and keep the way out open
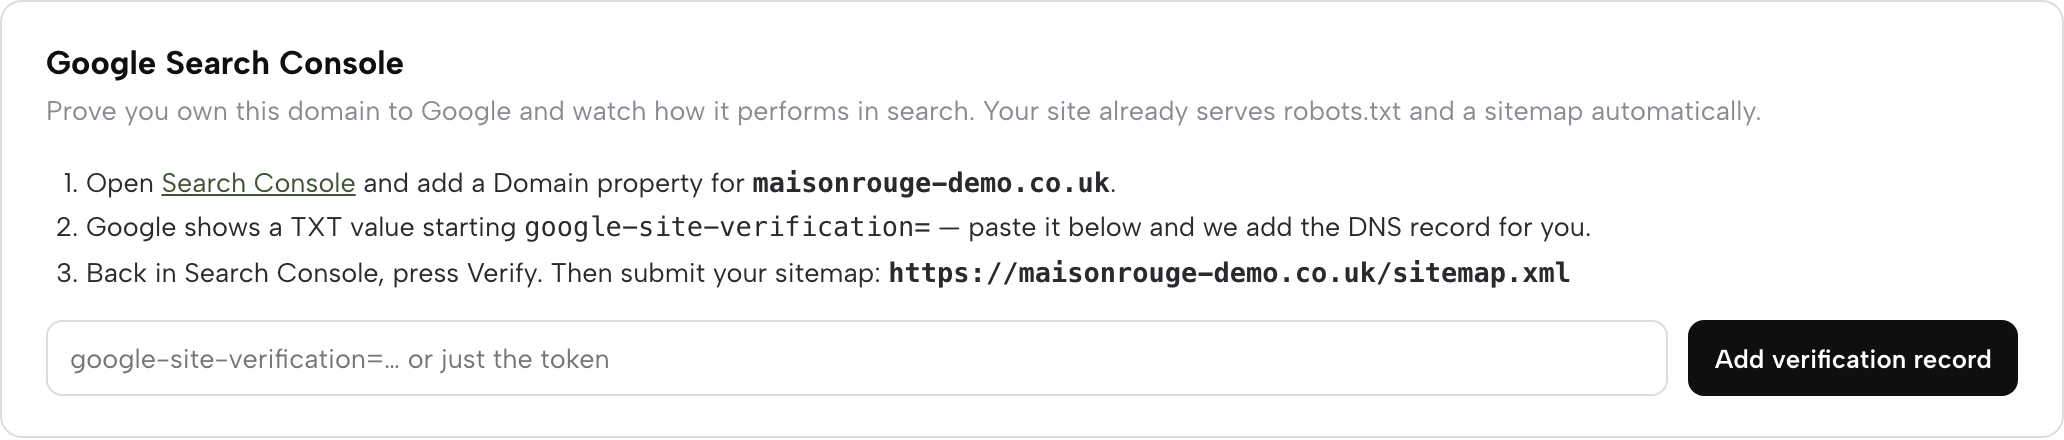
Two more cards finish the job a domain is actually for. Google Search Console walks you through proving ownership to Google: add the domain property in Search Console, paste the verification value it gives you, and press the button — the DNS record is written for you, and your sitemap address is printed ready to submit.
You do not have to wait for that step to be found. Every TableSpark site, on every plan, already serves its robots.txt and sitemap, and each time you publish, TableSpark submits the sitemap to Google Search Console and pings IndexNow for you. When a custom domain connects, TableSpark also registers and verifies a Search Console property for that domain in the background; the card above is how you see the same reports in your own Google account. Indexing and ranking remain Google’s decisions.
And Transfer this domain elsewhere is exactly what it says: your domain is yours, the paid year travels with it, and the page hands you the transfer code (.com) or moves the Nominet tag (.co.uk/.uk) whenever you ask.

Already own a domain? Connect it
If you bought your domain somewhere else — GoDaddy, Namecheap, 123-reg, anywhere — you don’t have to move it. On the same Settings → Domain page, use the card called Use your own web address: type the domain and press Connect.
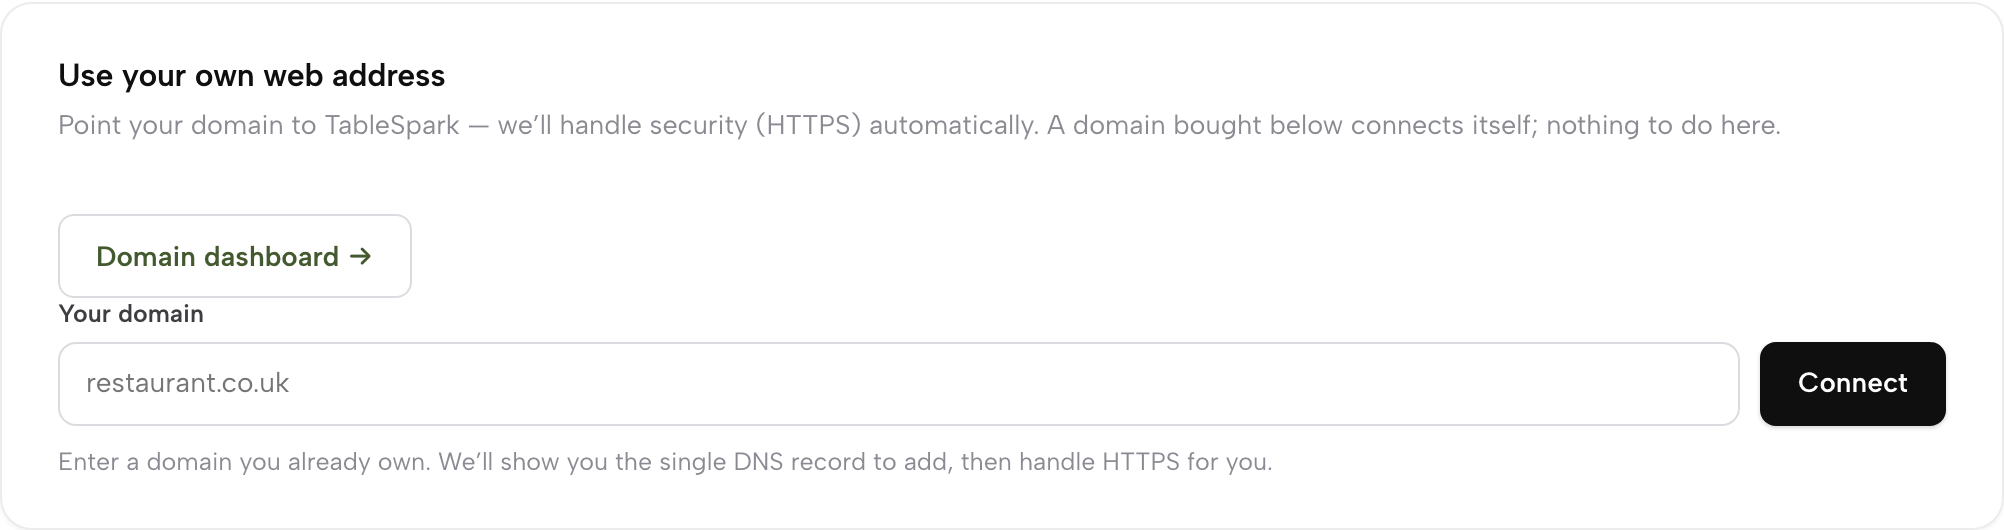
The card now shows your domain with a Pending DNS badge and one DNS record — a CNAME, with its type, name and value — to add wherever the domain is managed. Log in at your provider, find the DNS settings, paste the name and value exactly as shown, and save. That is the only technical step. DNS can take a few minutes to about an hour; press Check status whenever you like, and once the record is seen the badge flips to Live & secure and HTTPS is issued automatically. Remove domain on the same card disconnects it again. Your email and anything else on the domain keep working — the record only points the website.
Whichever route you took — bought here or connected from elsewhere — the result is the same: guests type your name and land on your site, with the padlock in the address bar.
Next · your email
Next: email on the same name
With the domain live, give yourself info@your-domain — it takes two minutes.