
One printer prints two things: the ticket the kitchen fires on, and the receipt a guest takes home. Which is which is a role you set per printer, the layout on the paper is yours to edit, and every ticket’s print status shows on its order in Orders.
Settings → Kitchen printerFull plan
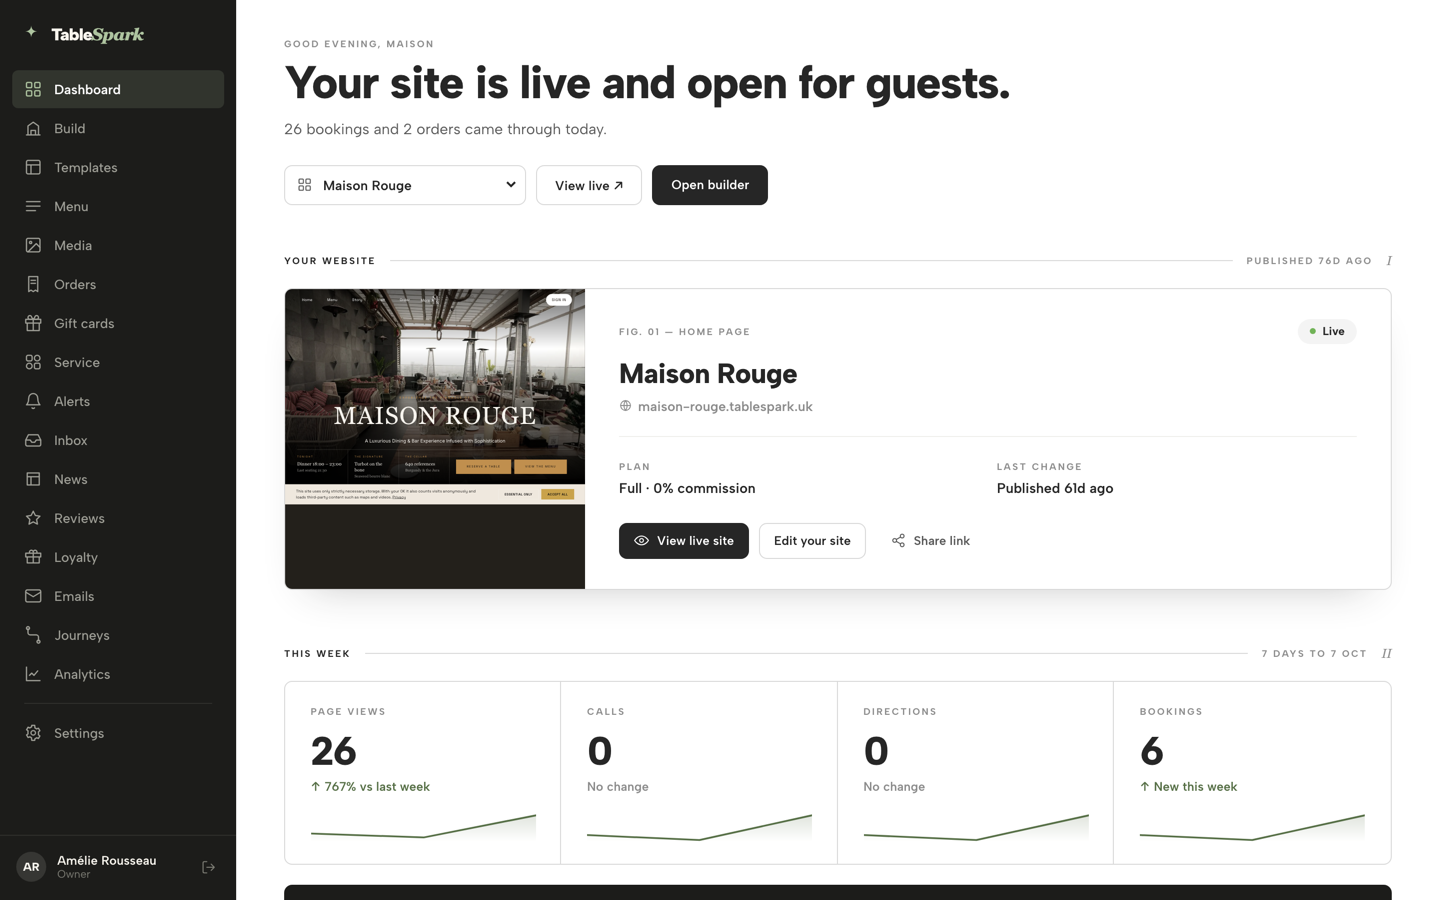
Start on your dashboard. Click Settings in the sidebar — every printer lives inside it.
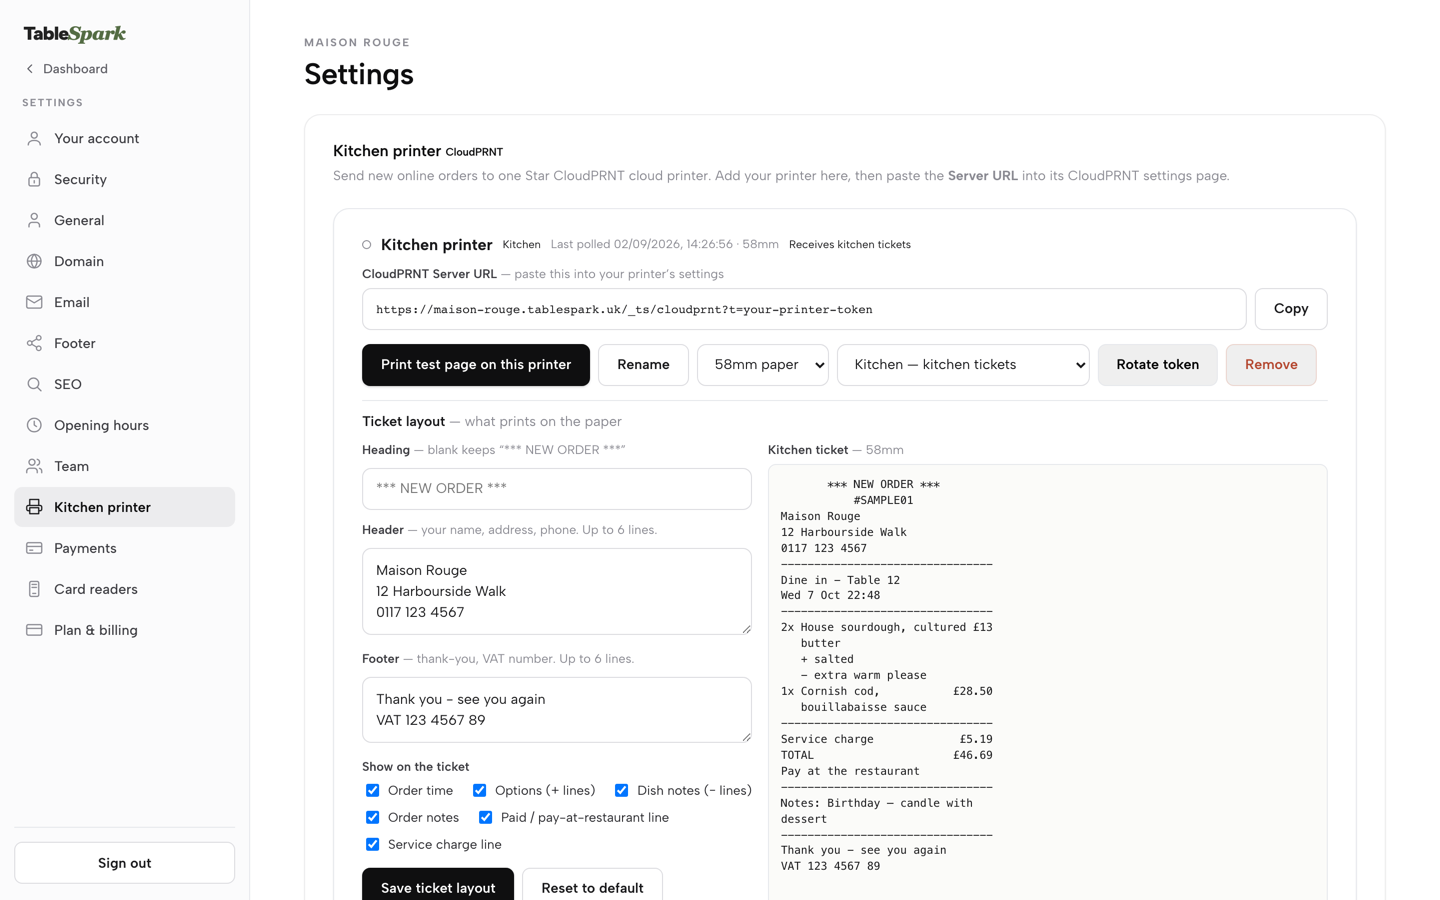
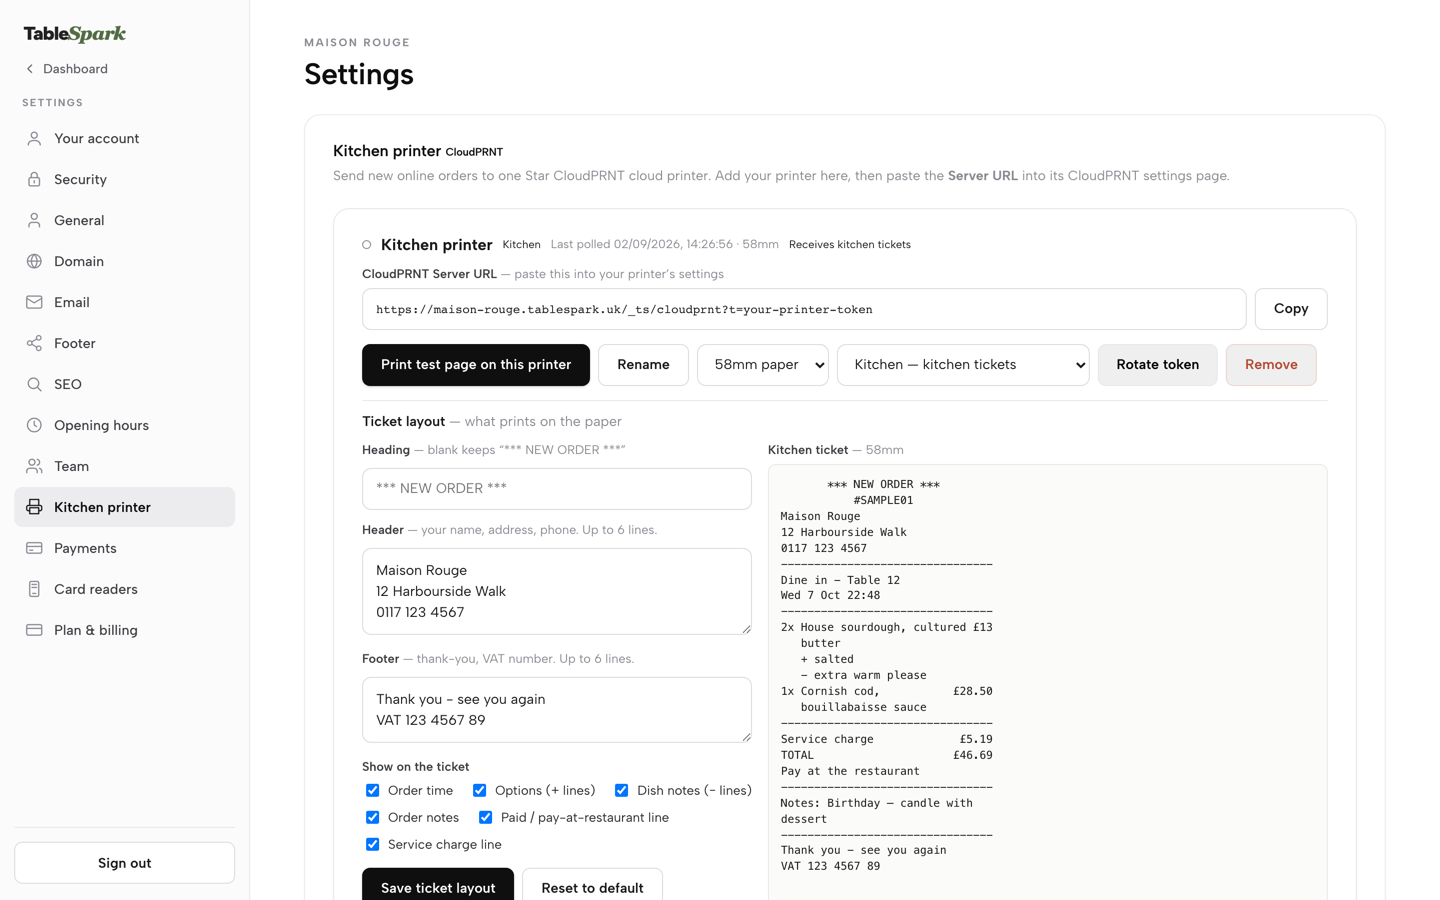
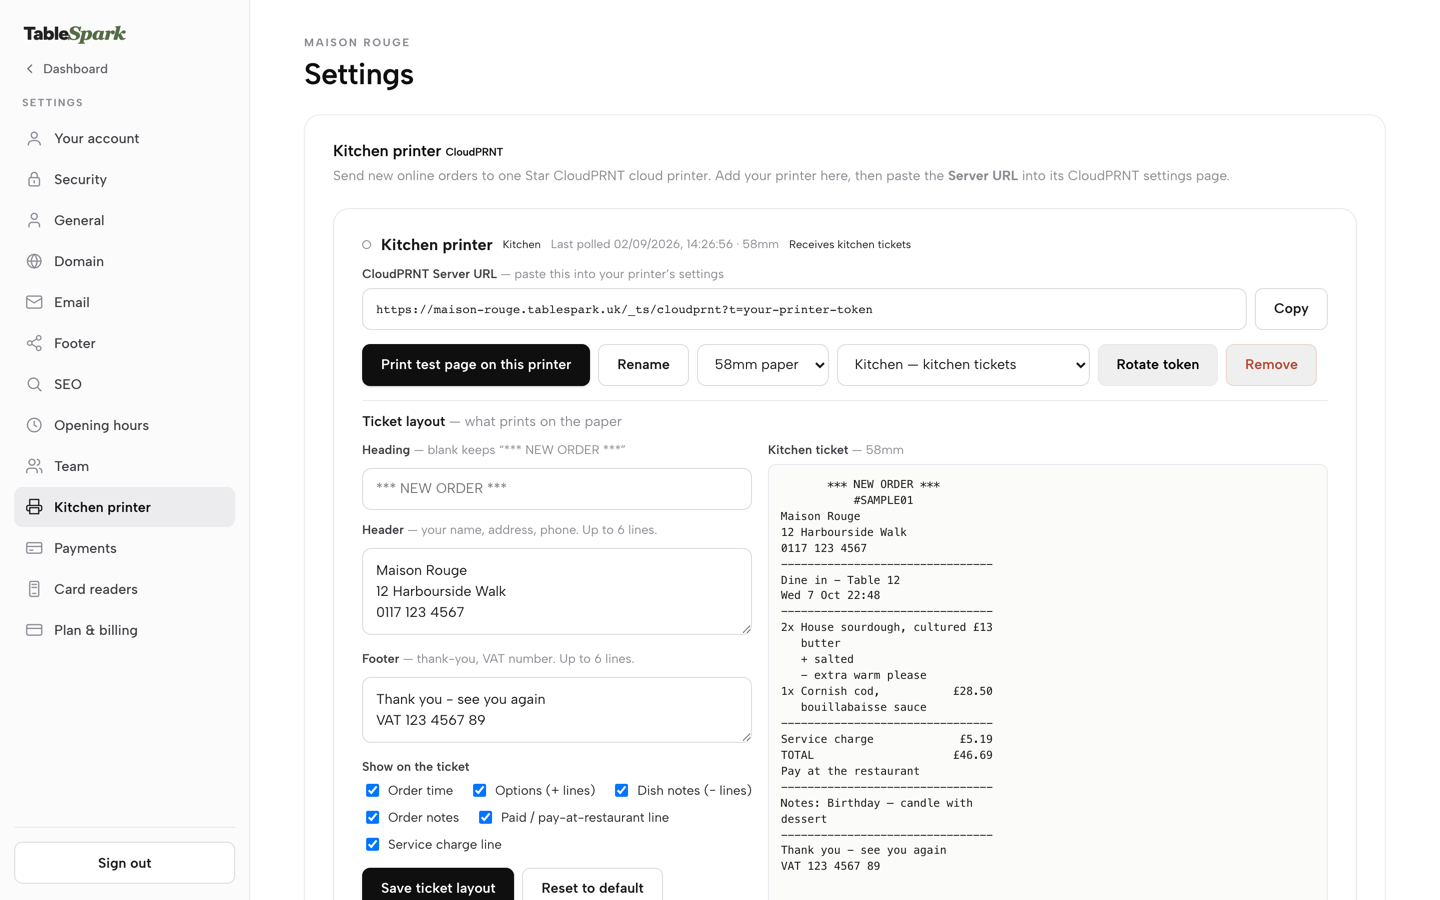
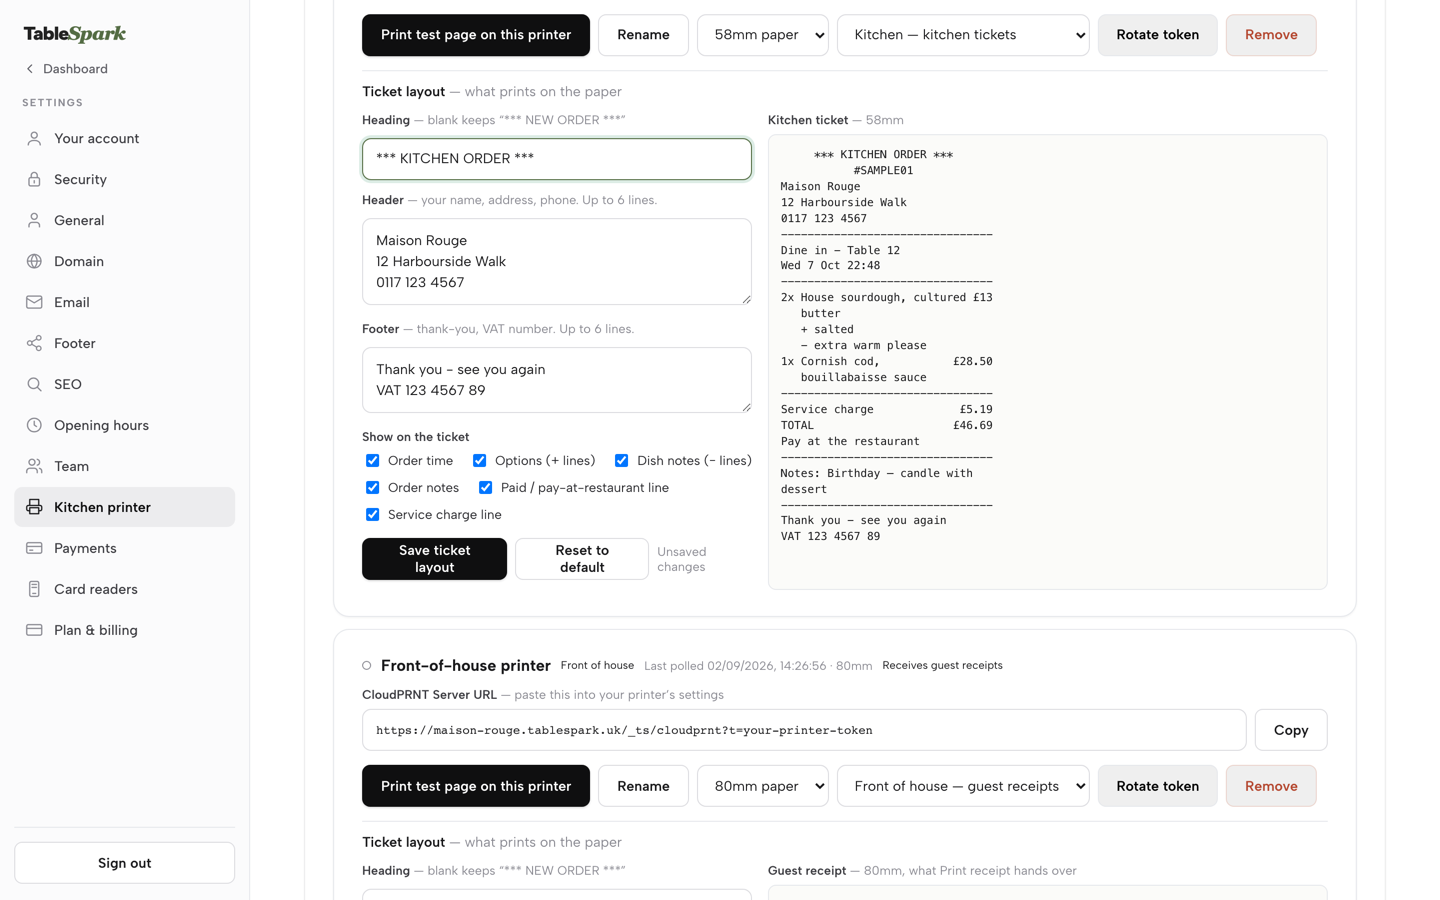
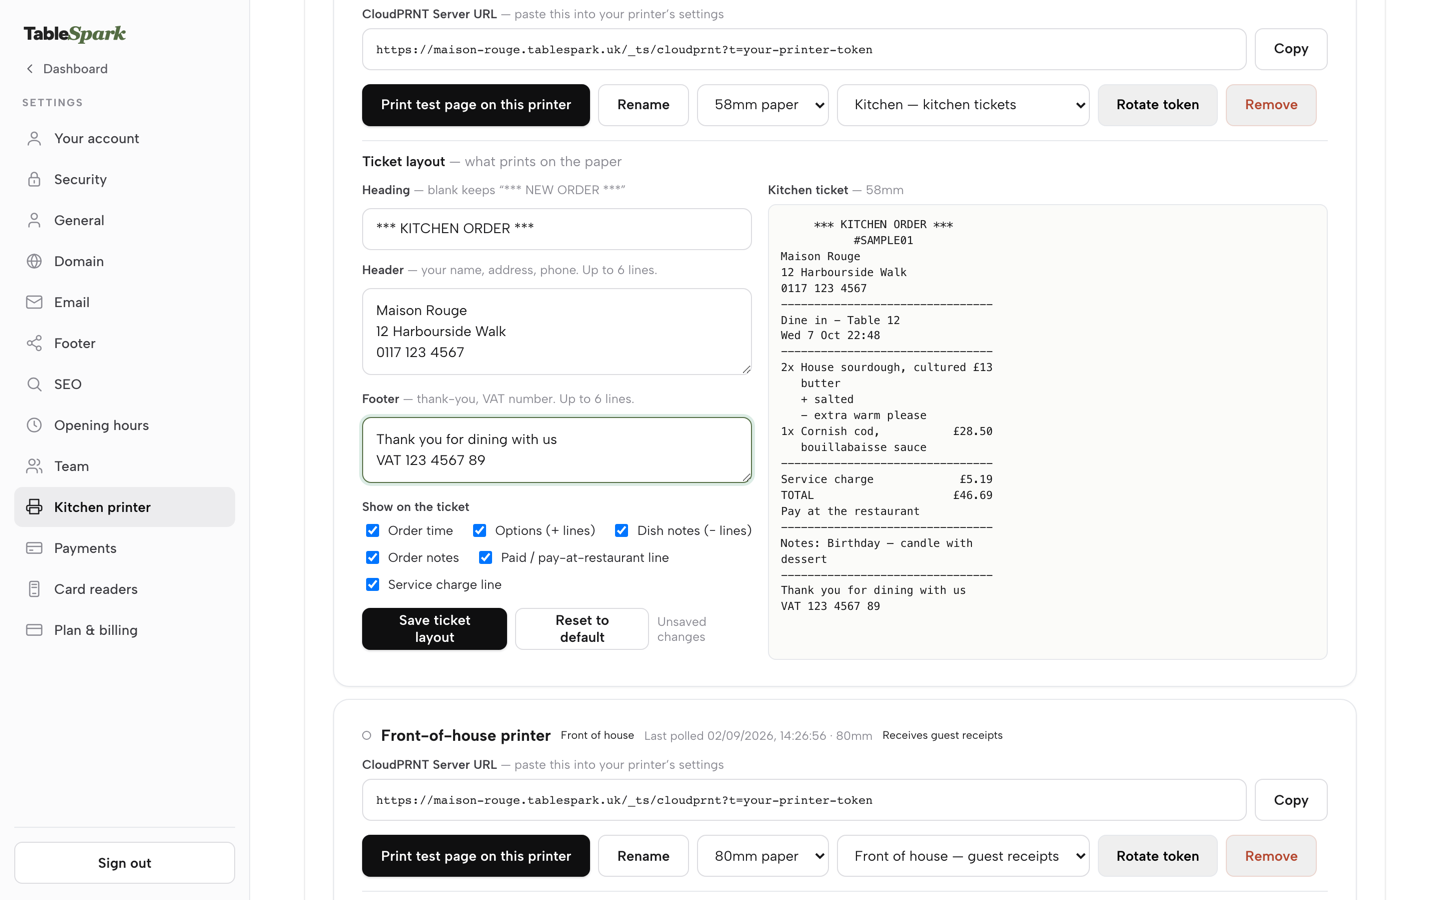
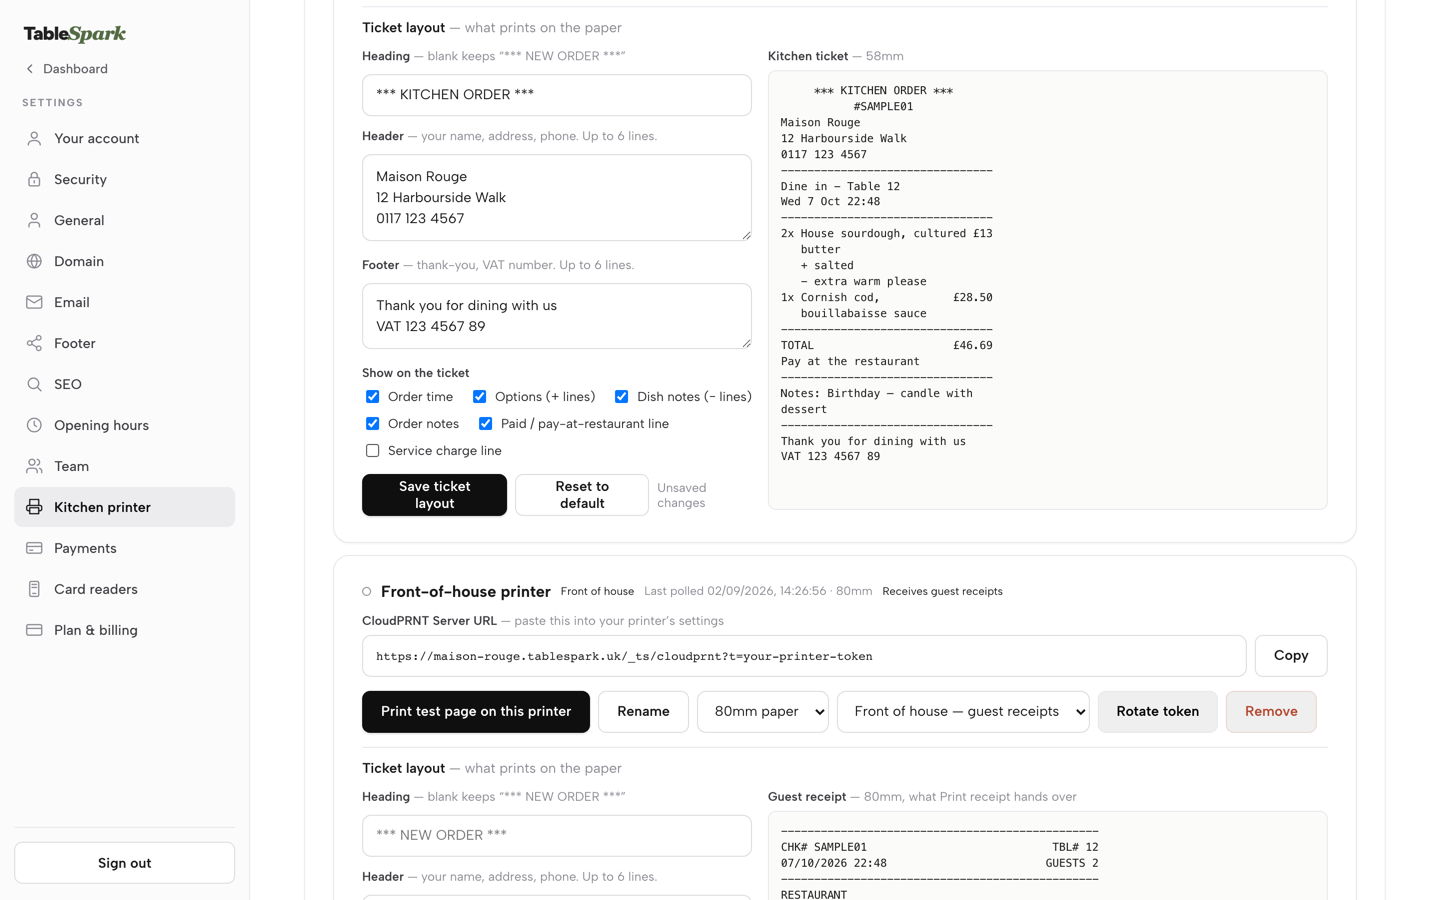
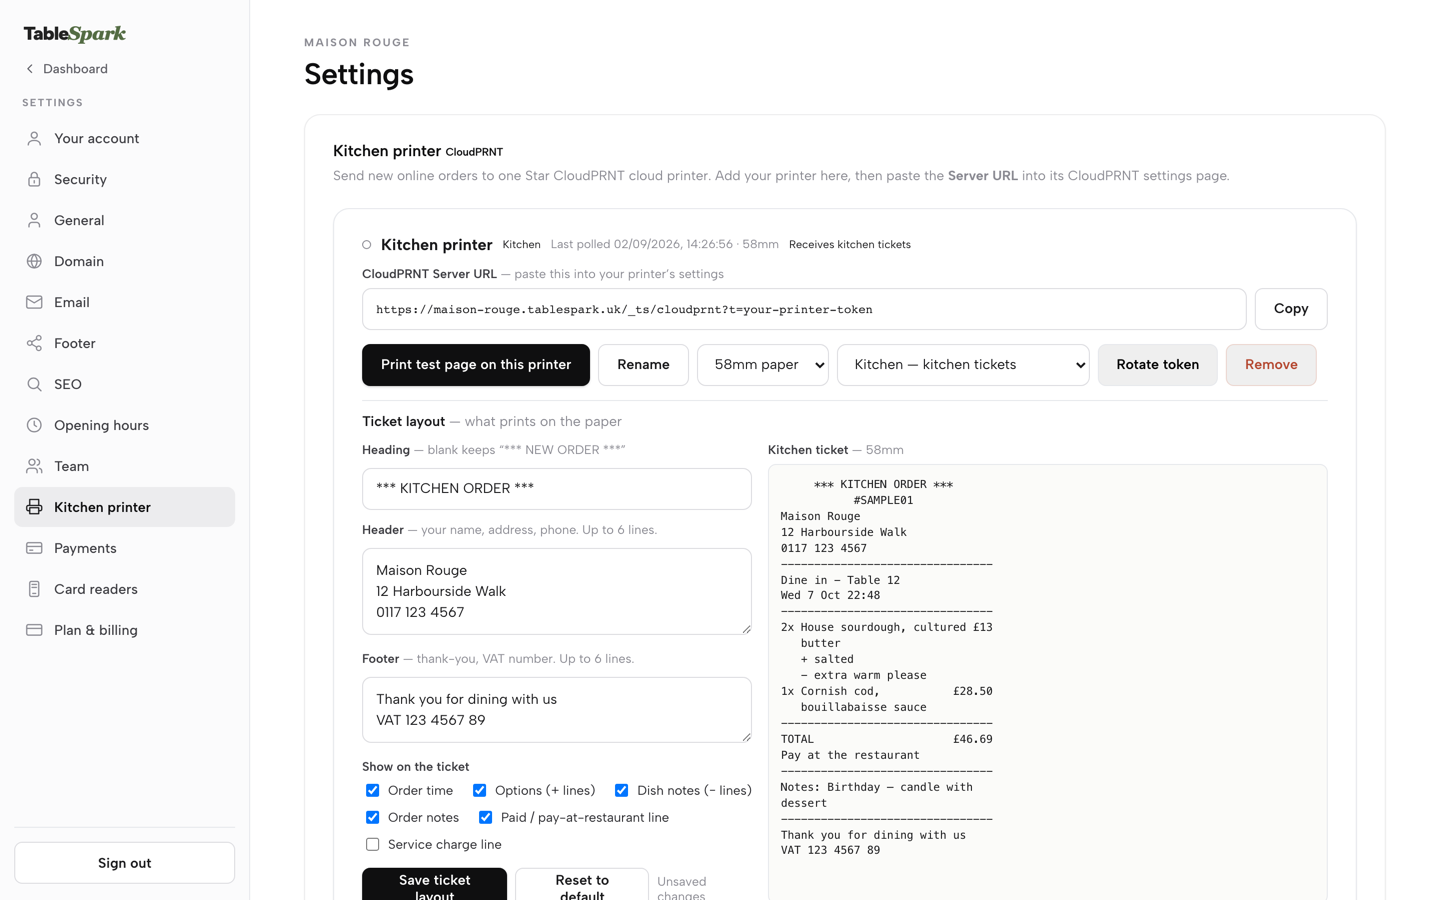
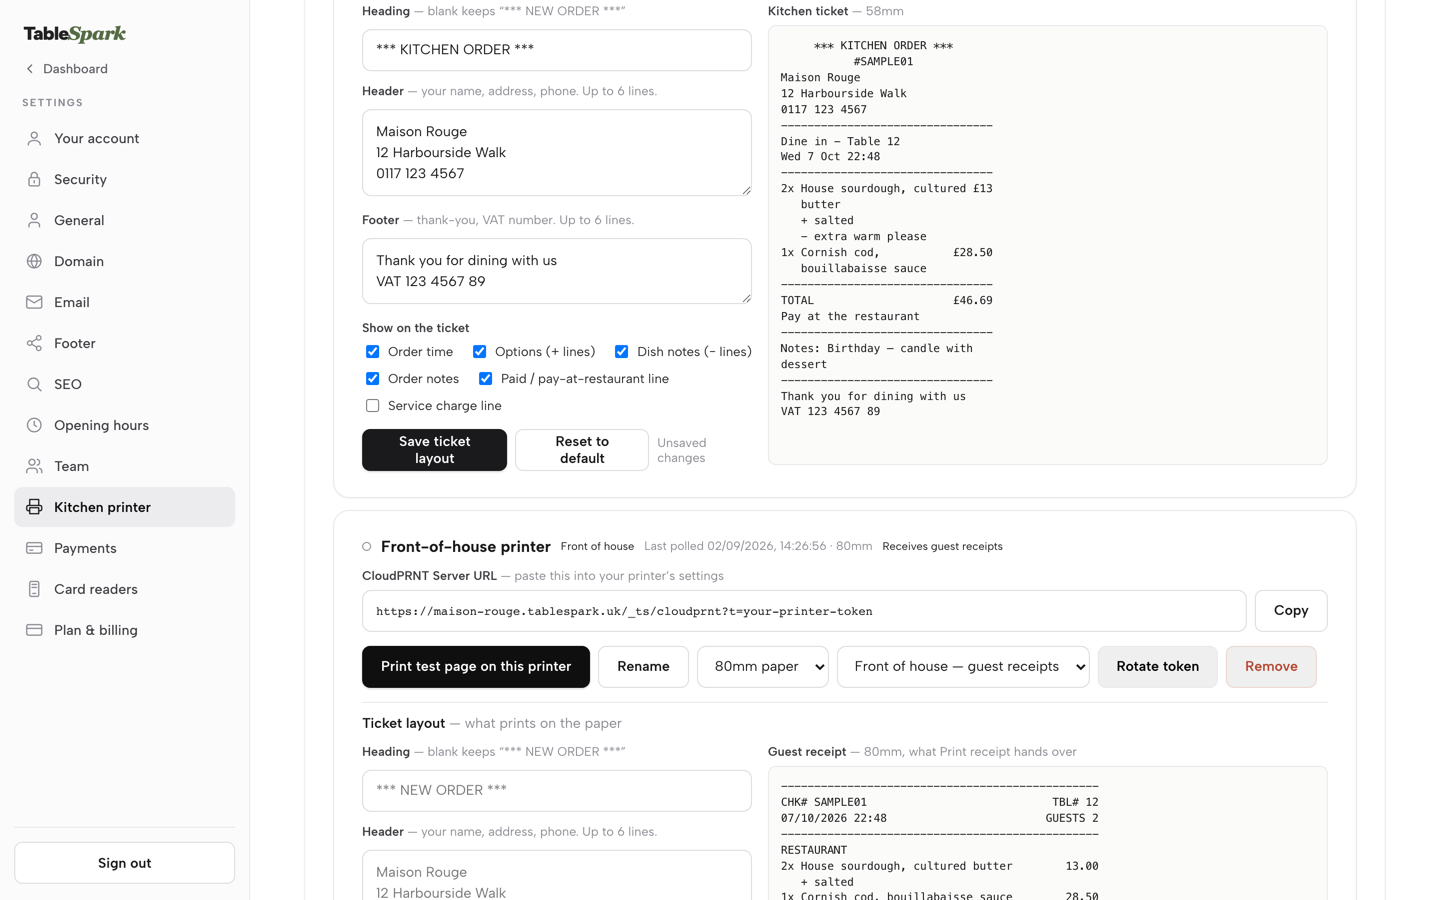
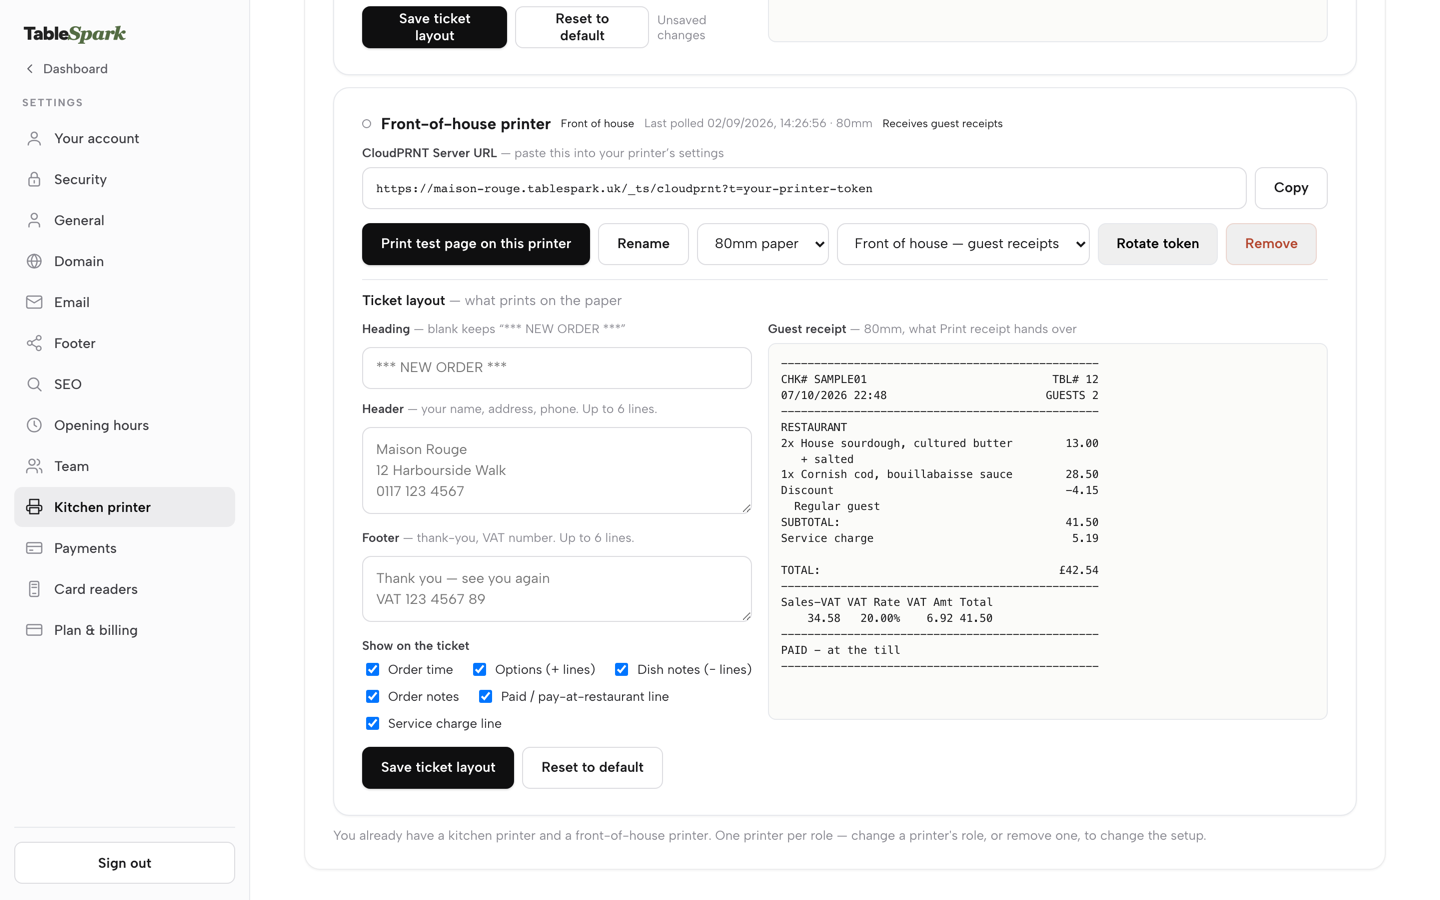
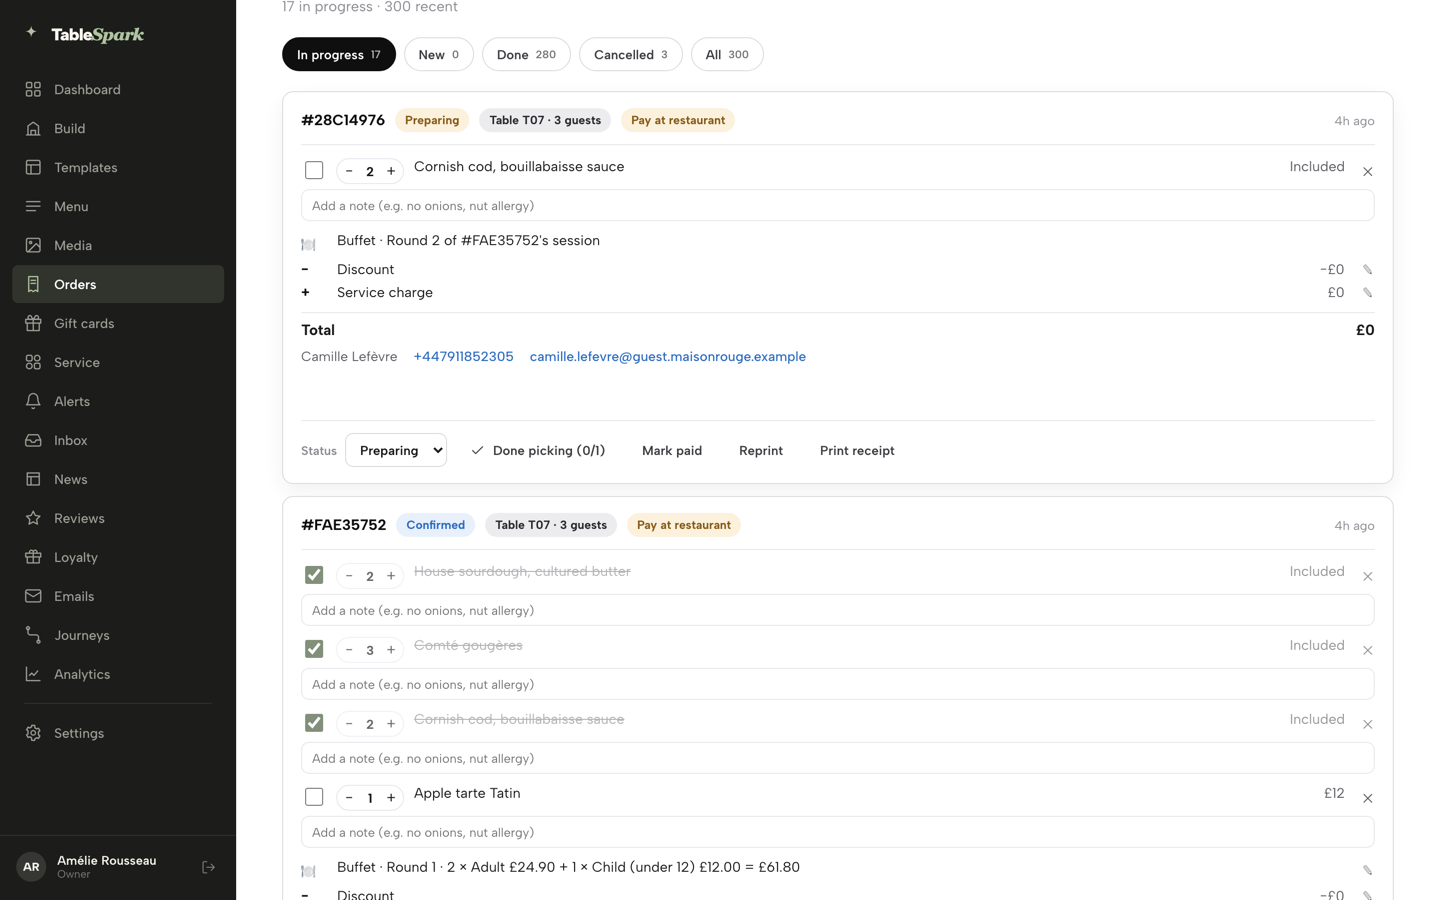
A printer’s Server URL copied, its paper width and role chosen, the ticket layout written, and the test page, Save and Print receipt each one click away on your own account.
- WHAT YOU NEED
- A CloudPRNT printer & its own settings page
- TIME
- About 6 minutes
- HOW HARD?
- Copy one link, paste it once the printer does the rest
- CAN I BREAK IT?
- No a test print is just paper
IN PLAIN WORDS / TAP A TERM
What’s “CloudPRNT”?
The standard your Star printer uses to fetch print jobs over the internet, instead of needing a cable to a till. Paste one web address into the printer once, and it checks in on its own from then on.
What does “polling” mean?
The printer asking TableSpark “anything for me?” on its own schedule. The “Last polled” time on each card shows when the printer last checked in, and the status dot stays a neutral colour. The print status on each order in Orders is where you confirm a ticket printed.
What’s the difference between a “ticket” and a “receipt”?
A ticket is what the kitchen reads — dishes, options, notes, no guest details. A receipt is what the guest keeps — itemised prices and VAT, no dish notes. Same editor, two different printer roles.
What’s a printer’s “role”?
Which of the two jobs it does — Kitchen or Front of house. With only one printer connected, it does both; add a second and each one takes a single job.
Find the printer settings
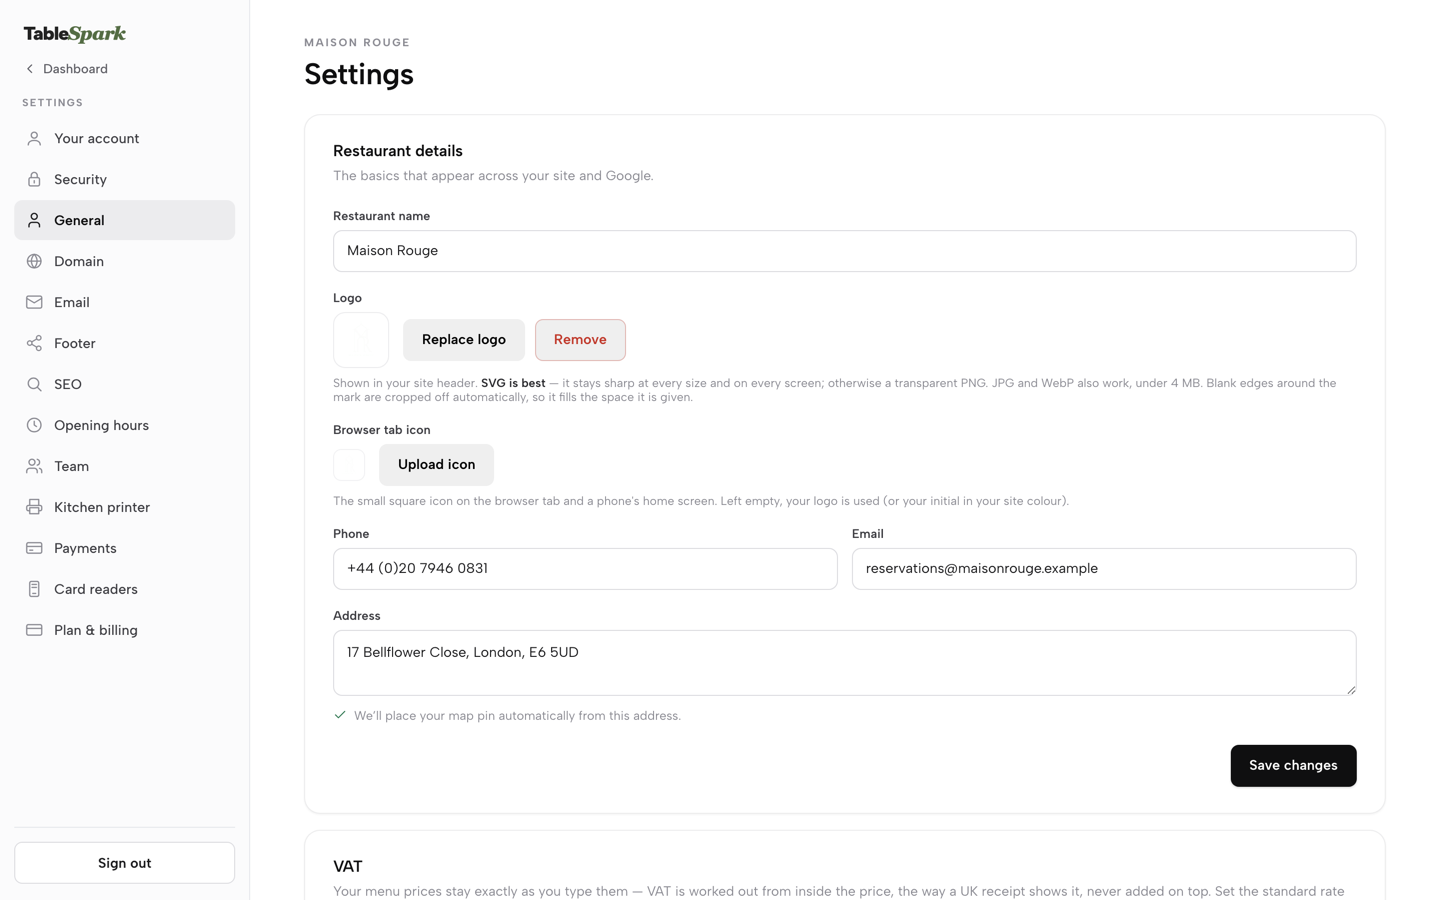
Open Settings and click Kitchen printer in the left-hand nav — the printer icon, sitting between Team and Payments. Kitchen printing comes with the Full plan, and it's open to owners, admins and editors alike, the same as most of Settings' content sections.
Above the printer cards a short note says how the connection works: any Star CloudPRNT printer connects with one pasted link, and the print status on each order in Orders is where you confirm a ticket printed.
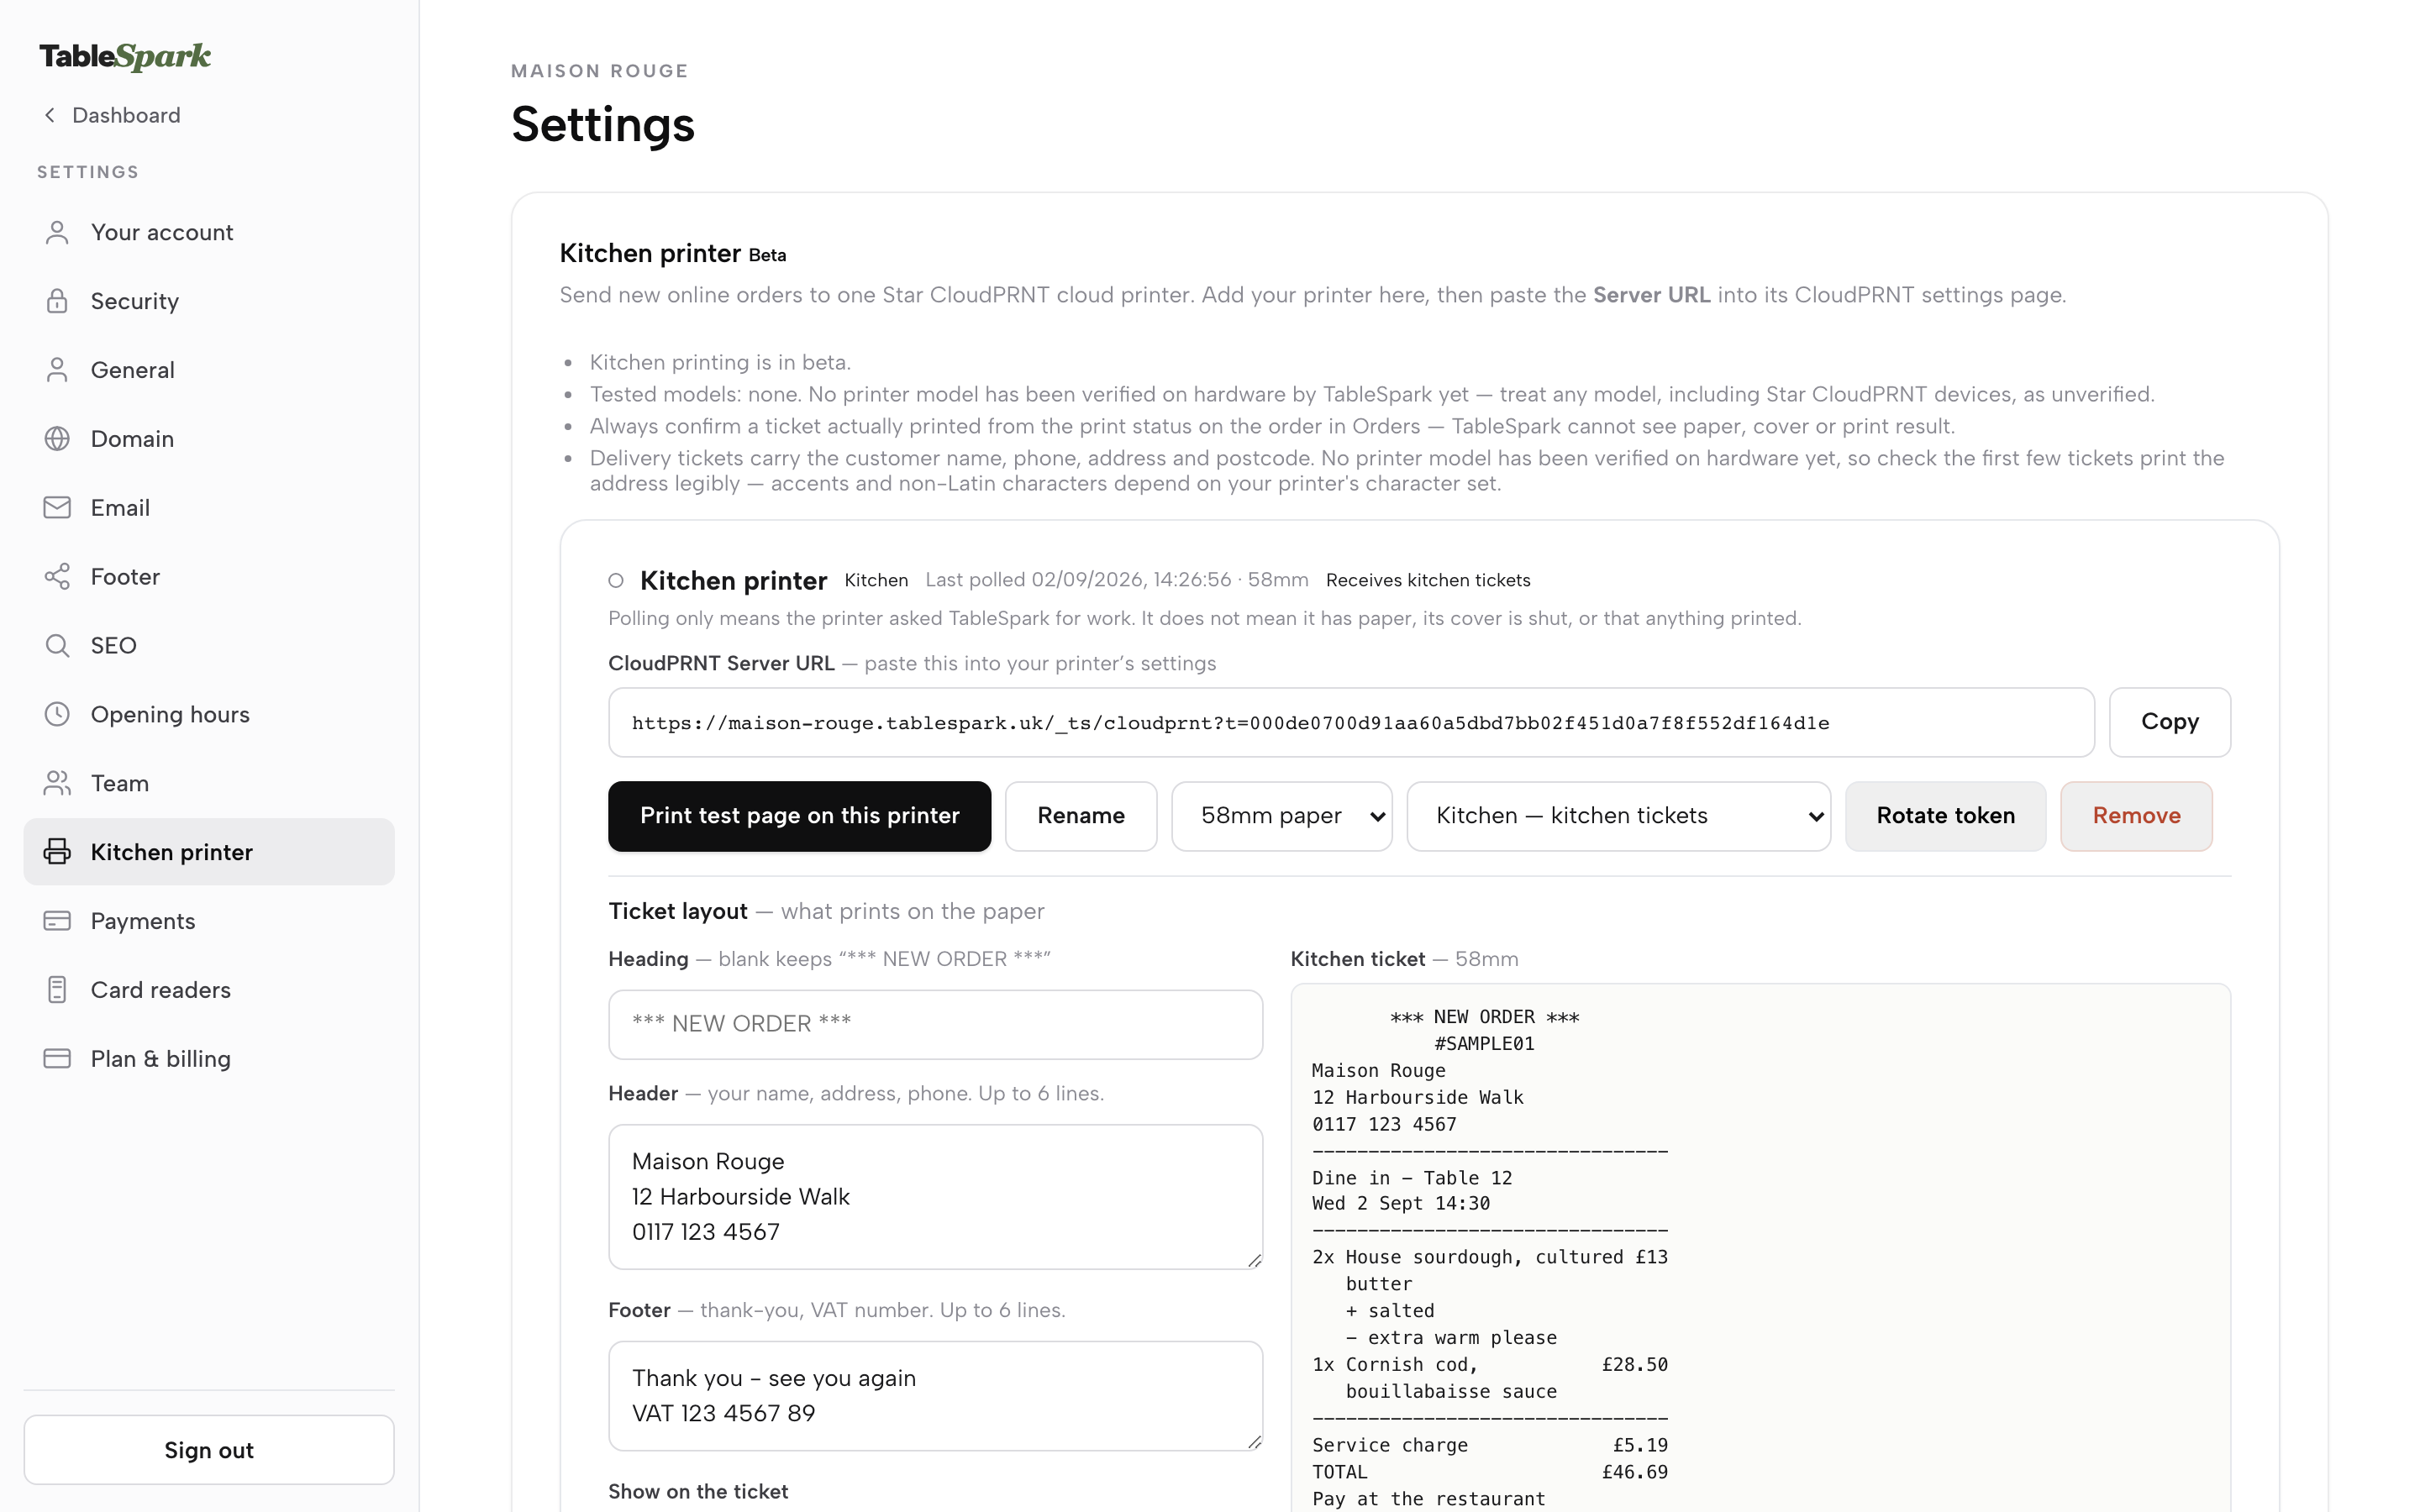
Connect a CloudPRNT printer
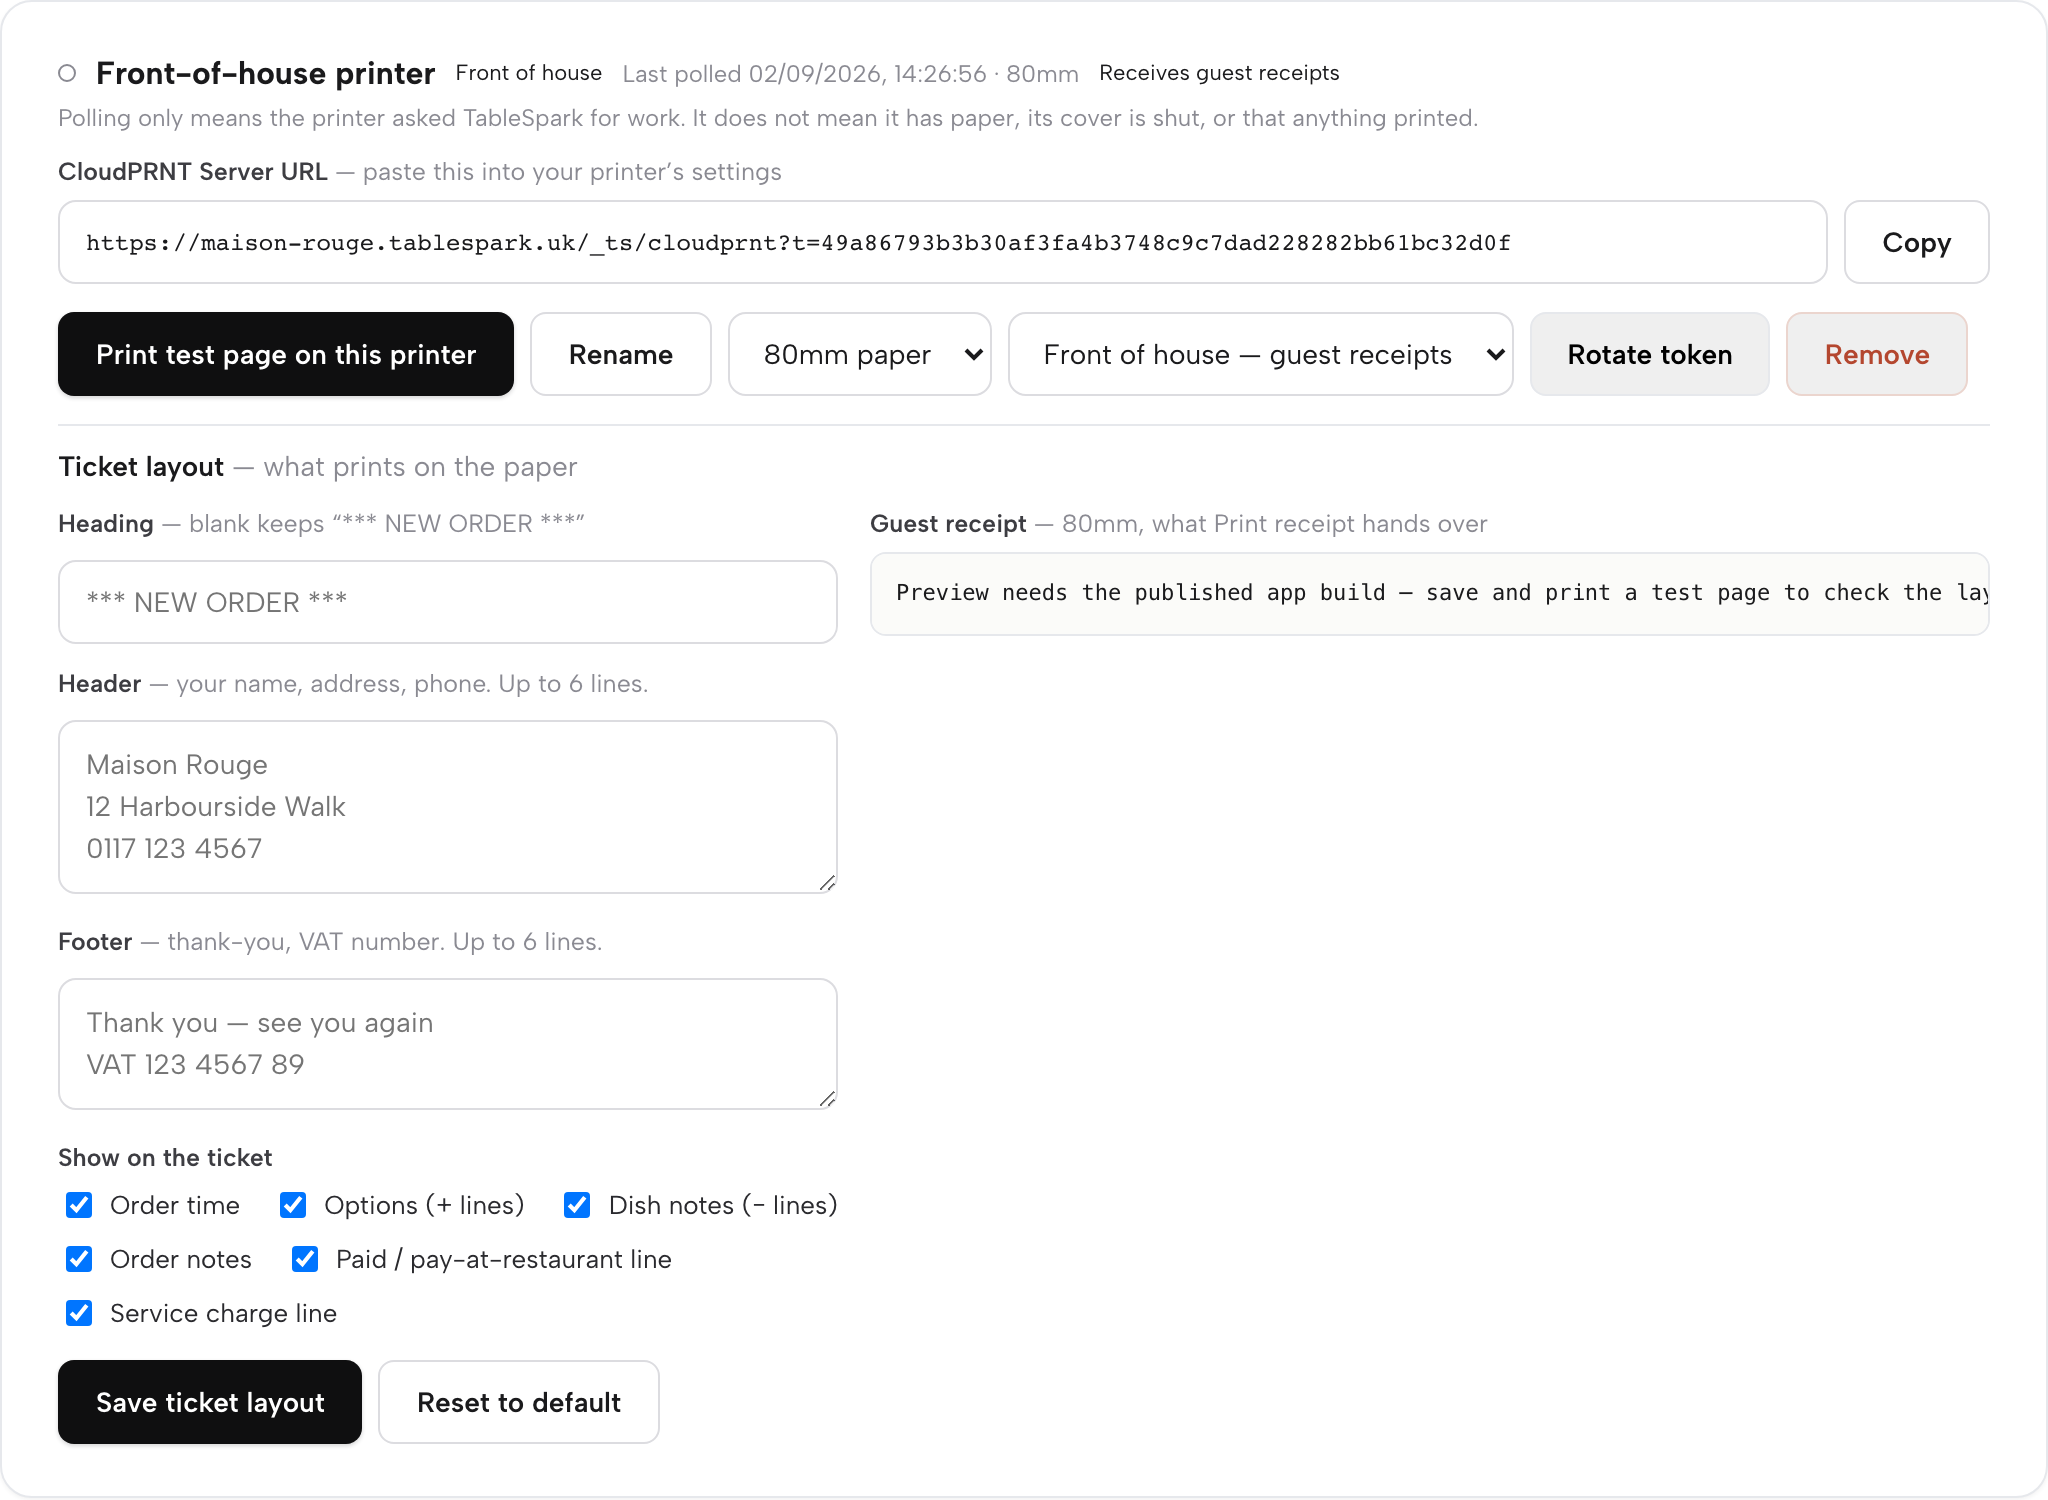
With no printer connected yet, the panel shows one button: Add a printer. Pressing it creates a printer row and gives every card a CloudPRNT Server URL — a single web address ending in a long random token, with a Copy button next to it. That URL is the one thing to paste into the physical printer's own CloudPRNT configuration page; the printer then polls TableSpark for work on its own. The token is the printer's only credential — there's no separate login and nothing else to configure on the printer itself.
The first printer you add always becomes the kitchen printer. Add a second and the button changes to Add a front-of-house printer — guest receipts print there, and that second printer takes the role automatically. Once both roles are covered, the Add button disappears entirely and is replaced by a plain note: you already have a kitchen printer and a front-of-house printer, one printer per role, and changing that means changing a role or removing a printer rather than adding a third.
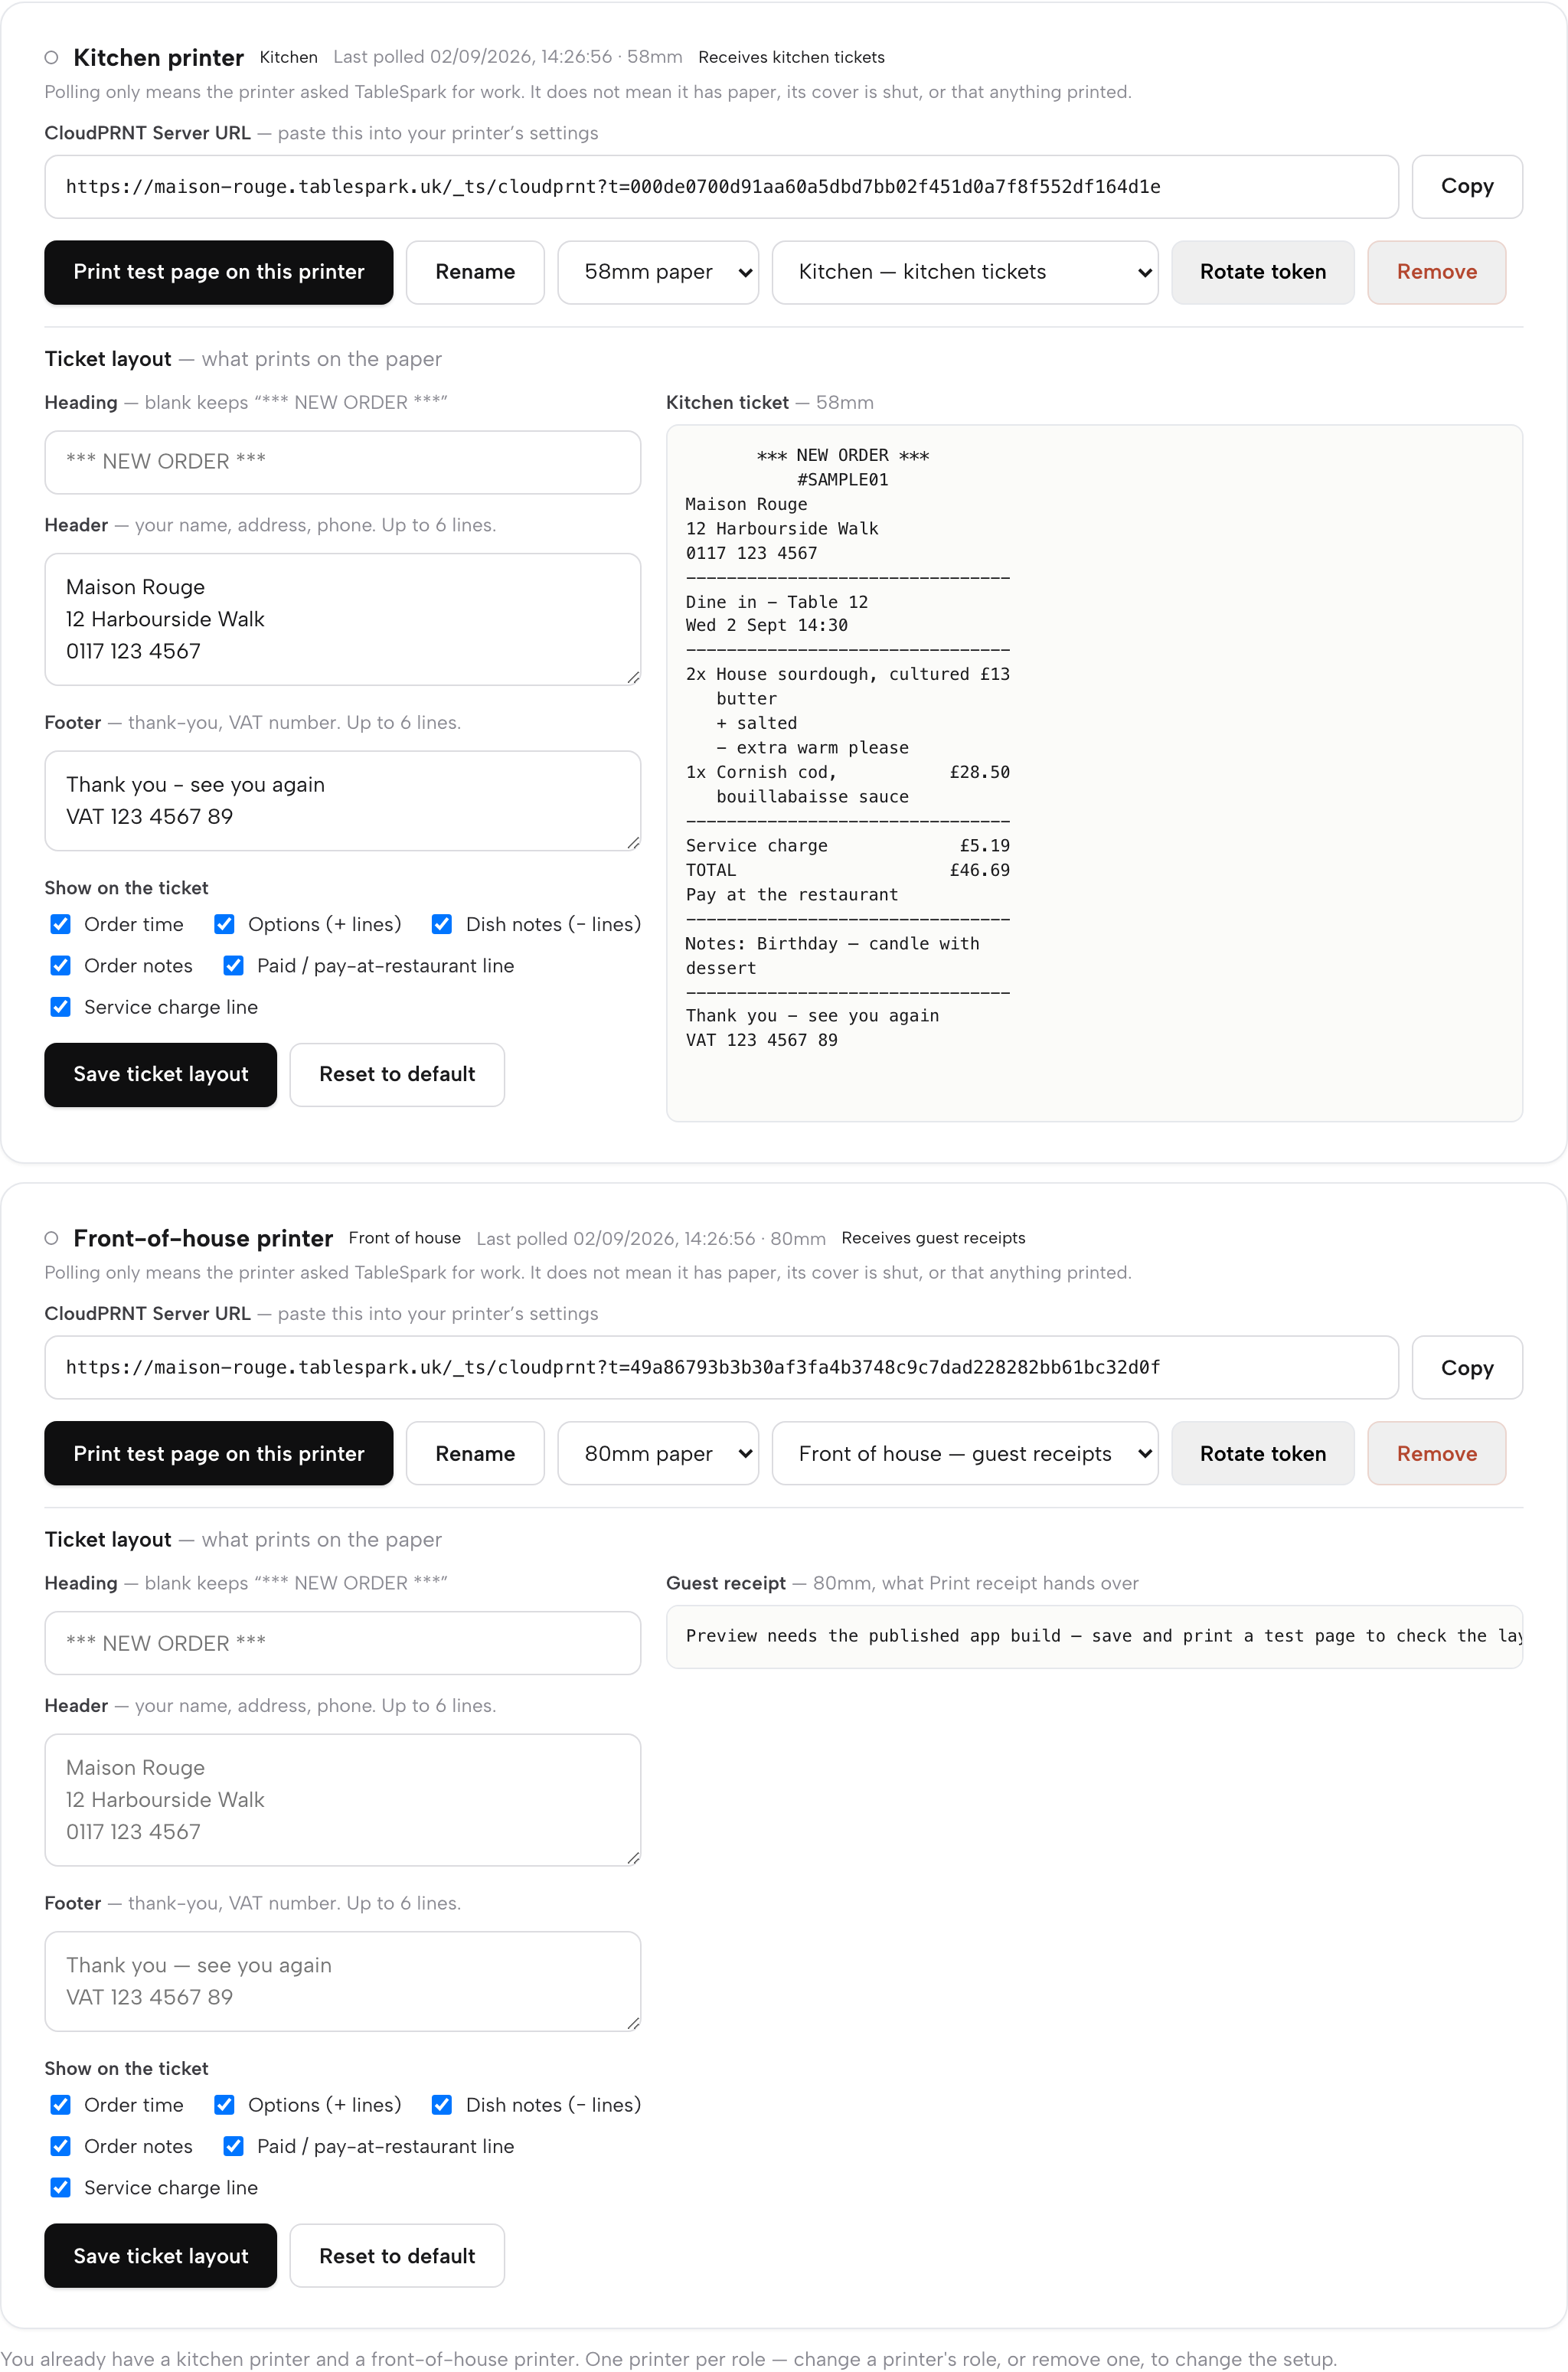
Kitchen or front of house: the role selector
Every printer card carries a role dropdown with two options: Kitchen — kitchen tickets and Front of house — guest receipts. Change it and the card confirms what will print there from that point on. Next to the role, a chip states the traffic plainly — Receives kitchen tickets or Receives guest receipts — so a glance down the printer list tells you exactly what each machine is for.
Routing is automatic, not something you choose per order: the kitchen-role printer gets every automatic kitchen ticket, the front-of-house-role printer gets every guest receipt. With only one printer connected, it receives both — nothing changes for a single-printer restaurant. Each card also shows a neutral status dot and a Last polled time, so you can see when the printer last checked in with TableSpark. To confirm a ticket itself, open the order in Orders and read its print status.
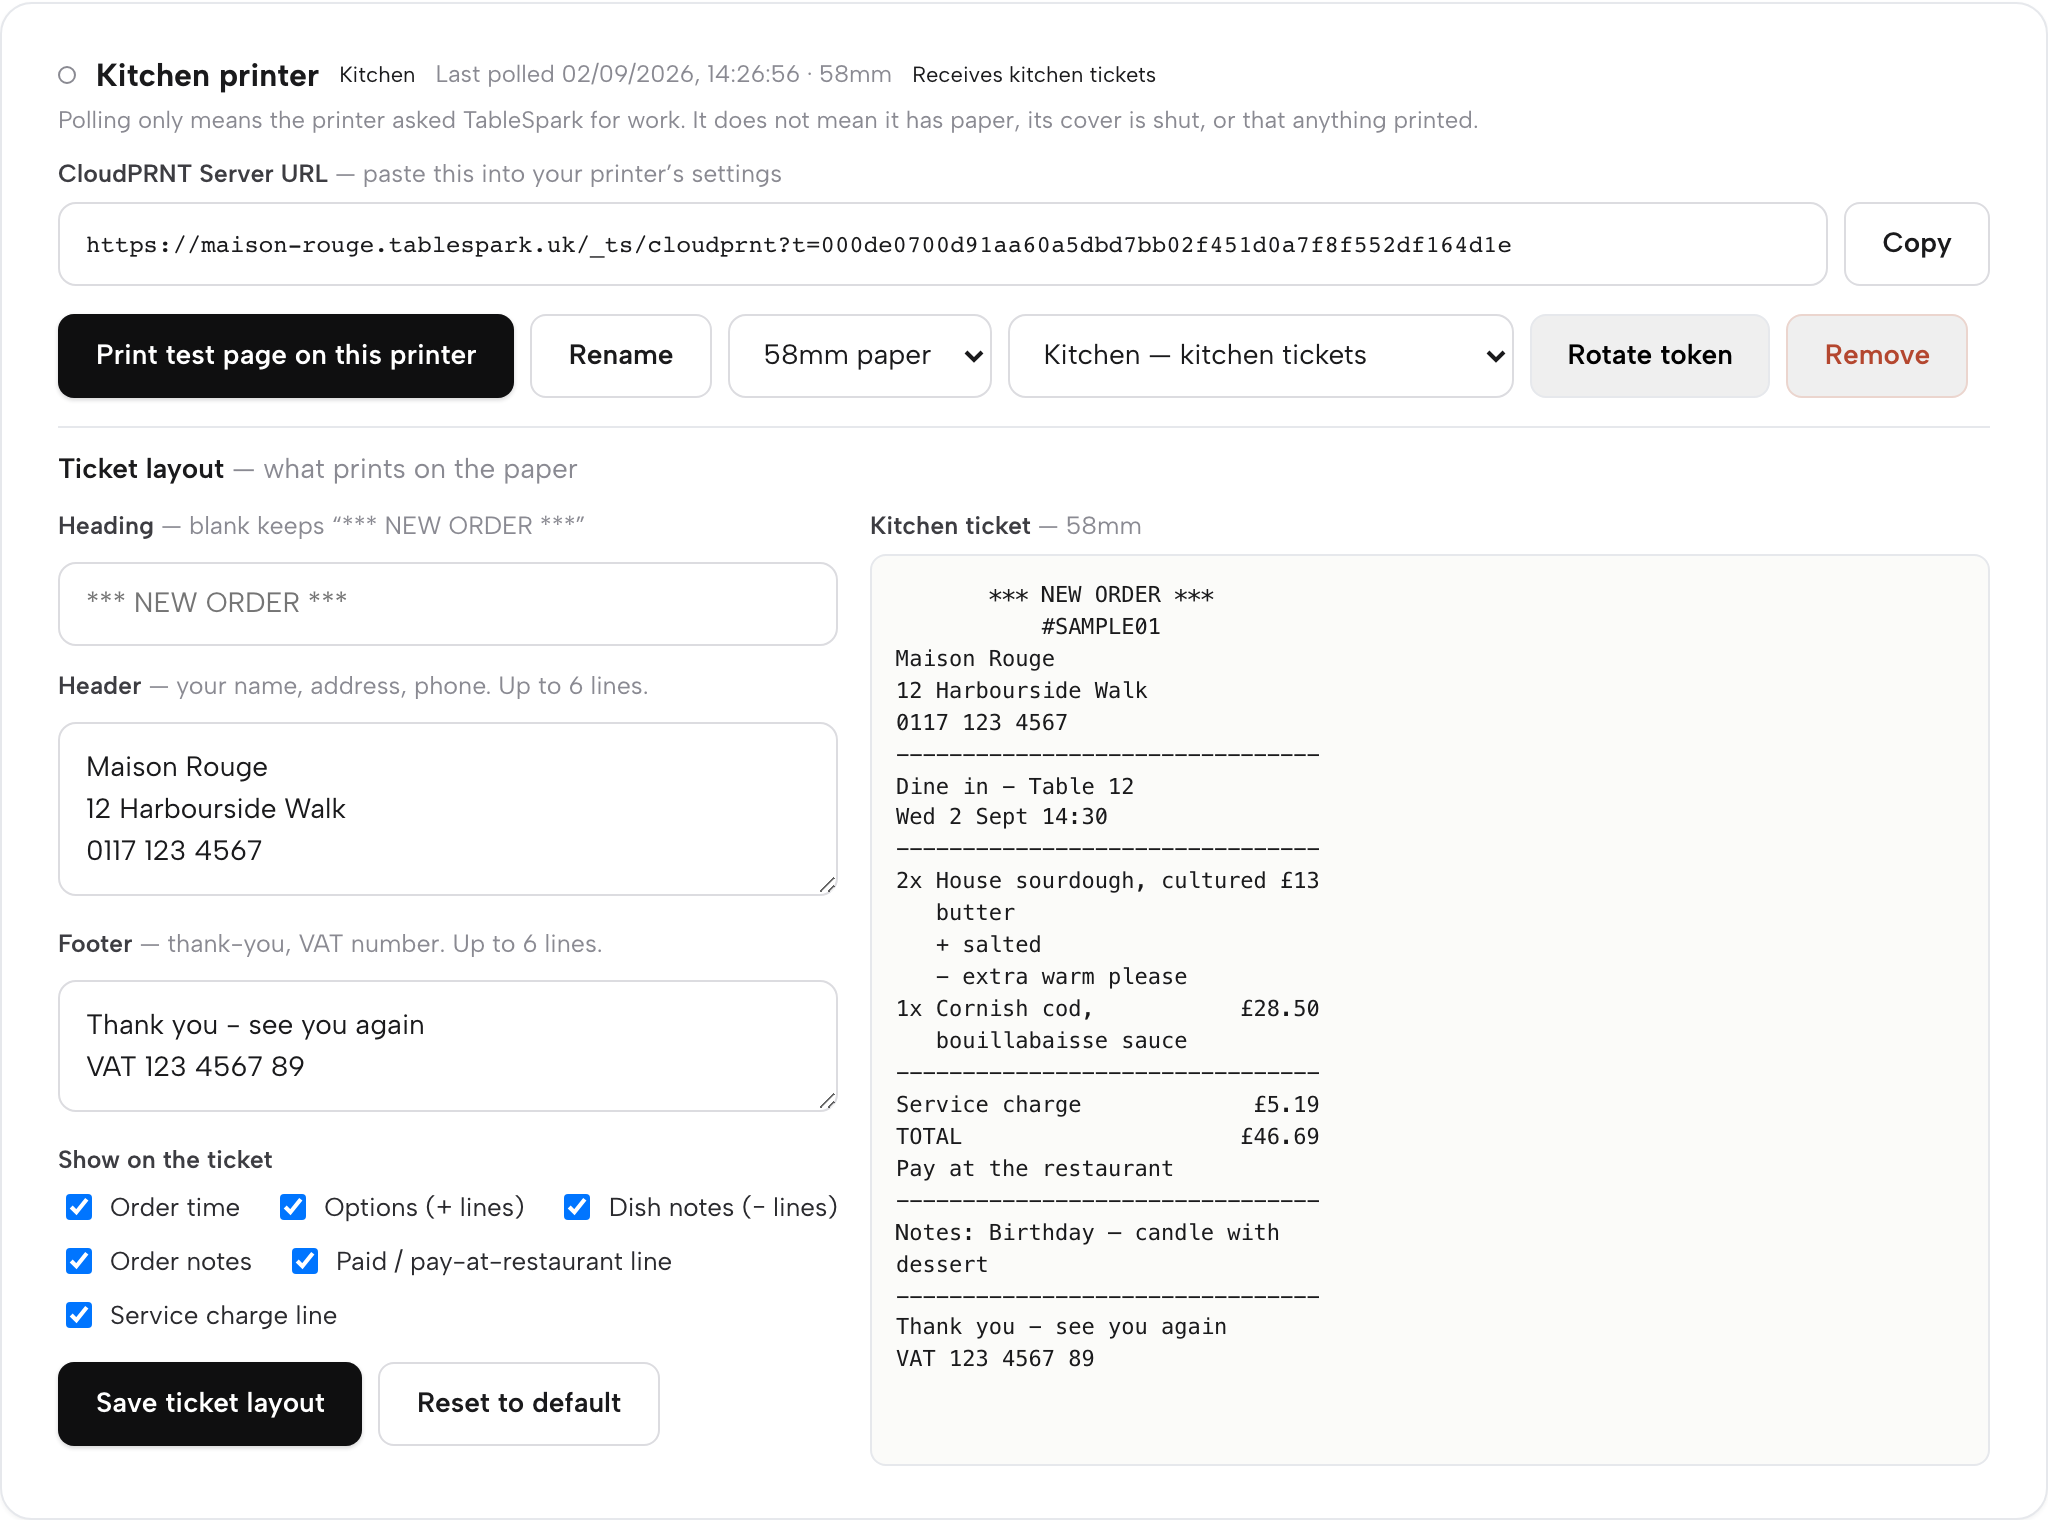
Edit what prints on the paper
Under Ticket layout — what prints on the paper, every card carries a Heading field (blank keeps *** NEW ORDER ***), a Header for your name, address and phone (up to six lines), and a Footer for a thank-you and your VAT number (up to six lines) — and six Show on the ticket toggles: Order time, Options (+ lines), Dish notes (− lines), Order notes, Paid / pay-at-restaurant line, and Service charge line. These fields hold static text only — there's nowhere to insert an order's own details — which is exactly what keeps a diner's name, phone or address off a dine-in or collection ticket no matter what you type into Header or Footer.
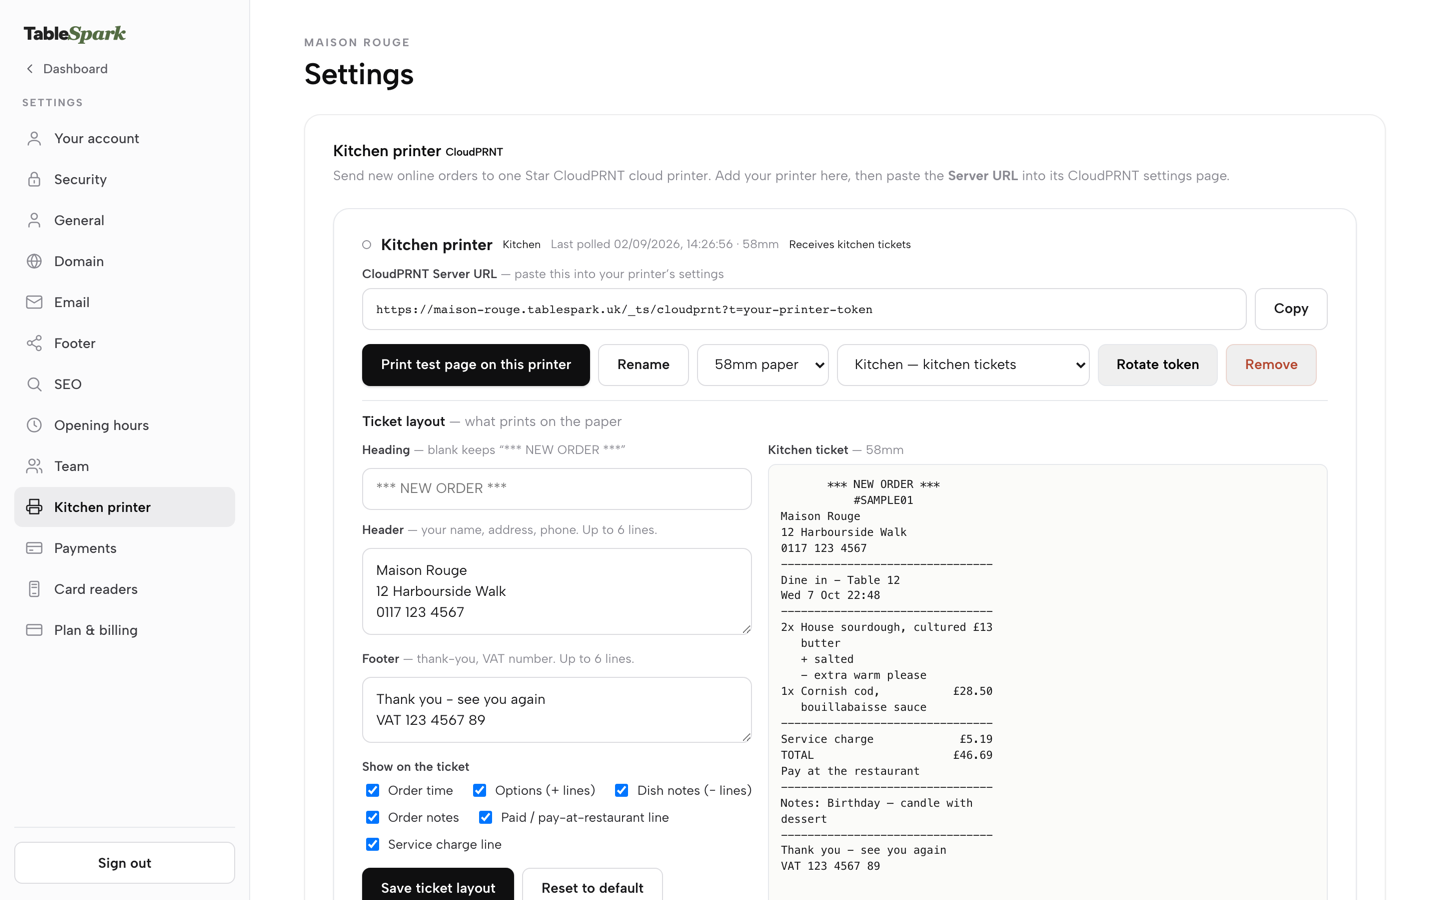
A live preview sits beside the fields and updates as you type or tick a box, rendered by the same code that feeds the physical printer — what you see in the preview is what comes out on the paper. Save ticket layout keeps it; Reset to default clears all three fields, re-checks every toggle and saves that straight away. While you edit, Unsaved changes shows beside the buttons until you save. FIG. 03 above shows the kitchen ticket preview in full: the heading and order reference, the restaurant's own header block, the table and time, each dish with its + option lines and − notes, the service charge, the total, a pay-at-restaurant line, and the order note — all from a sample order.
The preview is role-specific, one per card: a kitchen-role card shows the kitchen ticket; a front-of-house-role card shows the guest's own receipt instead, built from the same fields. That guest receipt is laid out differently on purpose — check number, table and guests at the top, an itemised money column with discount and service charge, a VAT breakdown, and a PAID line — and it never carries a customer's name, phone, address or dish notes, even on a delivery order's own copy of the bill.
Send a test print
Print test page on this printer sends a real test ticket straight to that one printer. If the printer's switched off in your account, the button waits, disabled, with a tooltip explaining why — a test only fires at a printer that can actually receive it.
When the test is queued, TableSpark names the printer it went to and points you to the order’s print status in Orders. If the print service does not name which printer took the job, the message asks you to check the printer before you try again, so a second page is not sent by mistake; if it reports a different printer from the one you clicked, you are told that instead. Every order also carries its own small print-status chip — Printing…, Printed, Print failed, Print expired, or Print unconfirmed — check the paper.
Alongside the test button, each card has Rename, a paper width switch between 80mm and 58mm, Rotate token (issues a fresh Server URL — paste the new one into the printer), and Remove.
Where tickets fire automatically
Most of what a kitchen printer does happens without anyone pressing a print button. A new online order routes straight to the kitchen-role printer the moment it comes in. And on the floor, a table order fires the same way: the instant a waiter presses Send order on a table's order pad, the order is saved and a kitchen ticket is queued to the connected kitchen printer in that same action — fire-and-forget, so a printer problem never holds up service. See Take an order in the service guide for the order pad itself.
Print receipt — the guest's own copy, in the receipt layout from step 4 — is a button rather than an automatic fire, and it lives in two places doing the identical thing: on every order in Orders, and inline on the table's till inside the booking sheet on the floor (see Take payment). Reprint sits next to it in Orders — on the table’s till the same button is called Kitchen copy — for recovering a jammed or missing kitchen copy at any time; a delivery order with no address on it prints DO NOT DISPATCH on the paper itself rather than being refused, so a jammed ticket is never a dead end.
Two roles, one editor each, and every ticket accounted for — the new online order that fires itself, the table order that prints the moment it's sent, and the guest receipt and kitchen copy sitting exactly where the till already is. See Where orders land for the online side of the same tickets.
Next · connect your printer
Next: paste one Server URL
Add a printer, copy its Server URL into the printer's own CloudPRNT settings, and send a test page — two minutes, start to finish.