
The rota is where a restaurant’s week actually gets decided. TableSpark keeps it in the same place as service itself: invite your people once, give each the right role — there are four, and no per-seat charges — then drag the week together, publish it, and every team member carries their own shifts, hours and days off in their pocket.
Settings → TeamService → Servers → Rota
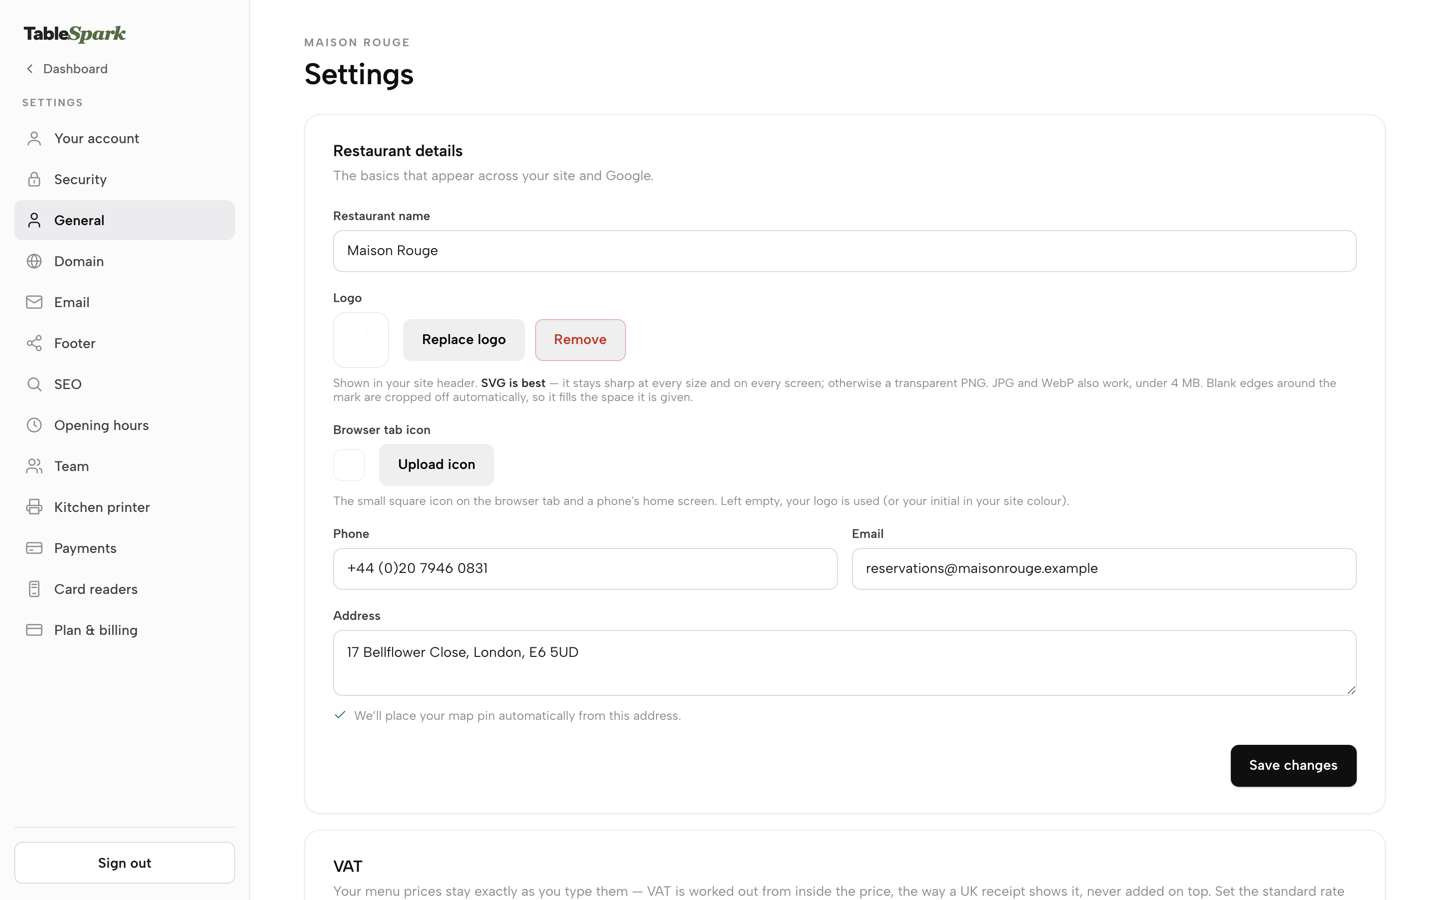
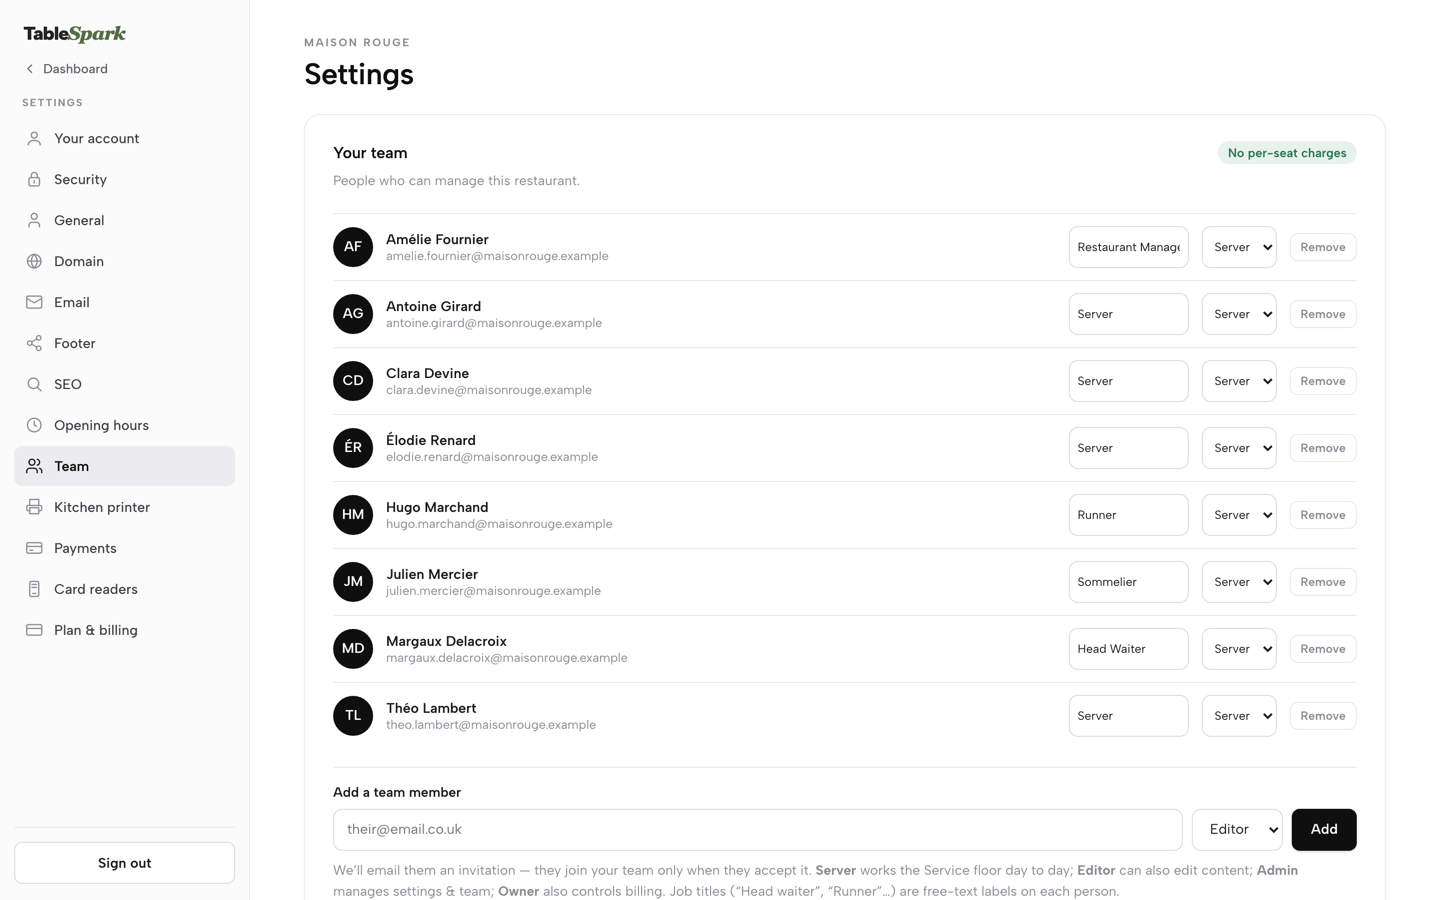
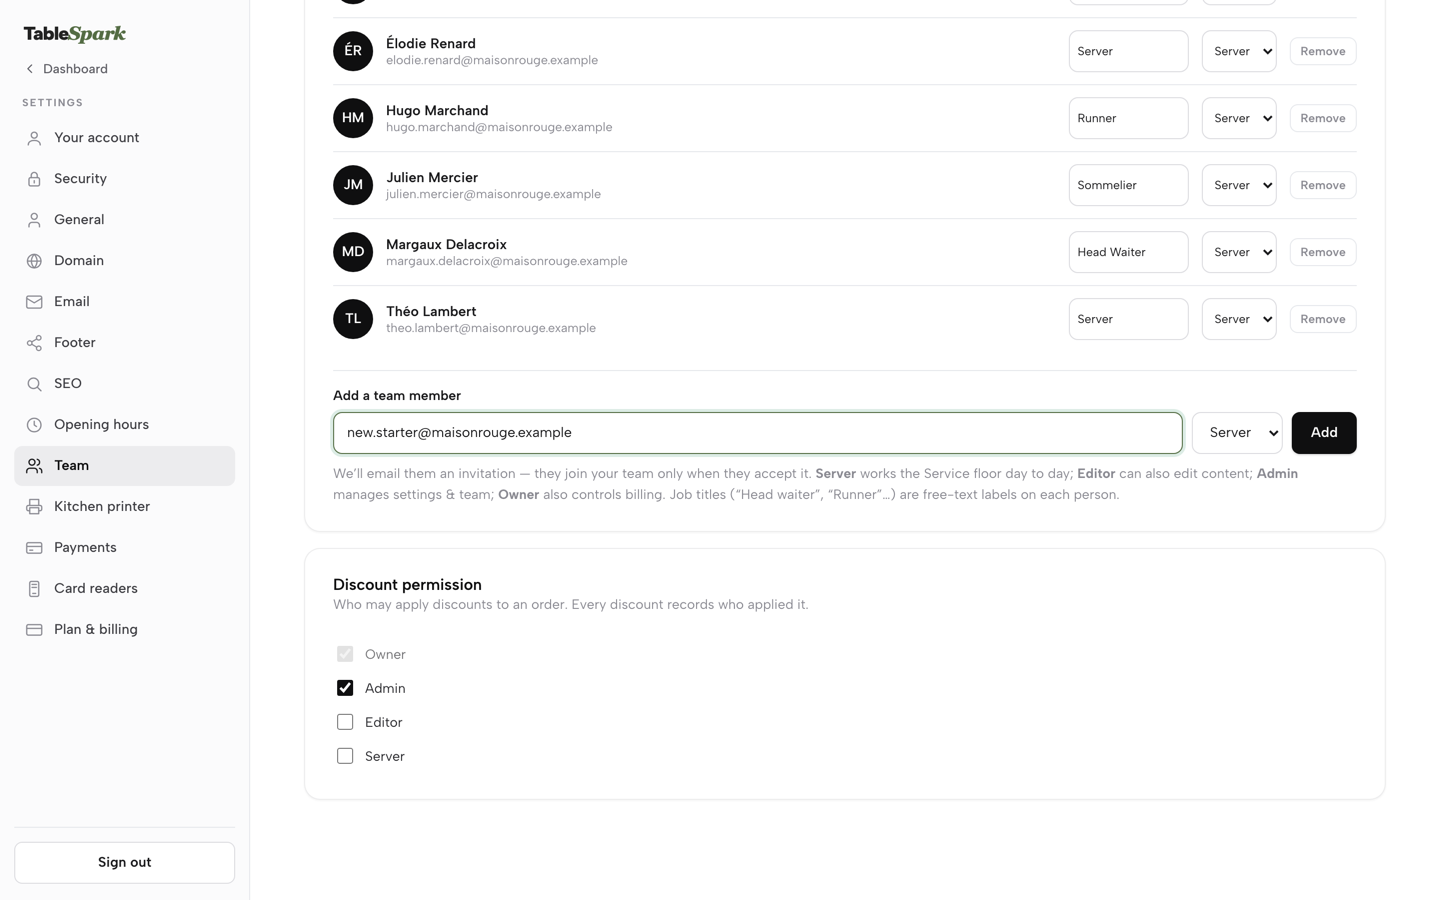
Open Settings and click Team in the sidebar — your team list opens.
A teammate invited with the right role, a Dinner shift drafted on next week’s rota, Publish drafts and the payroll export found, and the team member’s own My rota seen.
- WHAT YOU NEED
- Your team’s emails — that’s it
- TIME
- About 8 minutes
- HOW HARD?
- Like dragging an event in a calendar app
- CAN I BREAK IT?
- No — shifts stay draft until you press Publish
IN PLAIN WORDS / TAP A TERM
What’s the difference between a “role” and a “job title”?
Role — Server, Editor, Admin, Owner — decides what someone can open. Job title, like Sommelier or Runner, is free text you choose; it’s just the label on the rota.
What’s an “open shift”?
A shift on the rota that isn’t assigned to anyone yet — it sits in its own lane until someone takes it.
What does “draft” mean on the rota?
A shift you’ve placed but haven’t published. It’s hatched on your grid and invisible to staff until you press Publish drafts.
What’s an “acknowledgement”?
When you publish, each person is asked to confirm their shift, or say they can’t work it. A tick appears on the chip once they confirm — so you know who’s actually checked the week.
Invite your team
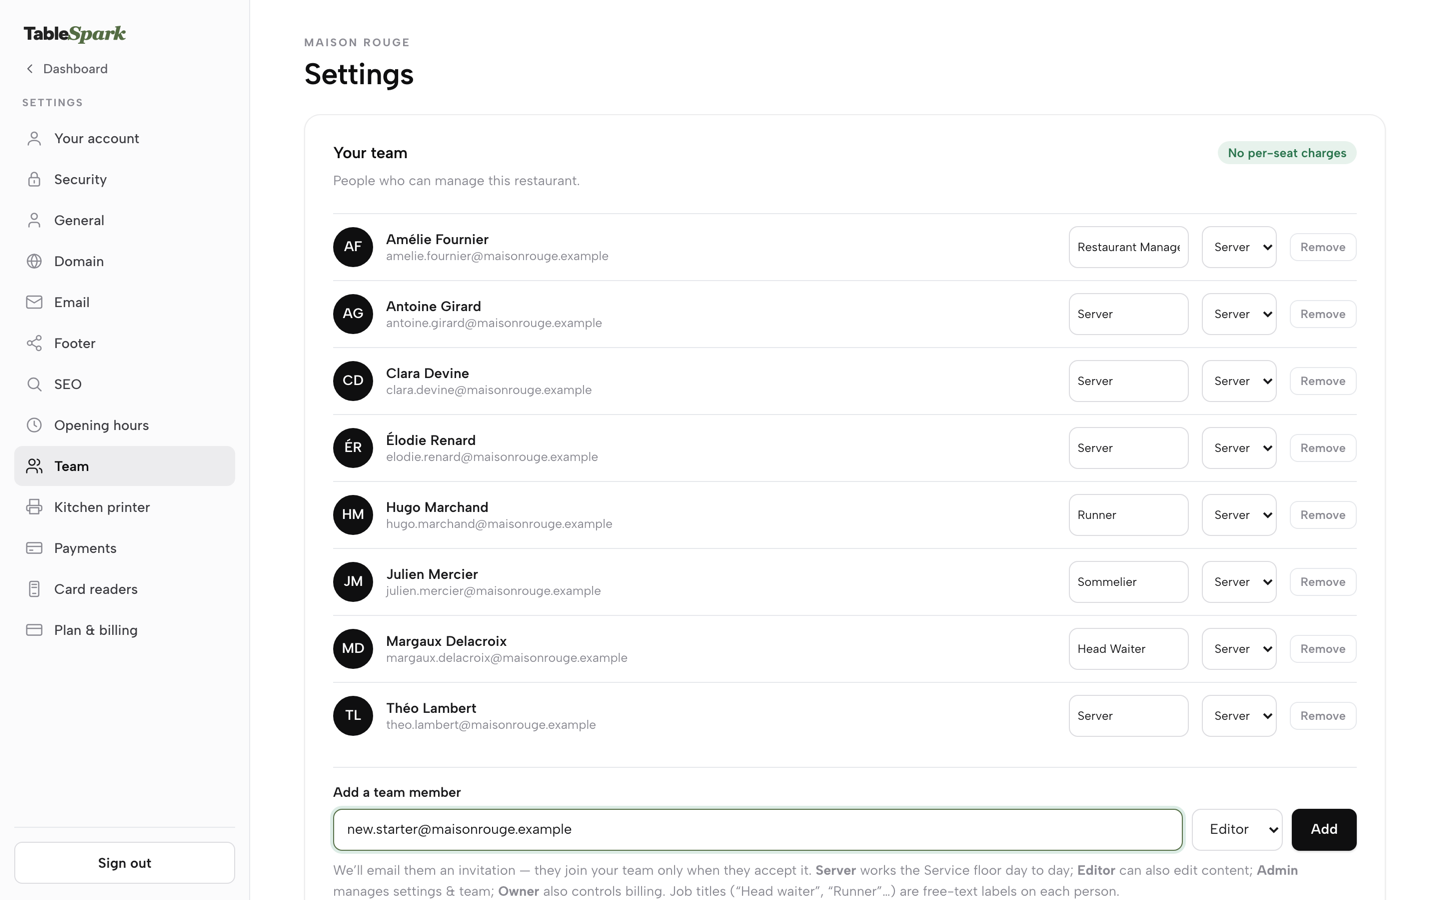
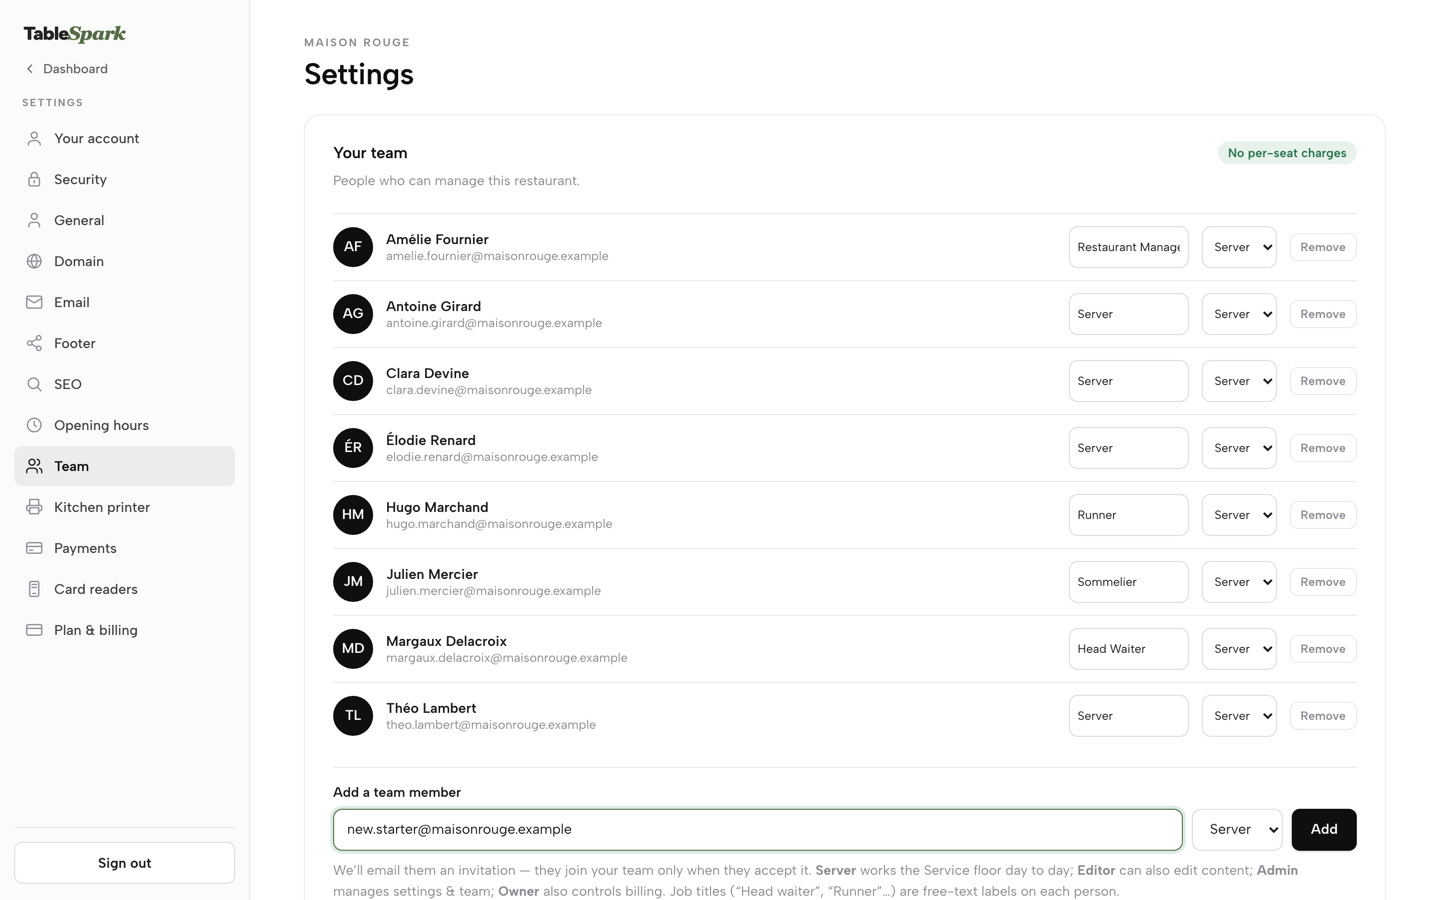
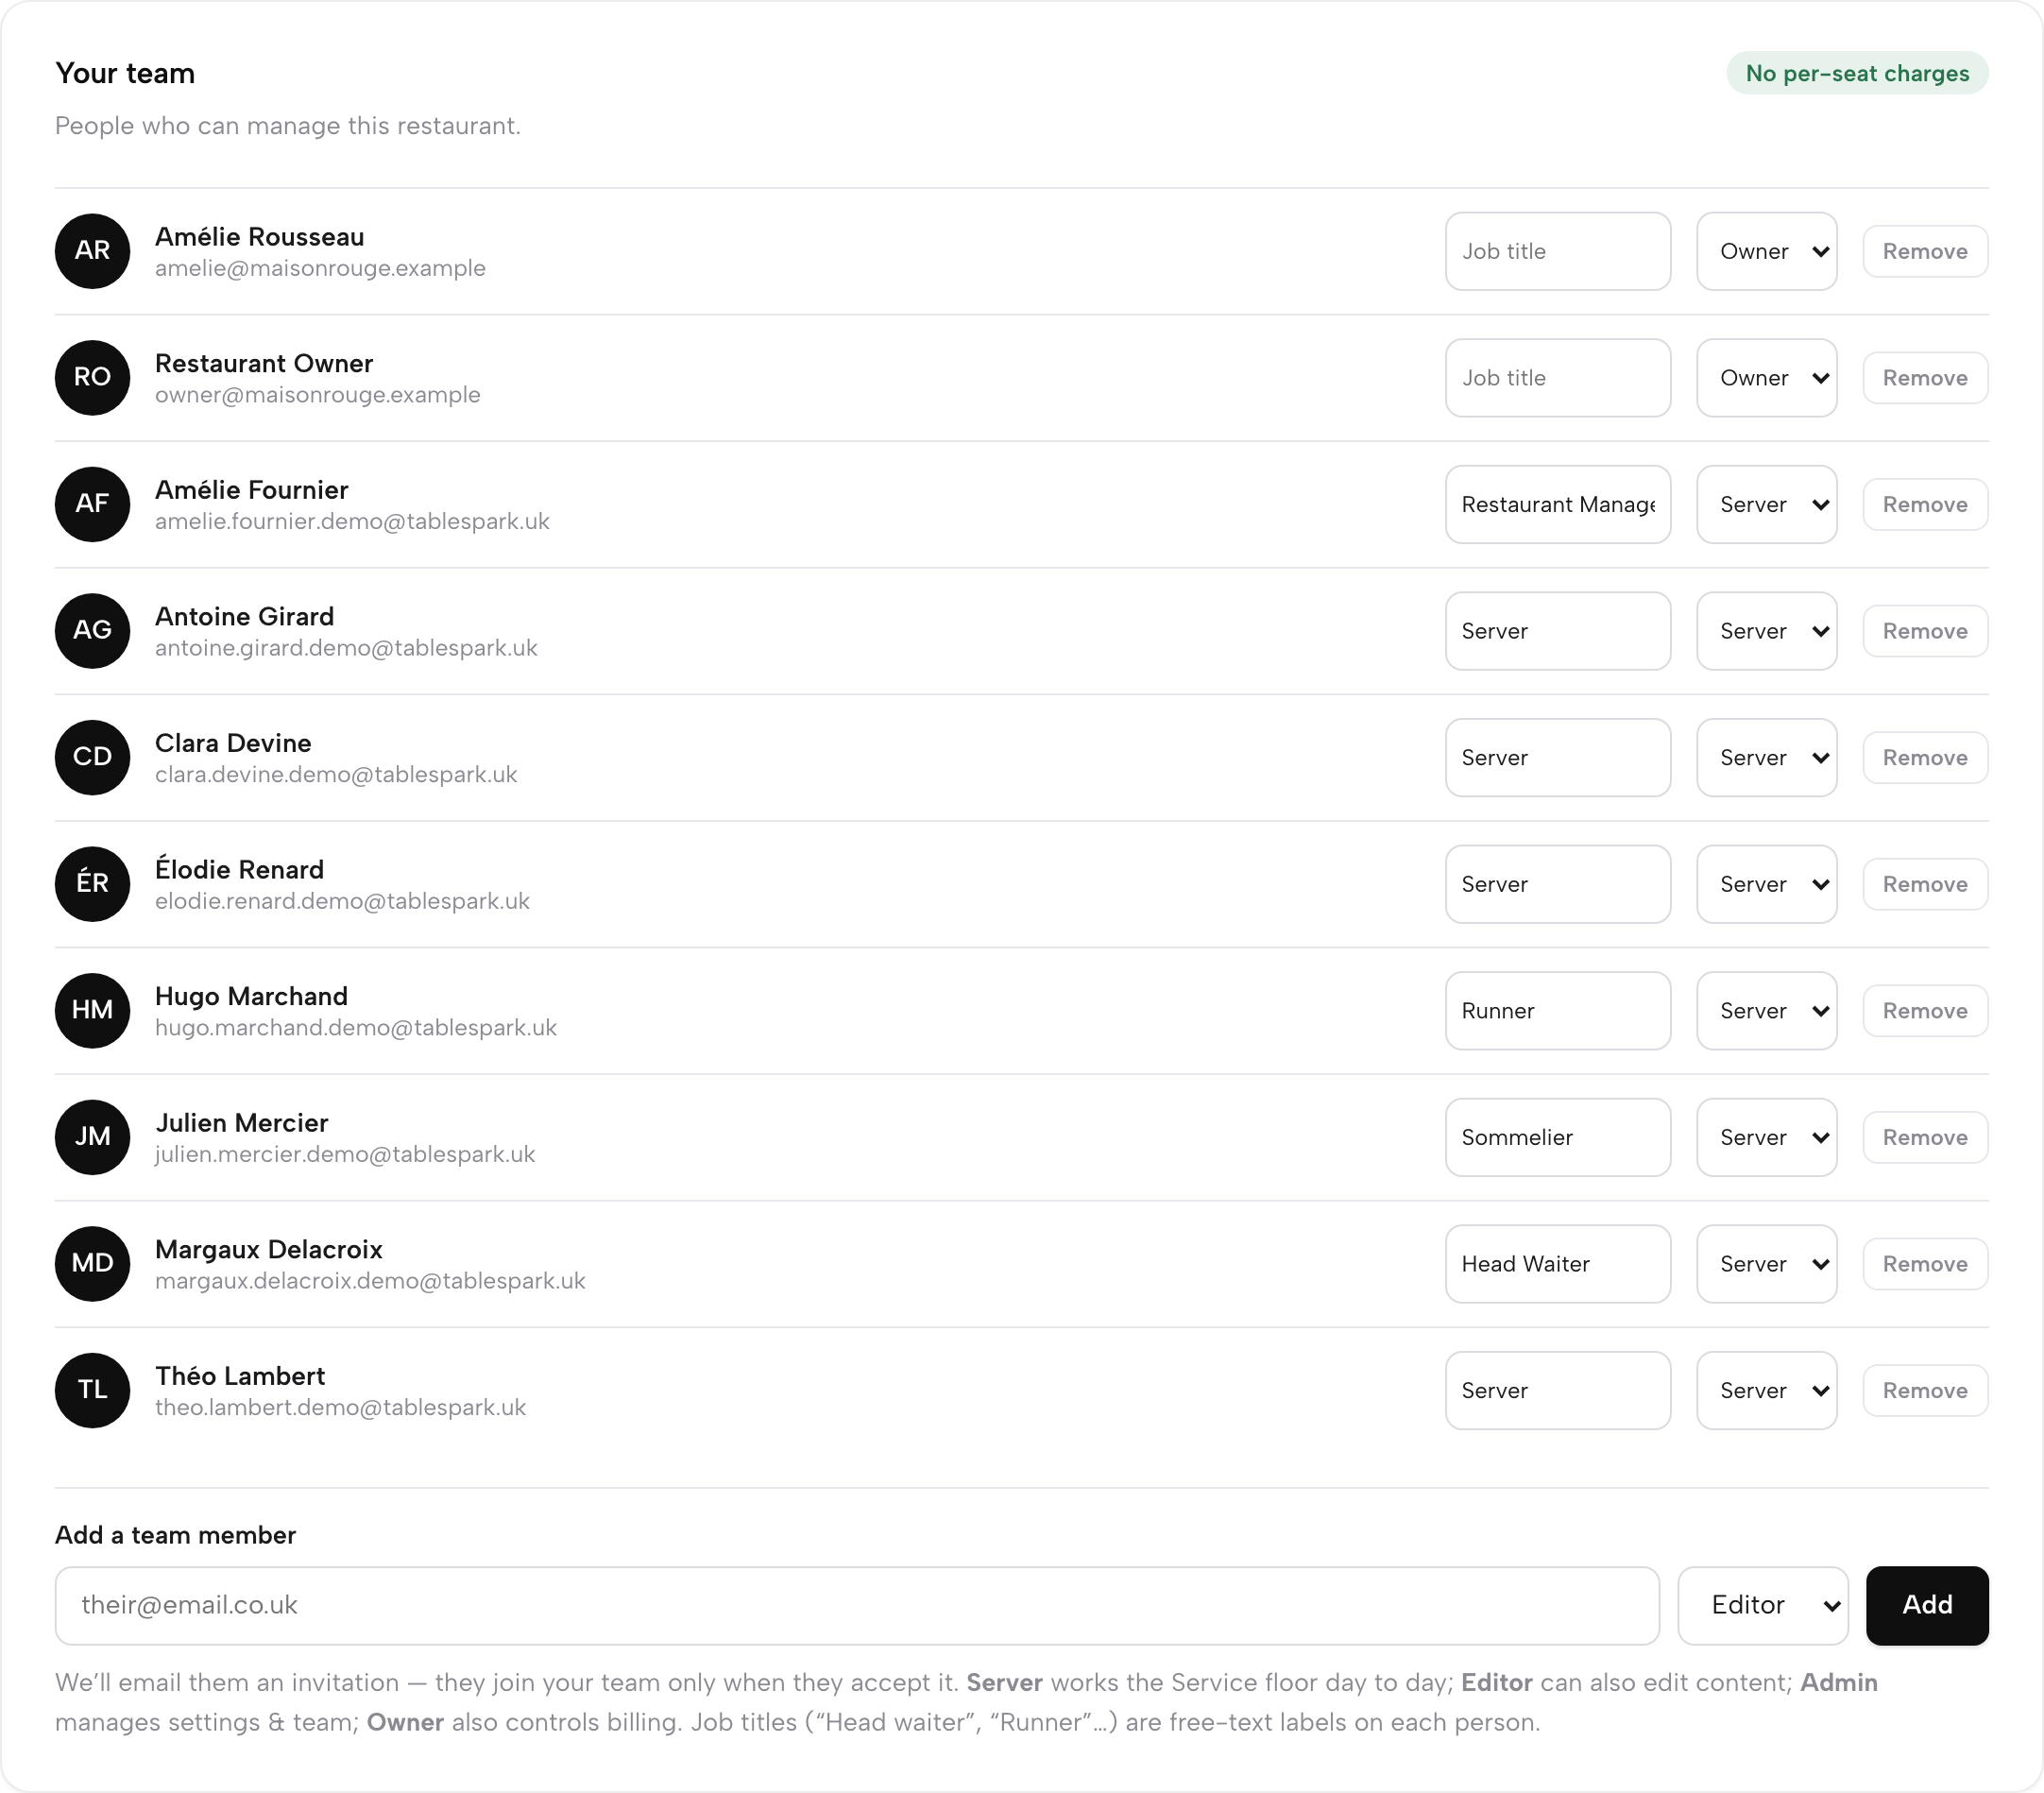
Open Settings and click Team. Each person in the list has a Job title box, a Role dropdown and a Remove button. Under Add a team member, type their email, pick a role from the dropdown — Server, Editor, Admin, or (for owners) Owner — and press Add. The page says exactly what happens next: “We’ll email them an invitation — they join your team only when they accept it.” Until then the invite sits under Pending invitations with a status pill, where you can resend or cancel it. The card wears its pricing on its sleeve: No per-seat charges — team members come with the Growth and Full plans, however many you add.
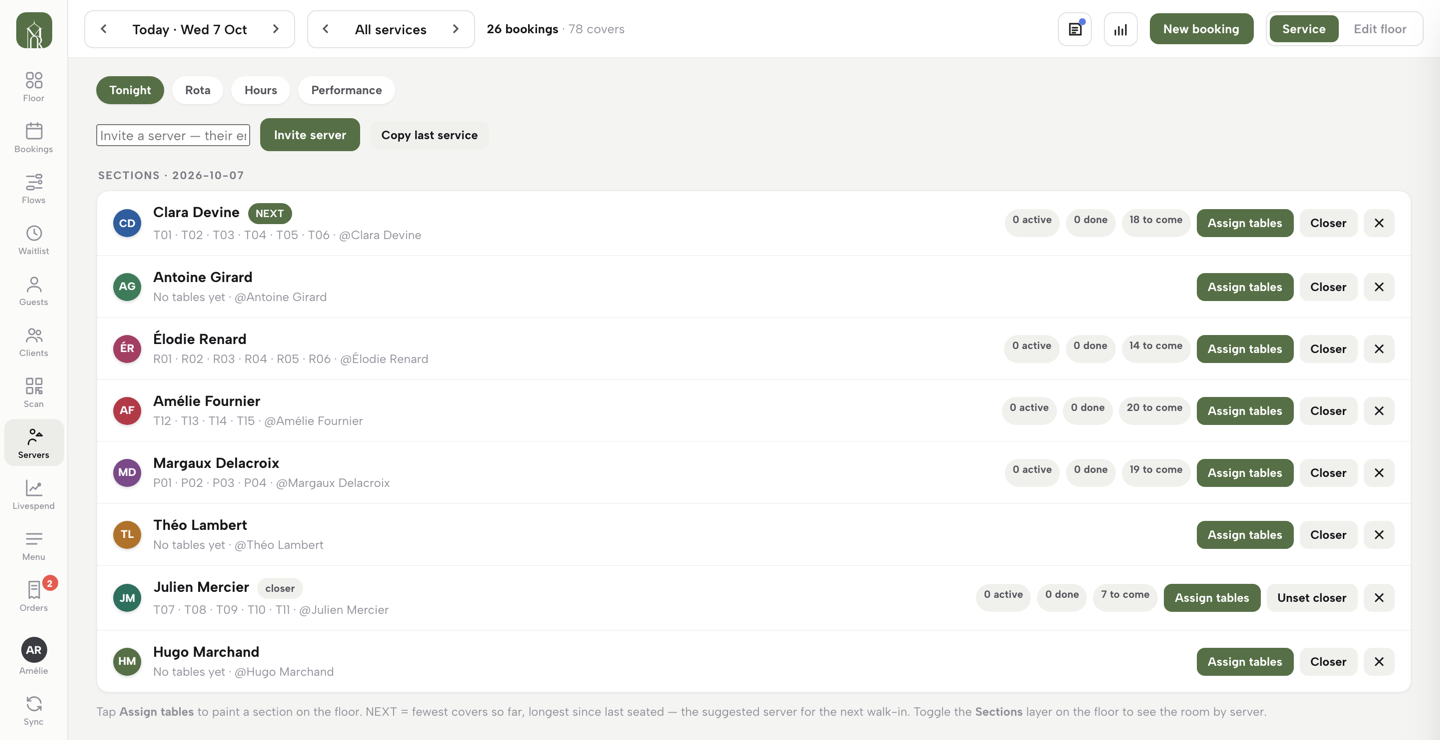
There’s a second door for the common case: on the Service console’s Servers view, the Invite a server field and Invite server button send the same invitation with the role already set — handy mid-shift when a new starter appears.
What each role can do
Four roles, one sentence each — and the Settings page prints the same summary at the foot of the team card. Server works the Service floor day to day: seats guests, takes orders, appears on the rota. Editor does all that and edits content — the content of your site. Admin manages settings and the team itself: inviting people and changing roles. Owner also controls billing.
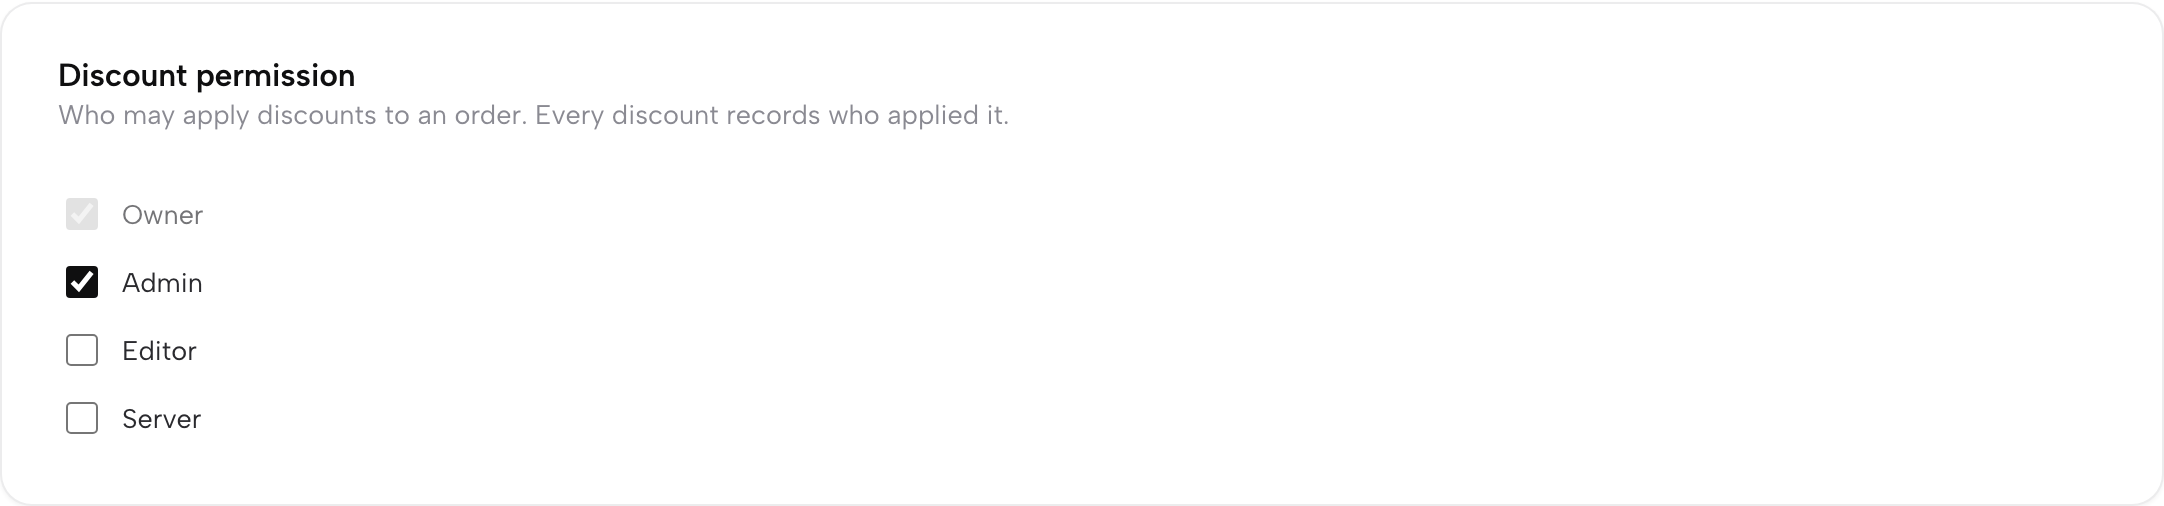
The job title next to each name — Head Waiter, Sommelier, Runner — is a free-text label, separate from the role. It’s what shows on the rota, so name people the way your room actually talks. And one floor-level permission is yours to tune: the Discount permission card below the team list ticks which roles may apply a discount to an order, and every discount records who applied it. Owner and Admin start ticked; Owner is always ticked and locked, deliberately. Ticking or unticking a box saves straight away.
Build the rota
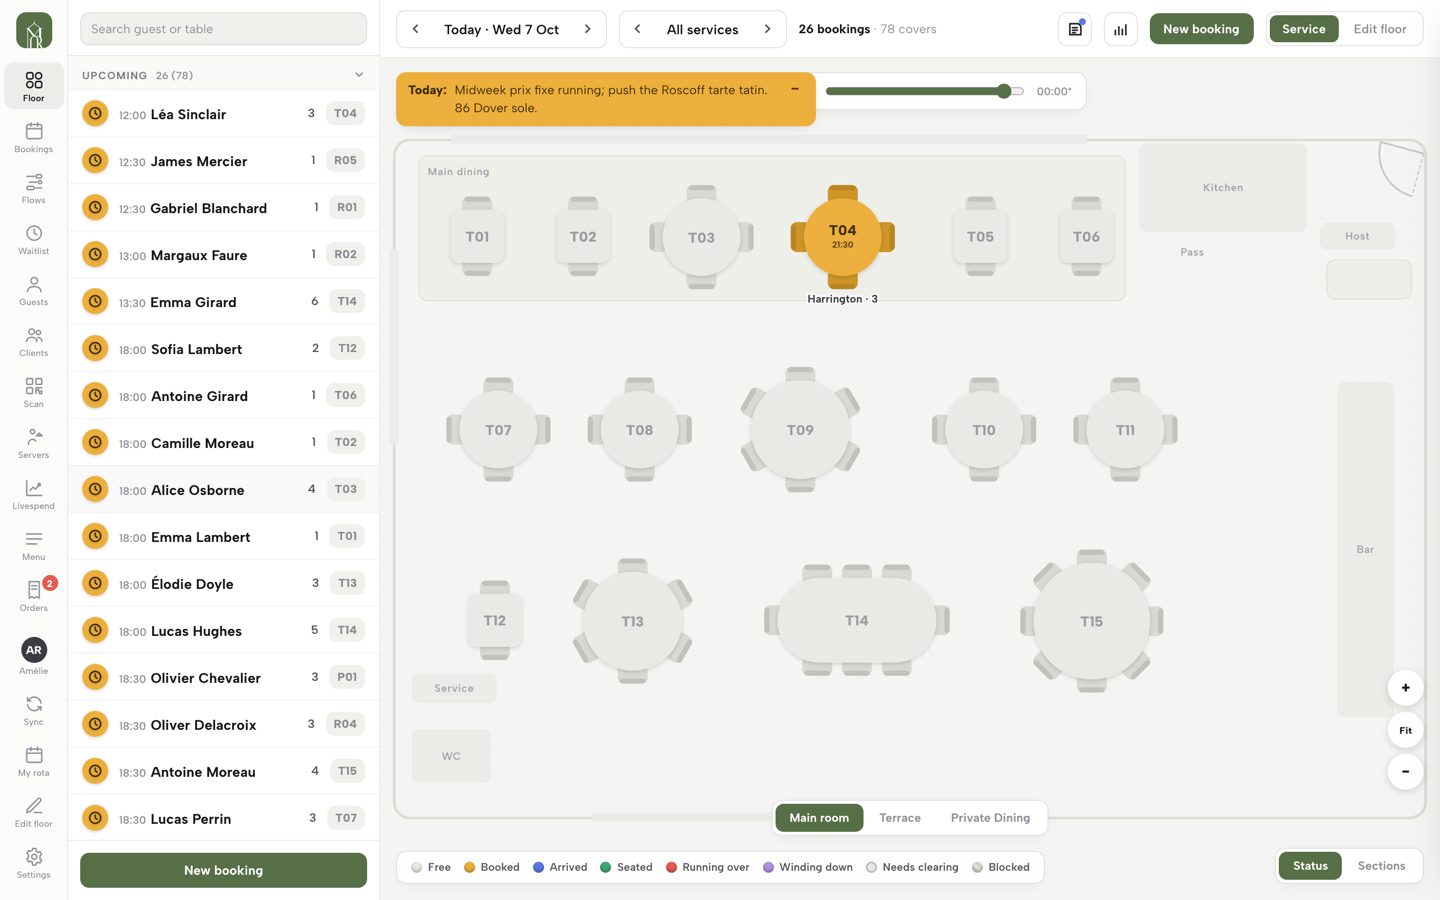
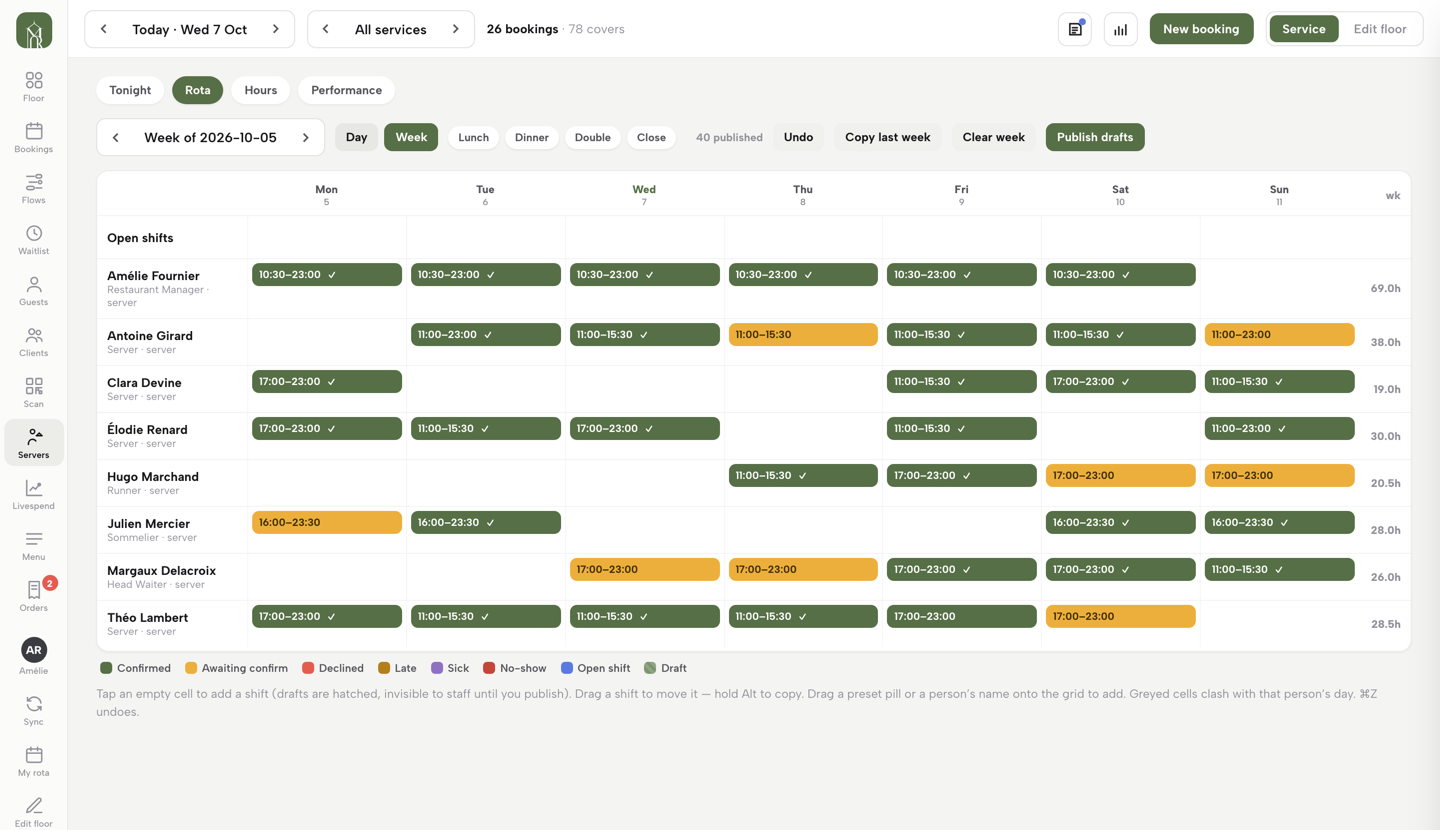
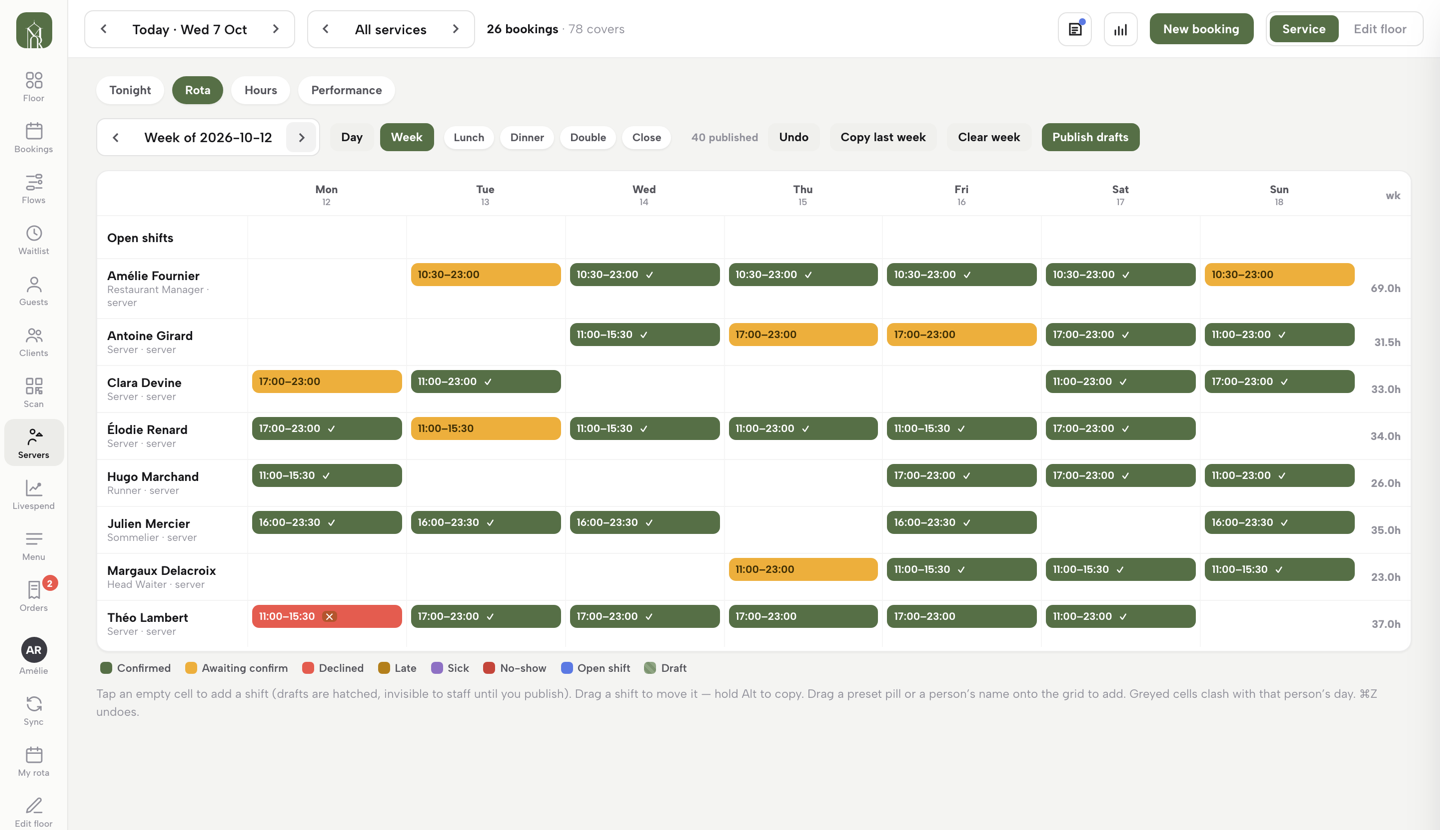
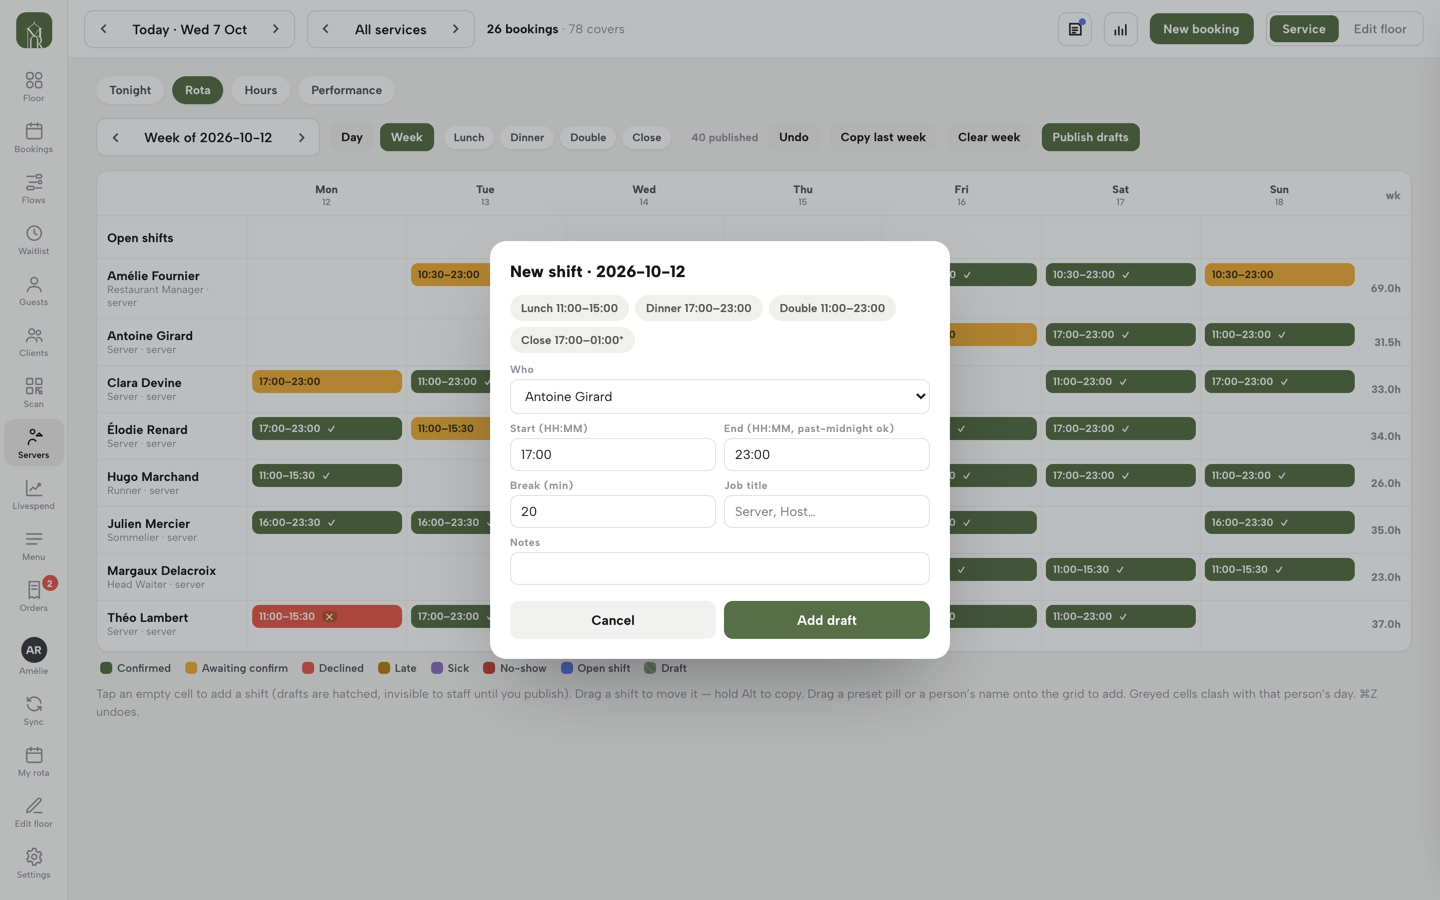
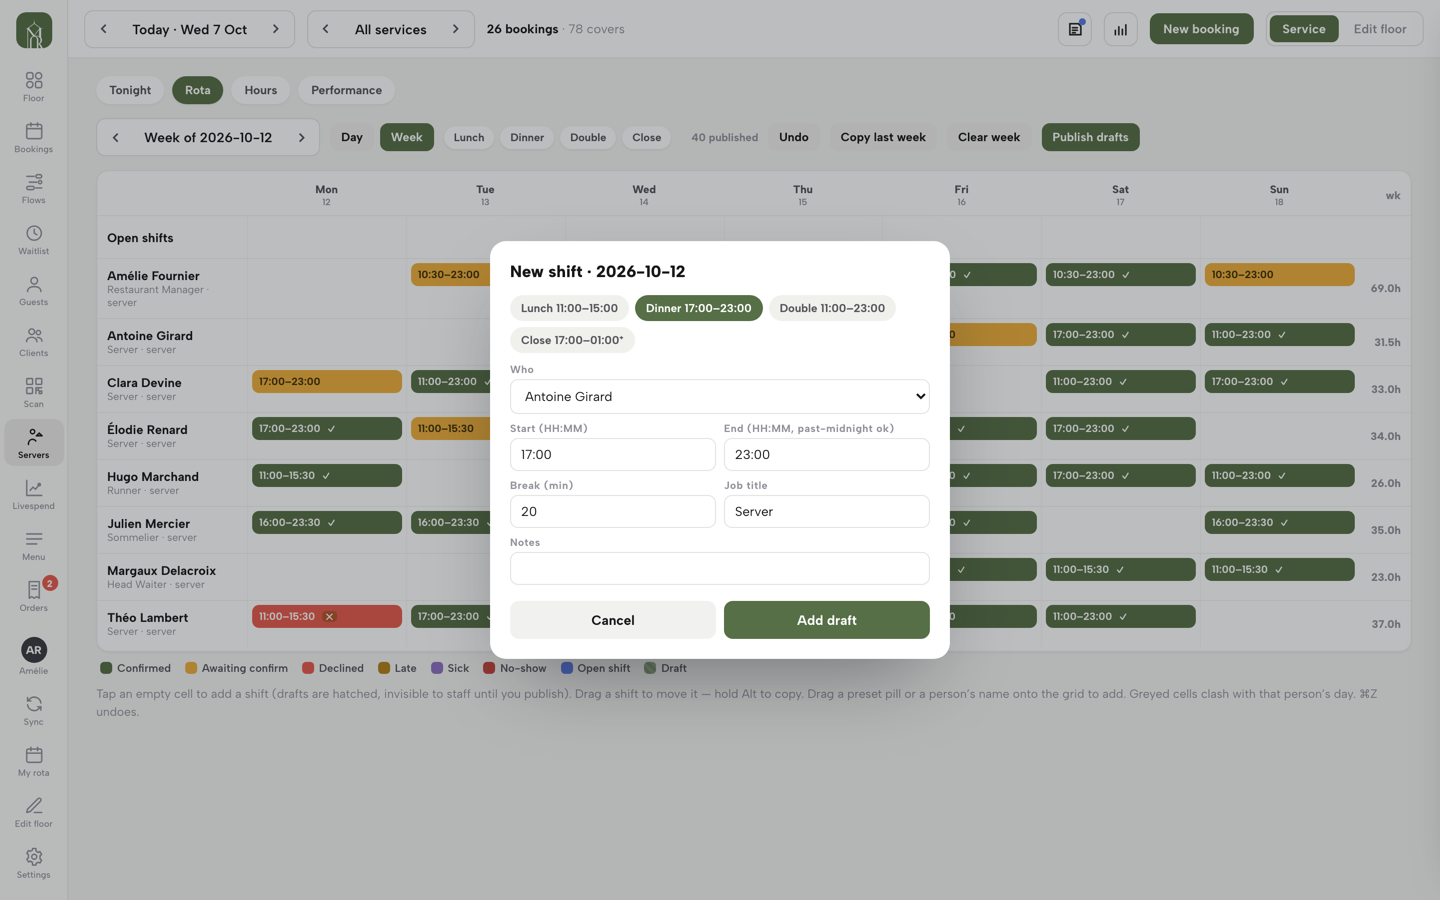
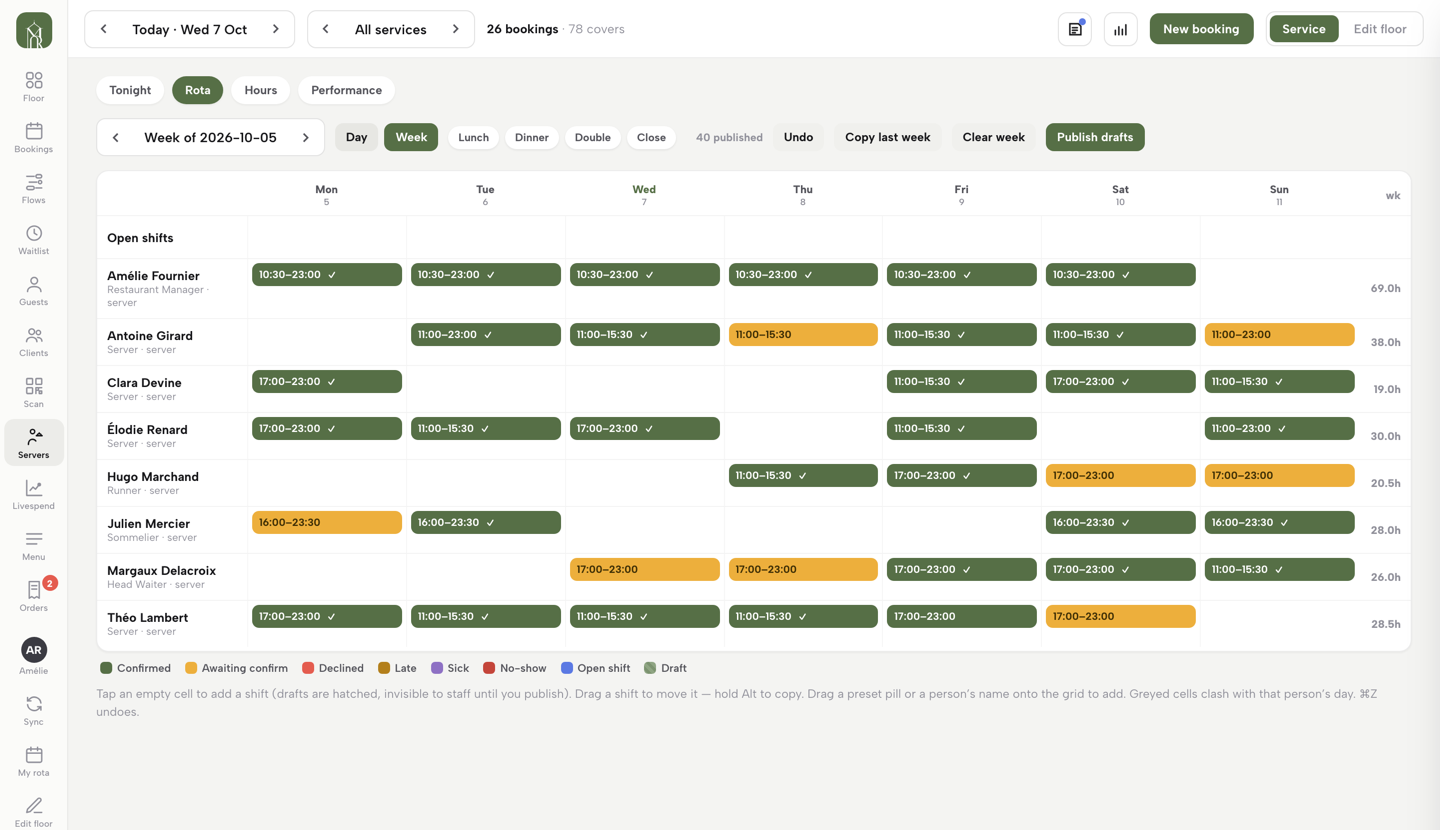
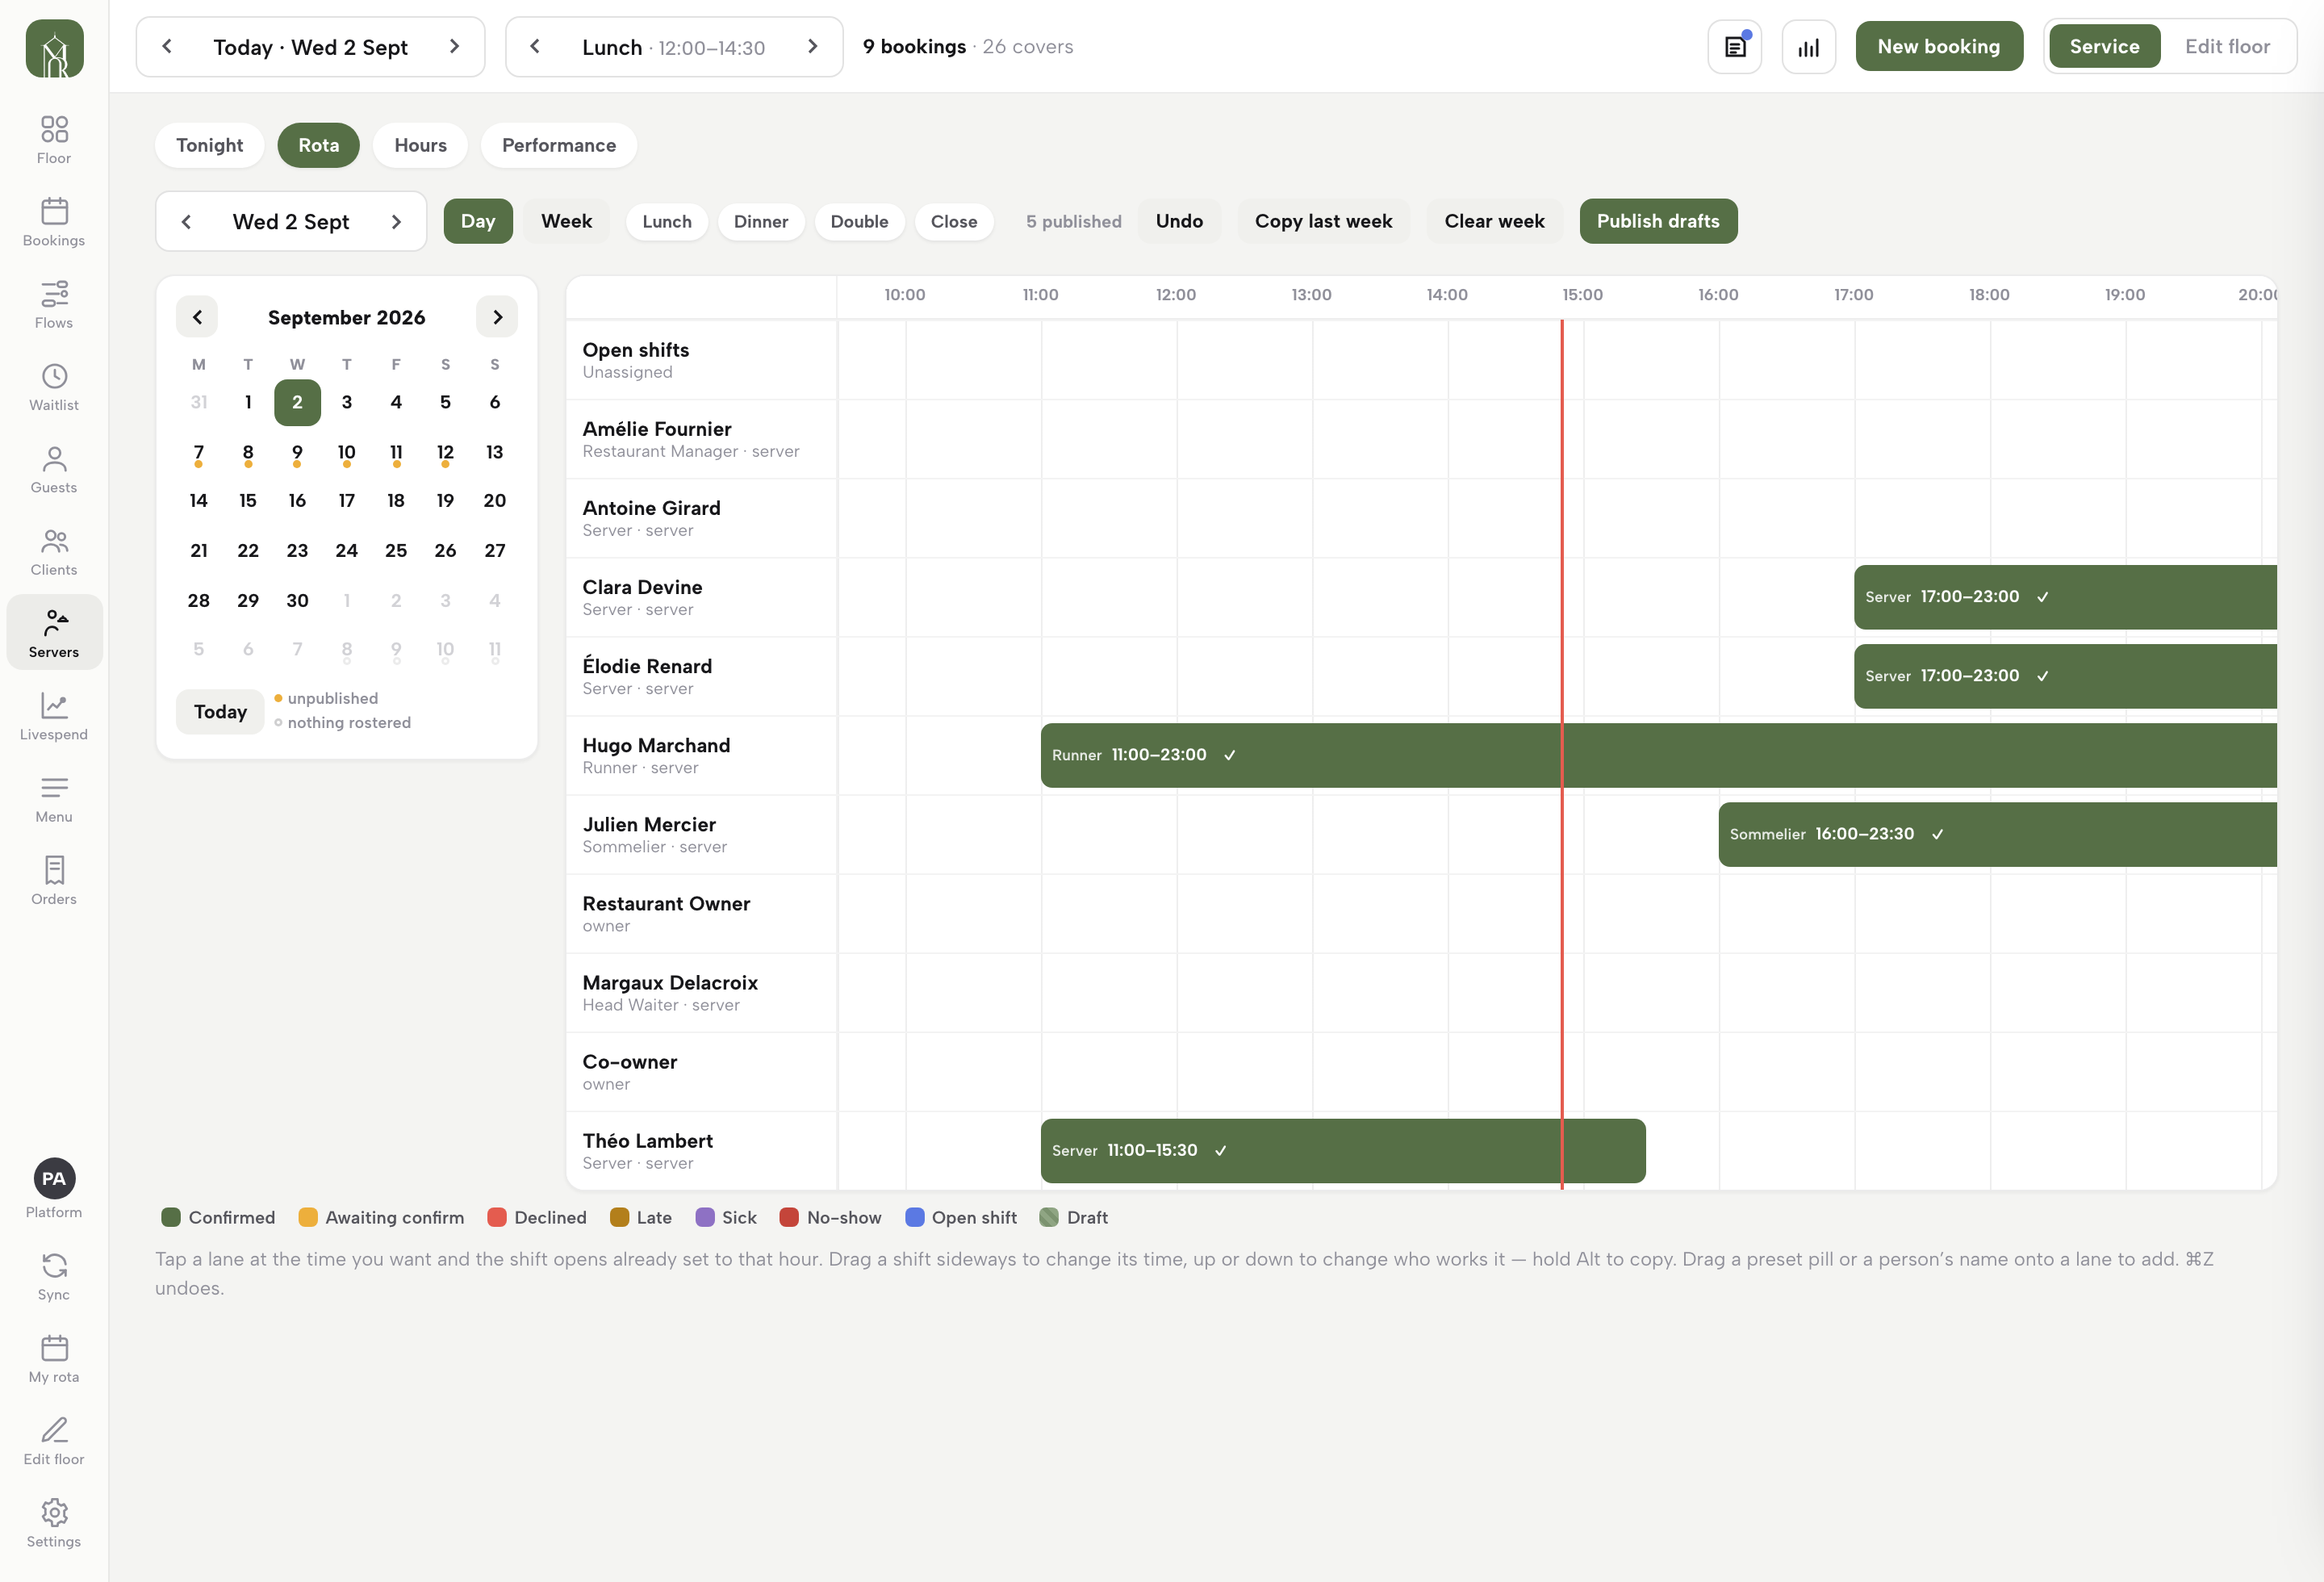
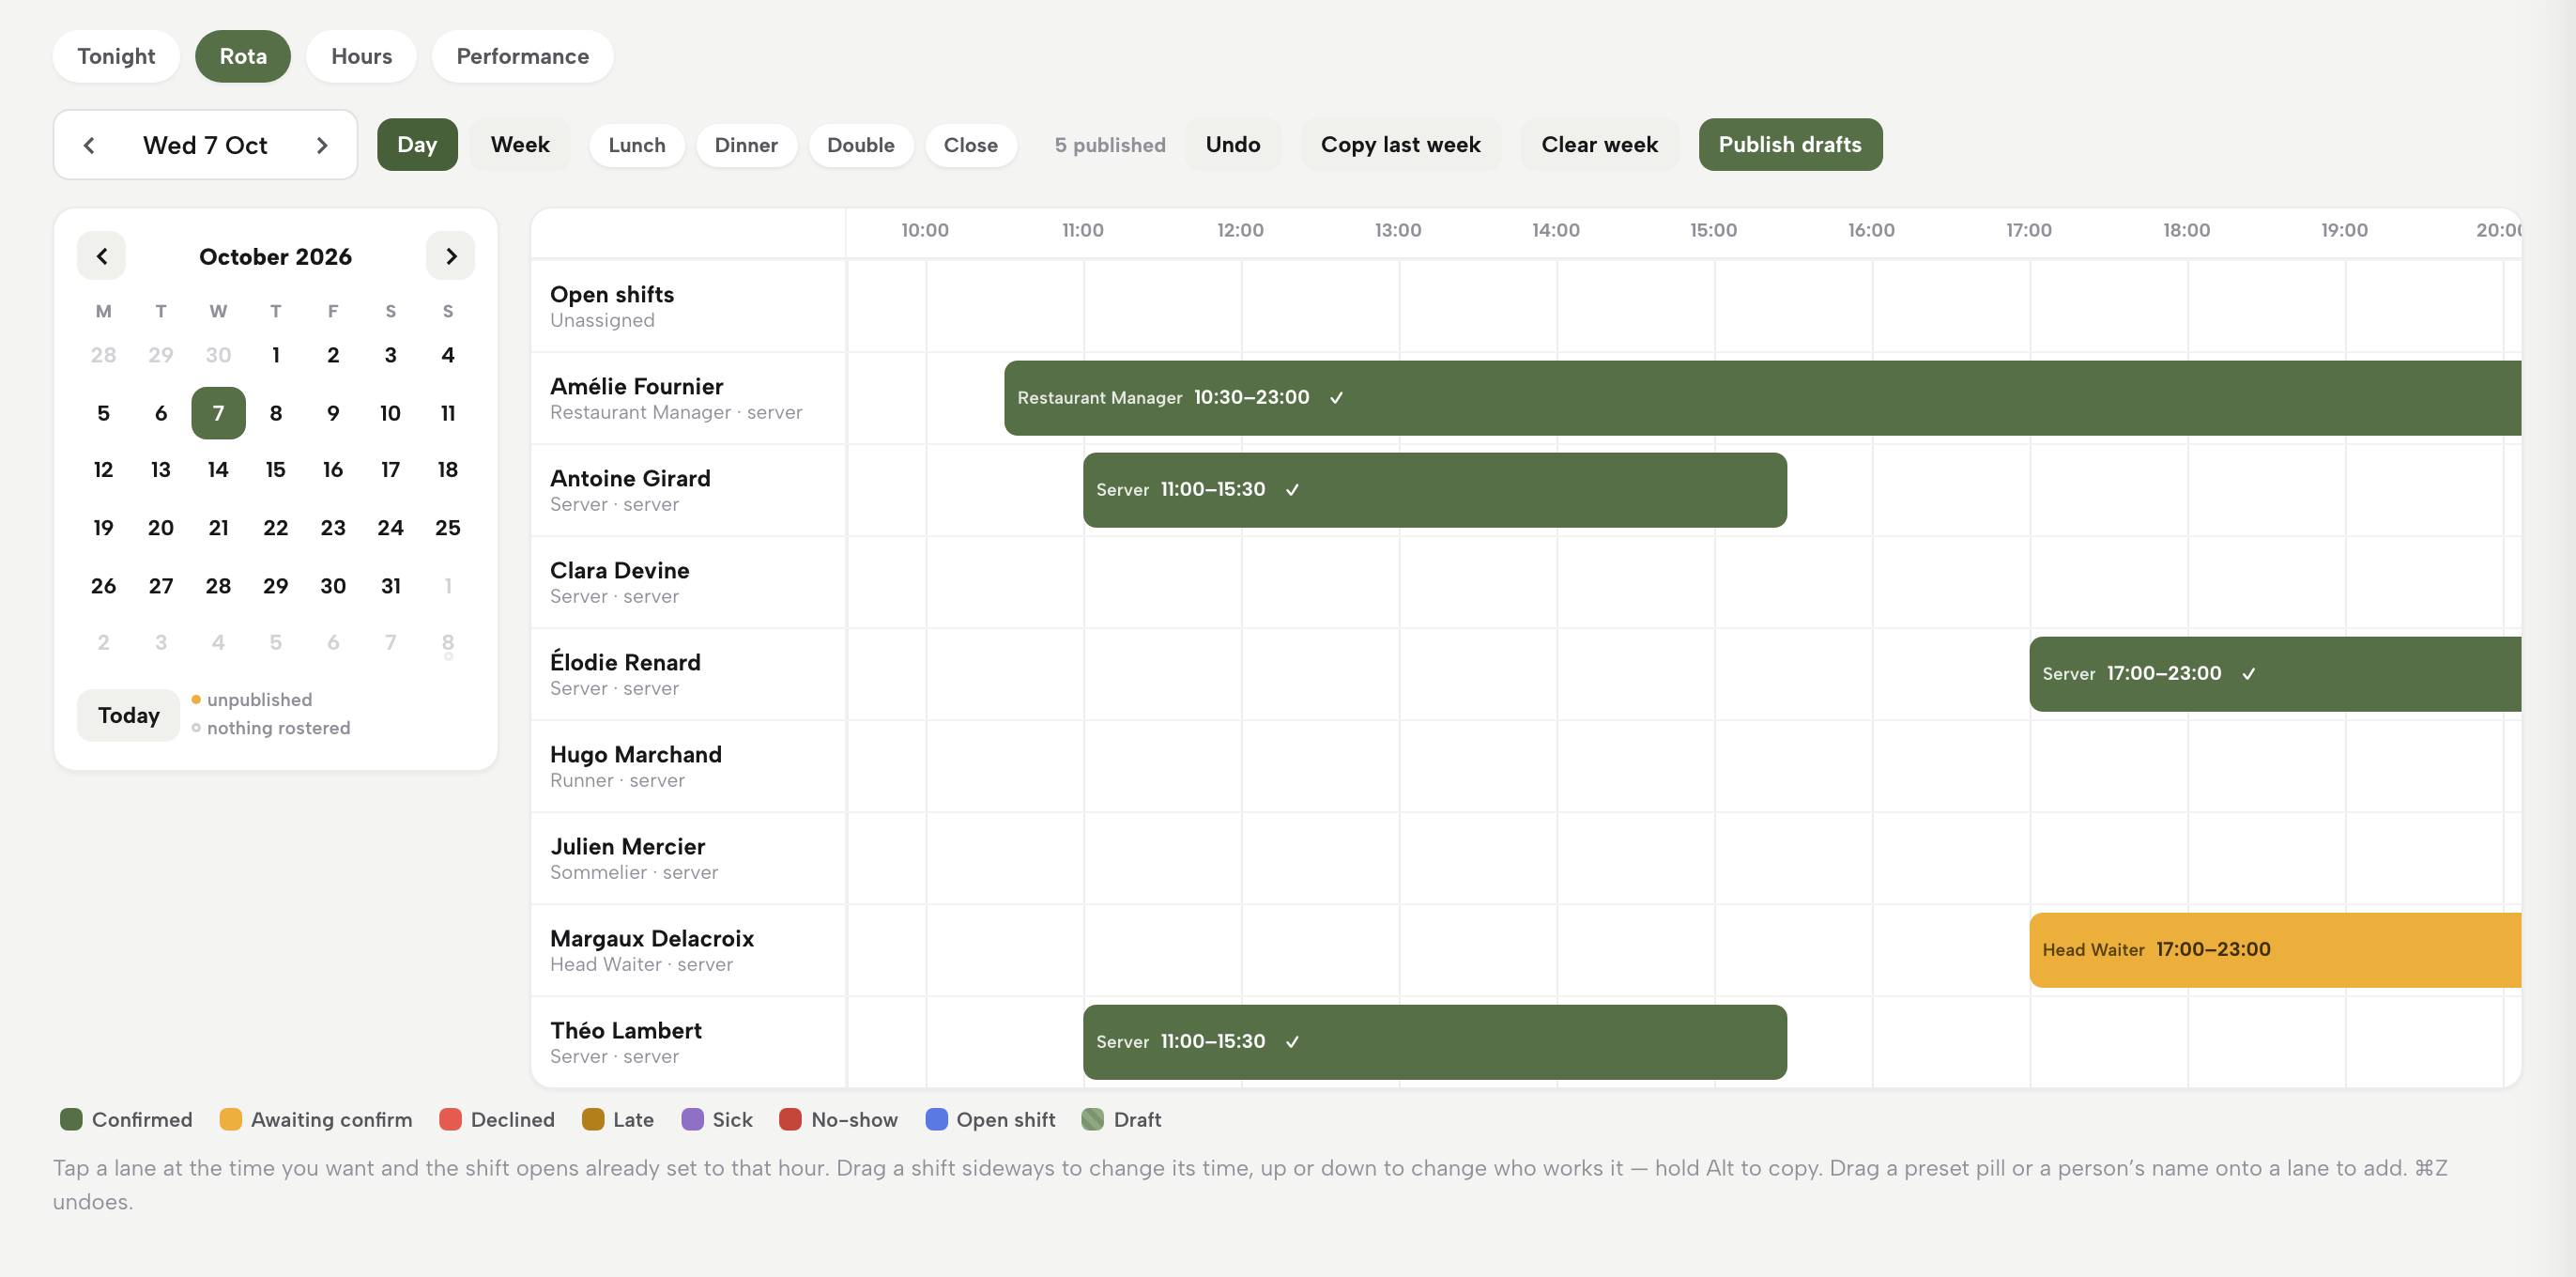
The rota lives where service lives: open the Service console, click Servers in the left rail, then the Rota tab beside Tonight, Hours and Performance. The Day / Week switch picks your canvas, and the arrows beside the week picker move between weeks. Tap an empty cell and the New shift form opens set to that person and date: choose Lunch, Dinner, Double or Close to fill the times, adjust Start, End, Break, Job title and Notes, then press Add draft. The same four presets sit in the toolbar as pills you can drag straight onto the grid.
Moving things is a drag. In the week view, drag a shift sideways to another day or up and down to give it to someone else; in the day view, with its time axis, sideways changes the shift’s time. Hold Alt to copy, press Undo (or ⌘Z) to step back, and use Clear week to start again. Copy last week brings a standing pattern across as drafts, and the Open shifts lane holds work that isn’t assigned to anyone yet.
Nothing reaches the team until you say so: drafts are hatched on your grid and invisible to staff, the counter shows how many shifts are published, and Publish drafts makes the week real — each person is asked to confirm, and a tick appears on the chip when they do. The colour legend runs a shift’s whole life: Confirmed, Awaiting confirm, Declined, Late, Sick, No-show, Open shift, Draft. A greyed cell means that person marked the day off. The people you’re rostering are the same people the live floor assigns to sections at service time.
Read the hours
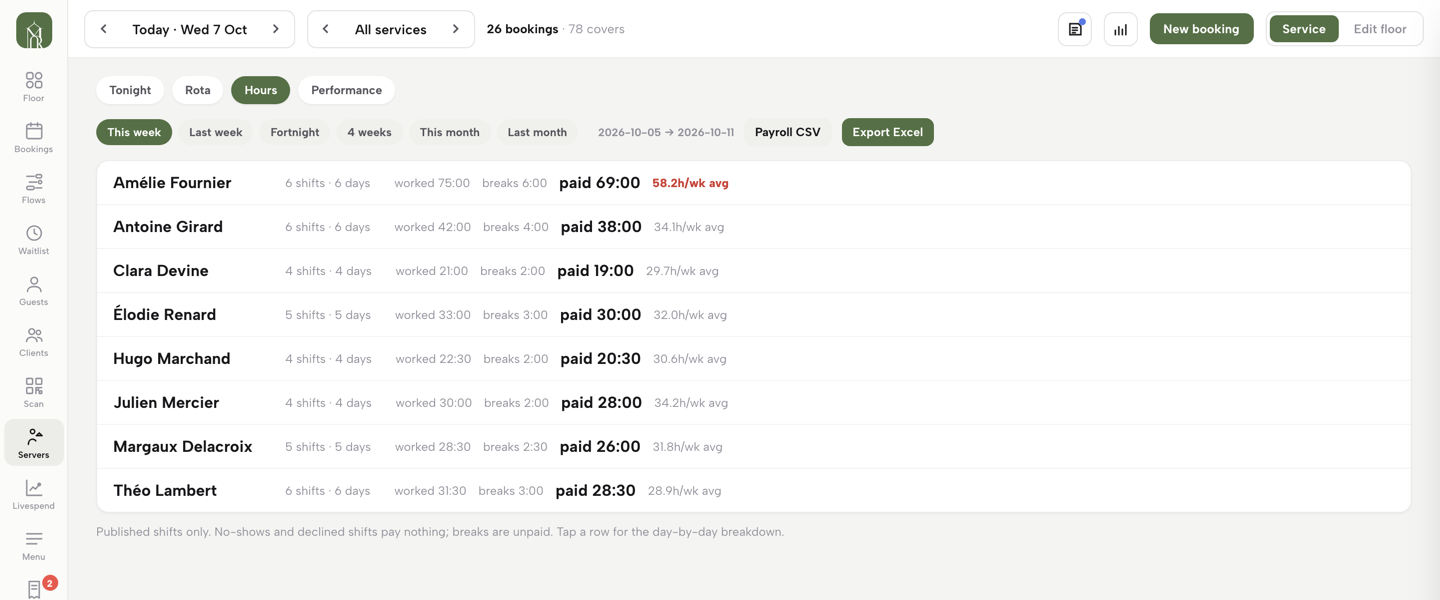
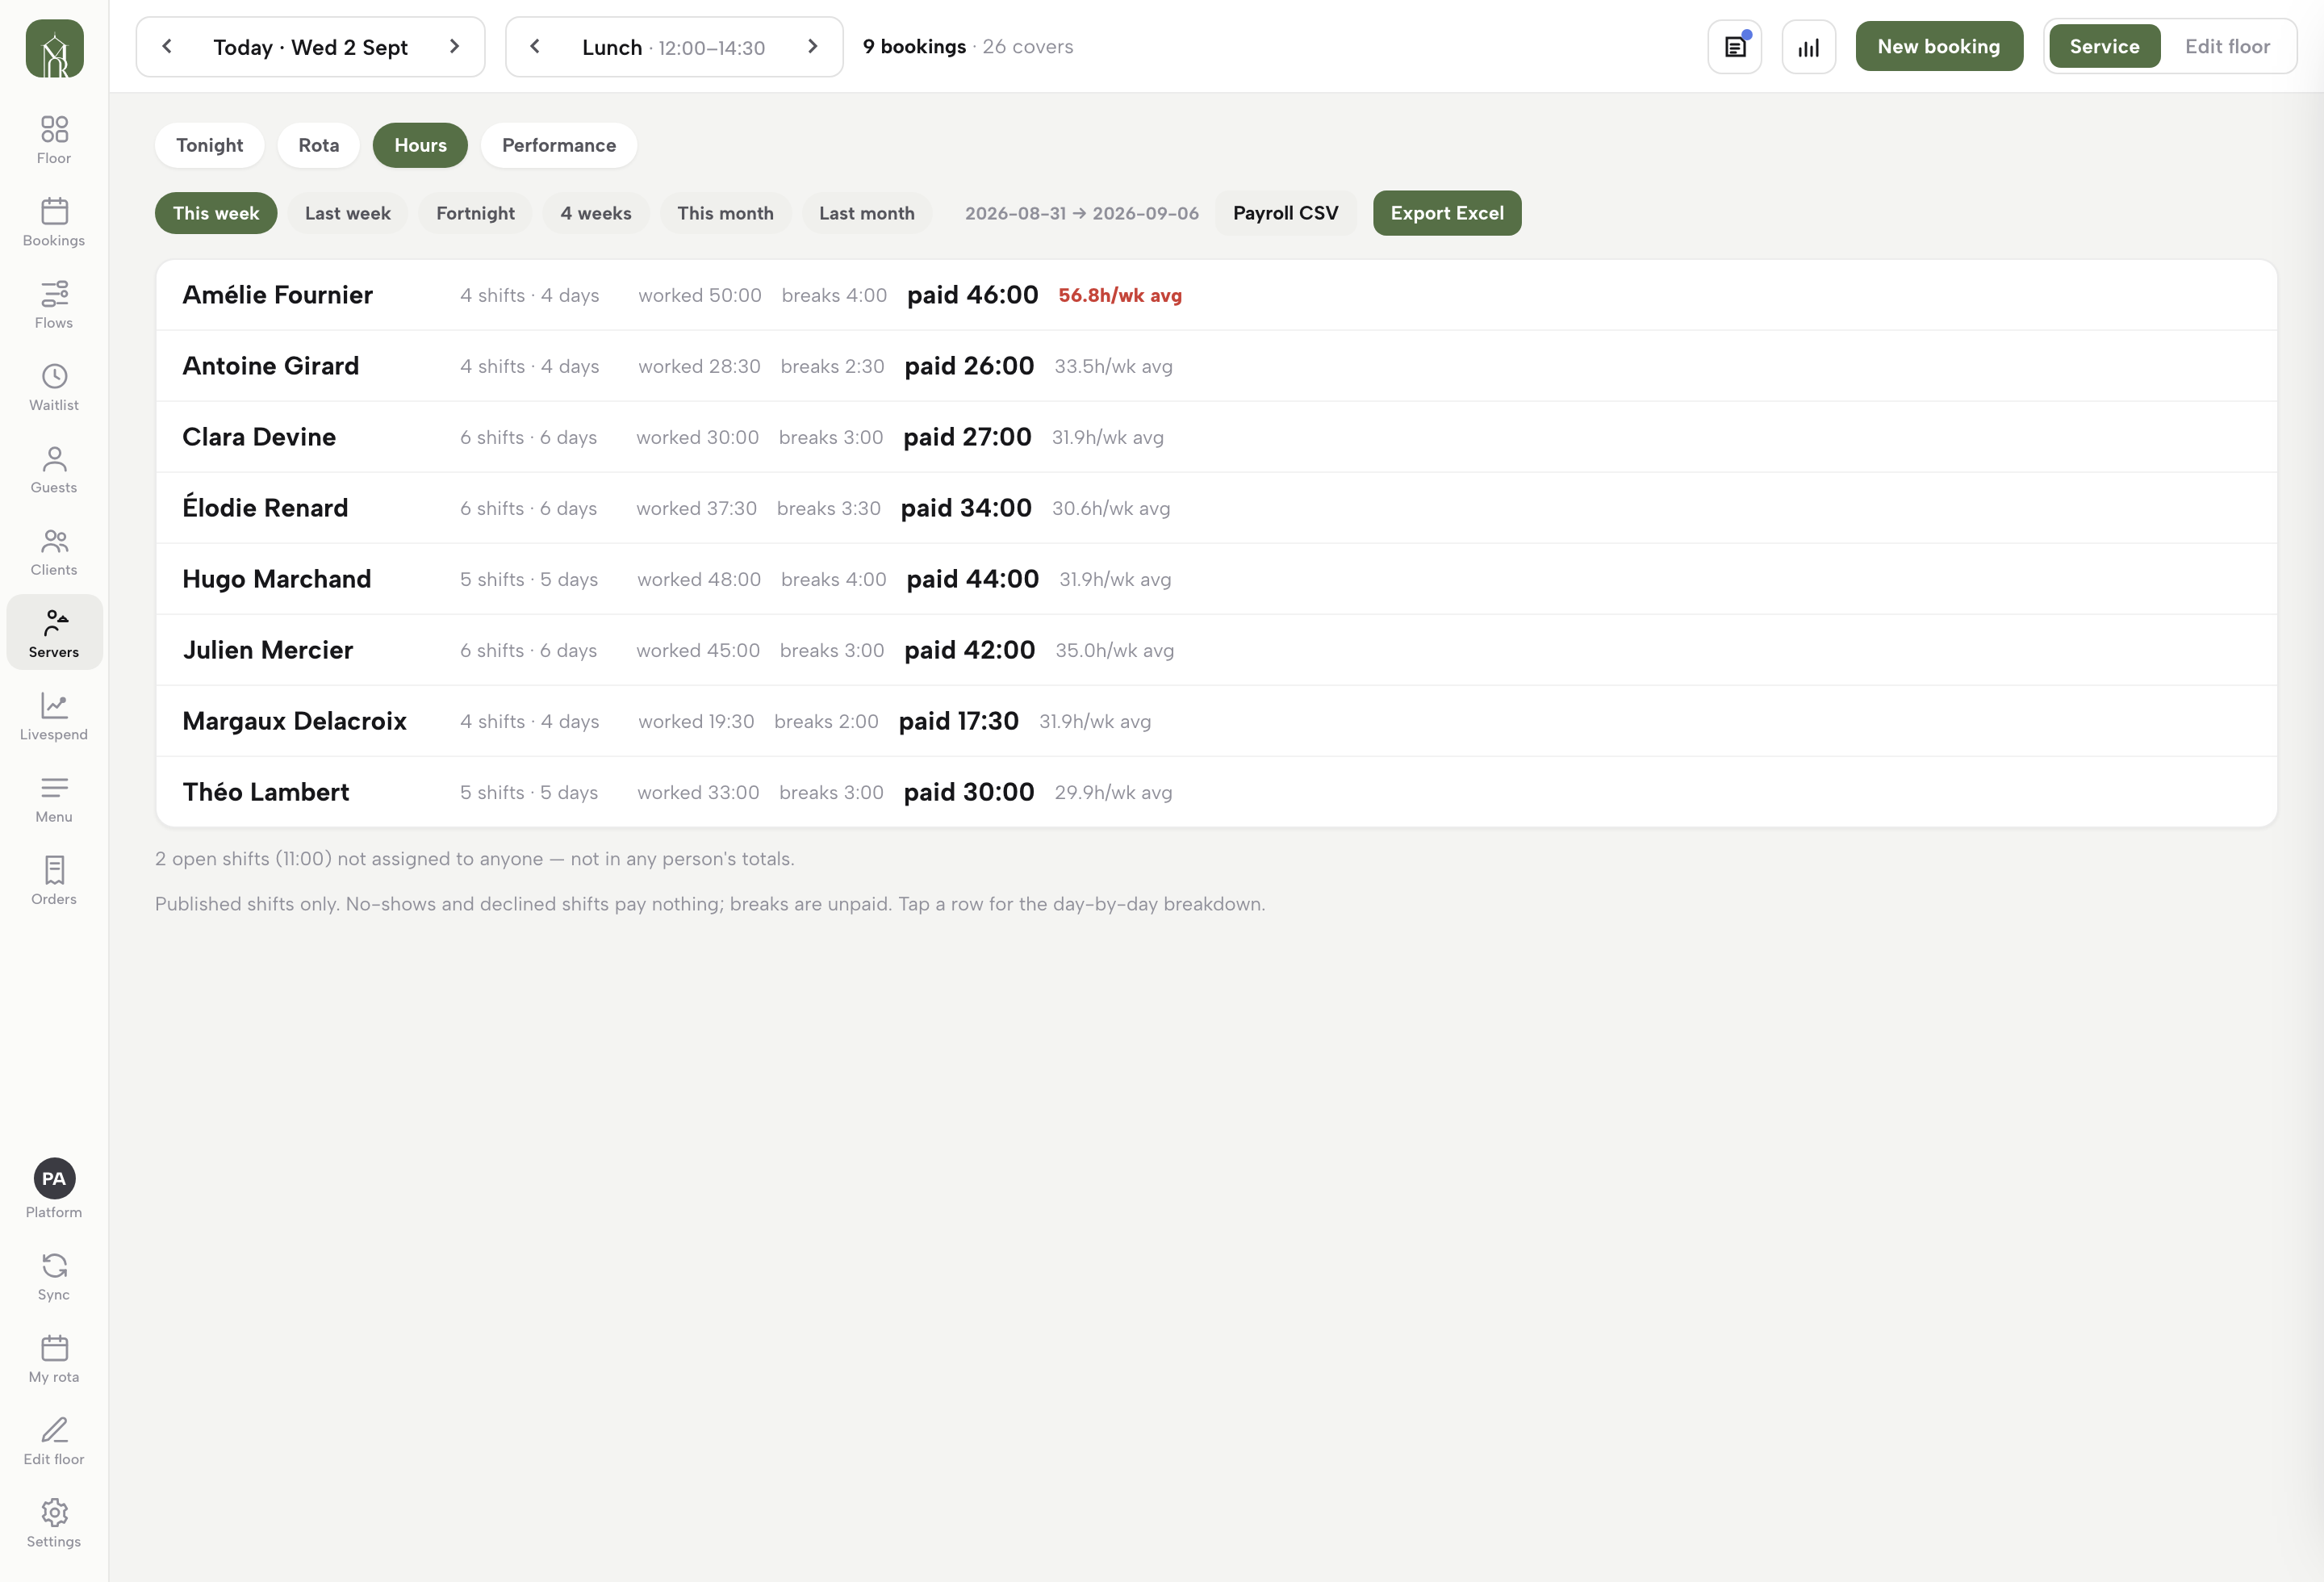
Next to Rota sits the Hours tab — the week added up per person: shifts and days worked, worked time, breaks, and the paid total that payroll actually cares about, with a weekly average alongside. An average running hot is flagged in red — a 58.2-hour week stands out before it becomes a problem. The page states its own accounting honestly: published shifts only, no-shows and declined shifts pay nothing, breaks are unpaid, and open shifts sit outside everyone’s totals. Tap any row for the day-by-day breakdown.
Export payroll
Pick the range — This week, Last week, Fortnight, 4 weeks, This month or Last month, with the exact dates printed beside the chips — then Payroll CSV for the bookkeeper’s import or Export Excel for a spreadsheet with the same totals. What you export is exactly what the Hours tab shows: published shifts only, breaks unpaid. Payroll stops being an argument about who remembers what.
Their own rota, in their pocket
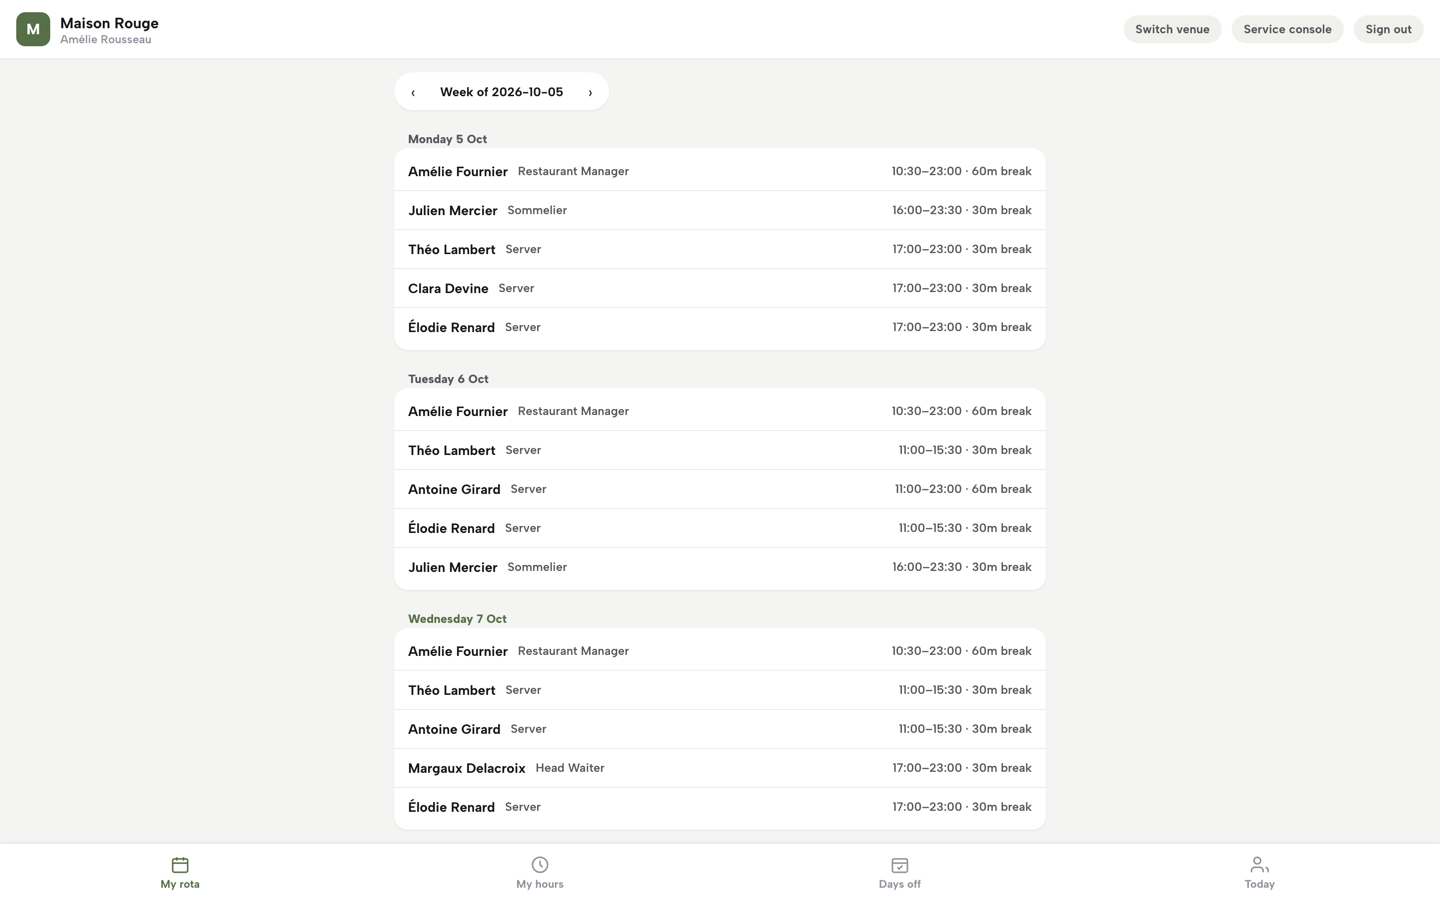
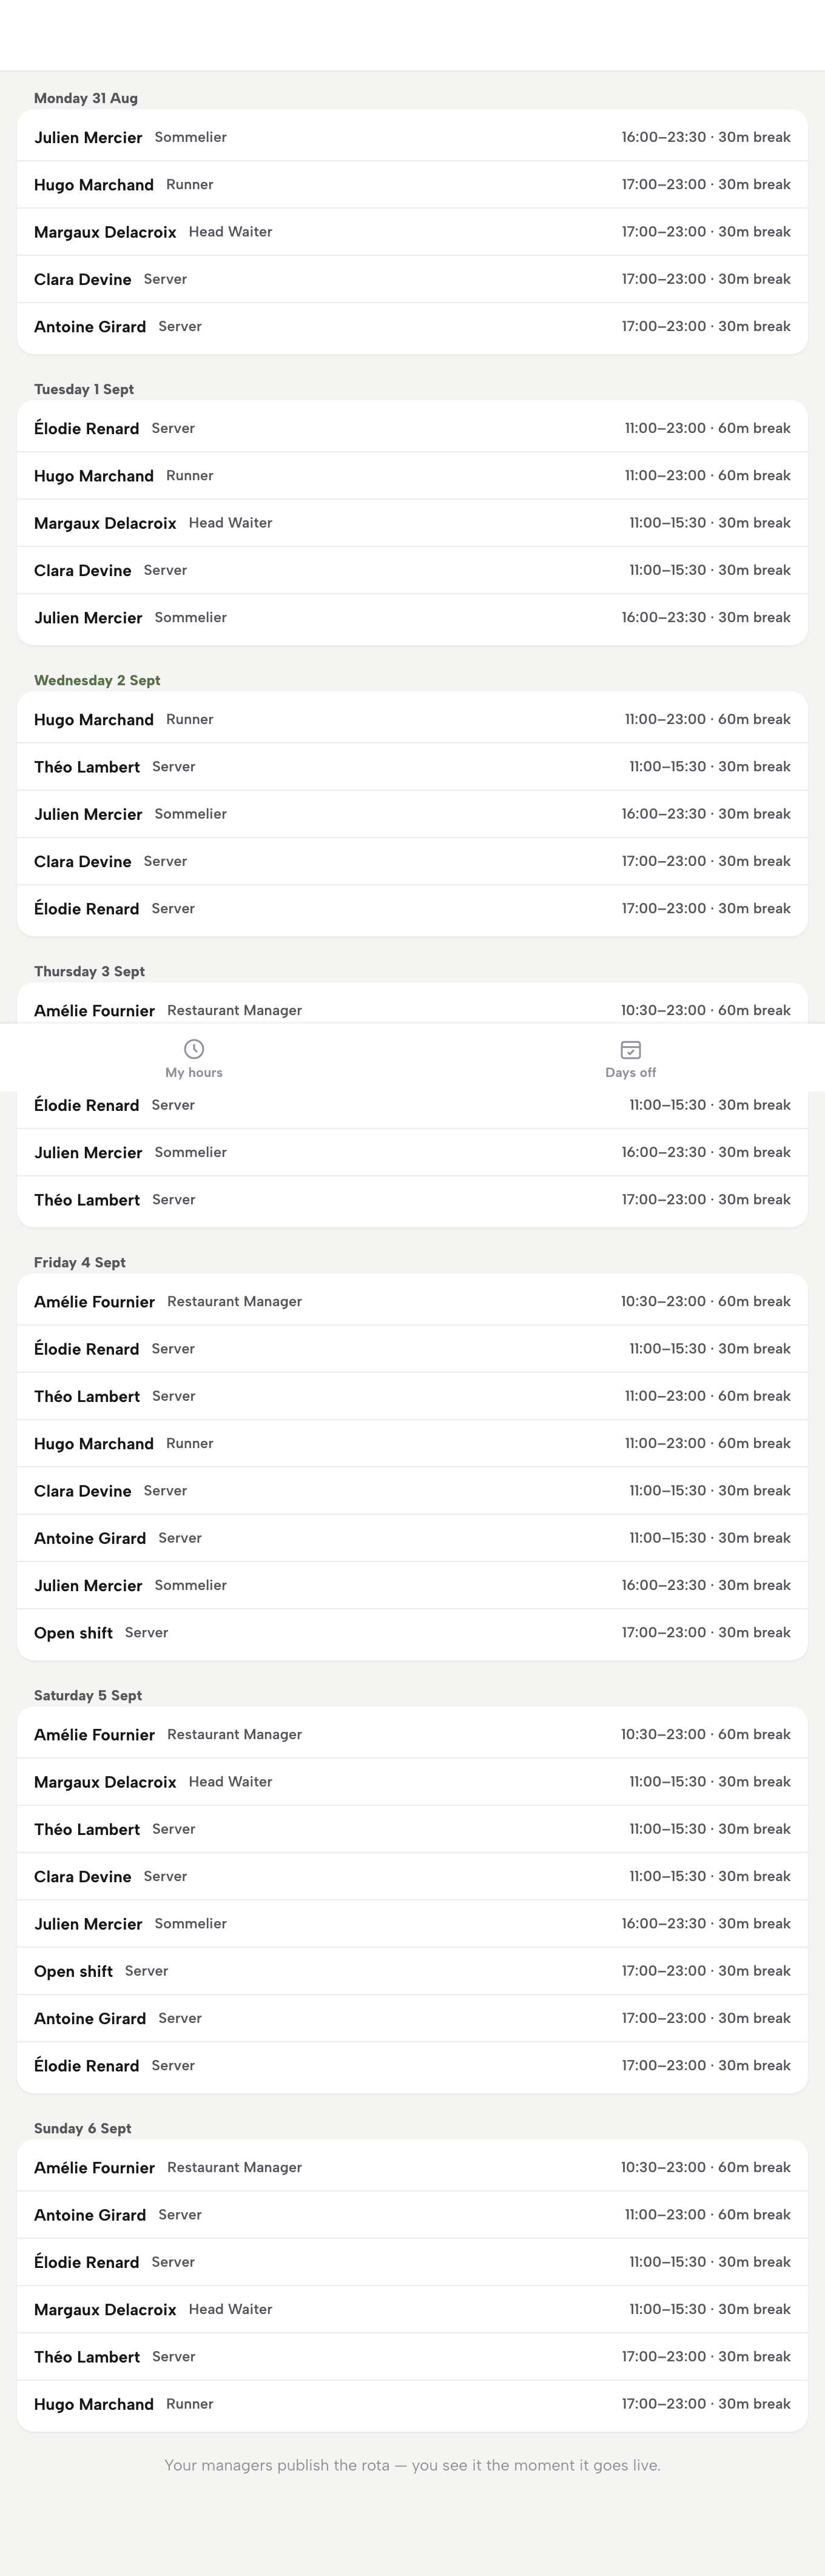
Every team member gets My rota, linked from the left rail of the Service console and made for a phone. It lists the published week day by day with times, role labels and breaks, and marks their own shifts You. When you publish, a new shift shows Please confirm with two buttons: Confirm, or Can’t work it, and your grid shows the answer. The tab bar adds My hours (this week, the last four weeks and shifts rota’d, day by day), Days off (pick a date, add an optional reason, press Add — your managers see it while scheduling) and Today (who’s in today). The page closes with the promise that matters: “Your managers publish the rota — you see it the moment it goes live.” Open it yourself as an owner and it shows the whole published week, so you can see exactly what the team sees.
Next · read the numbers
Put the week on the wall
Invite your people, drag one week together, publish it — and let everyone carry their own copy.