
Most of what your restaurant emails guests, you never write — booking confirmations, reminders, order receipts and gift-card notices go out on their own, the moment a booking, order or gift card triggers them. What you control is the wording, the look, and the address they come from. Beyond that, two channels are yours to press send on: a one-off campaign to your newsletter list, or a journey that runs itself once you’ve built it.
Settings → EmailPlus Emails & Journeys
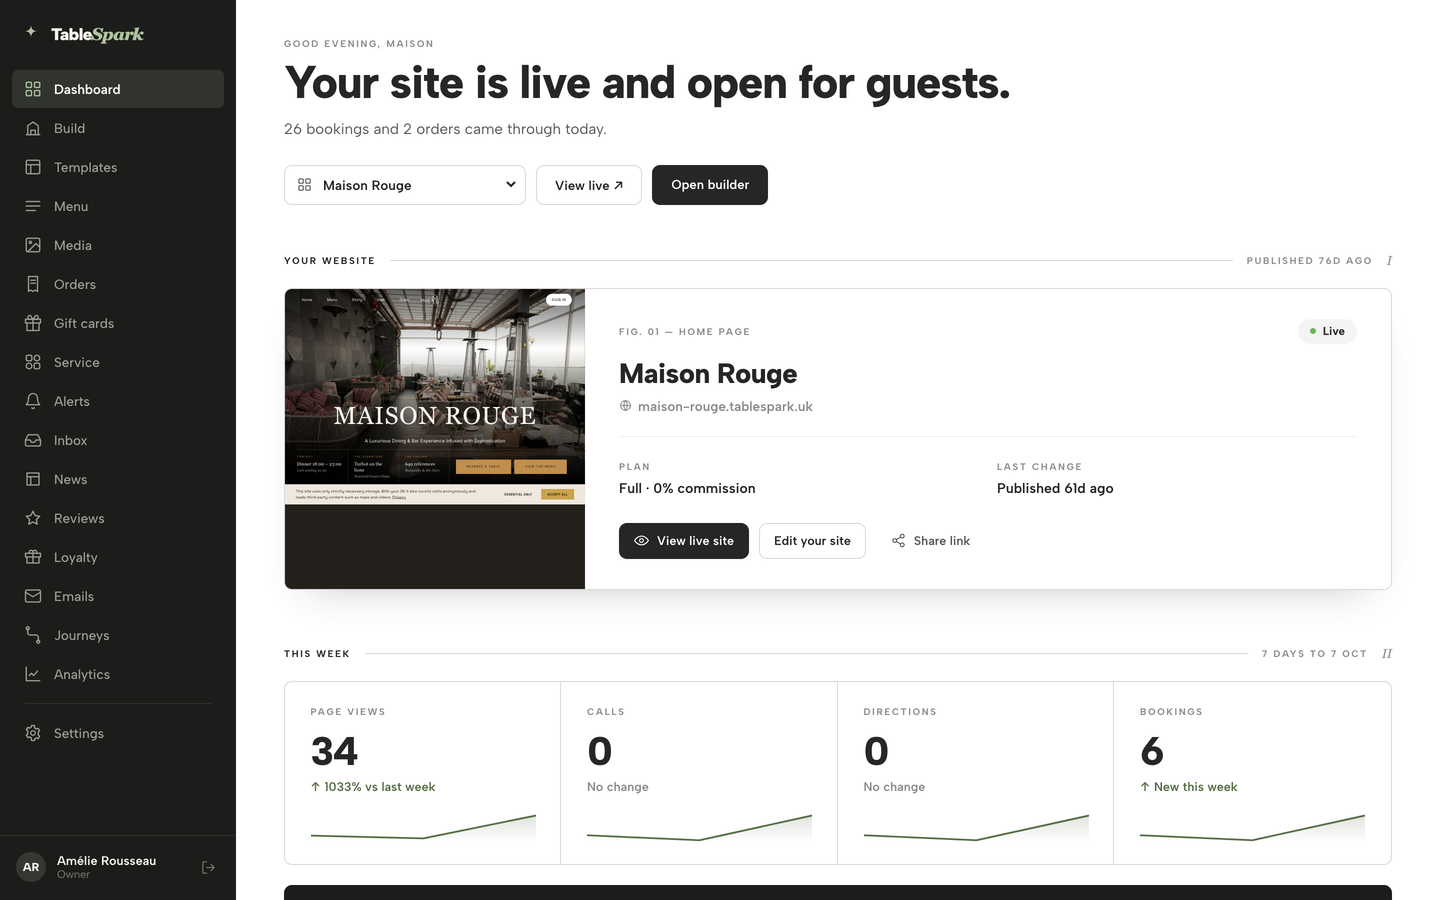
Click Settings in the sidebar, below the divider — every setting for your restaurant lives there.
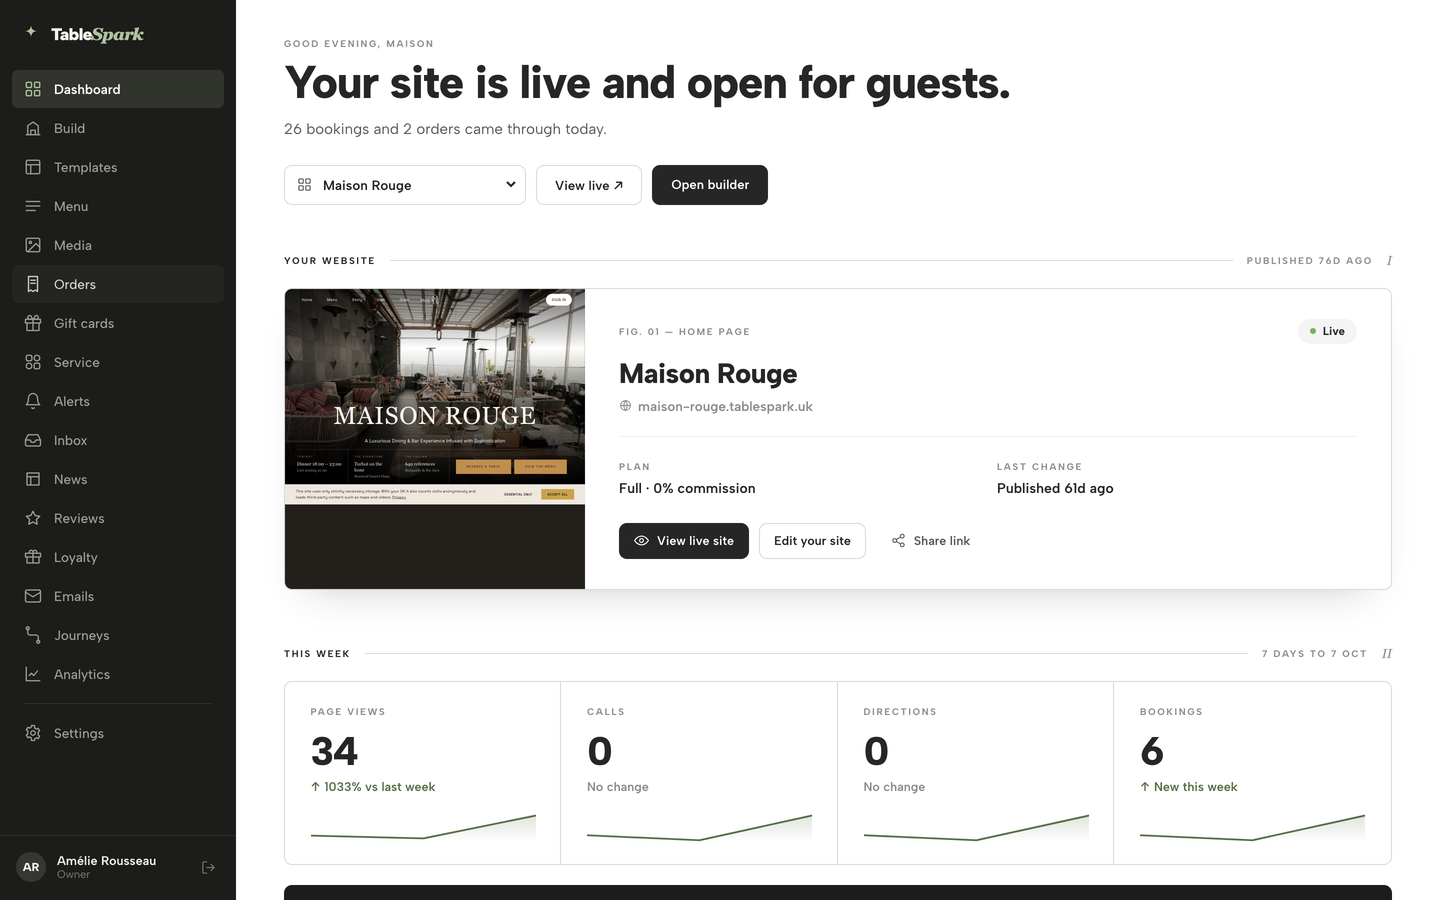
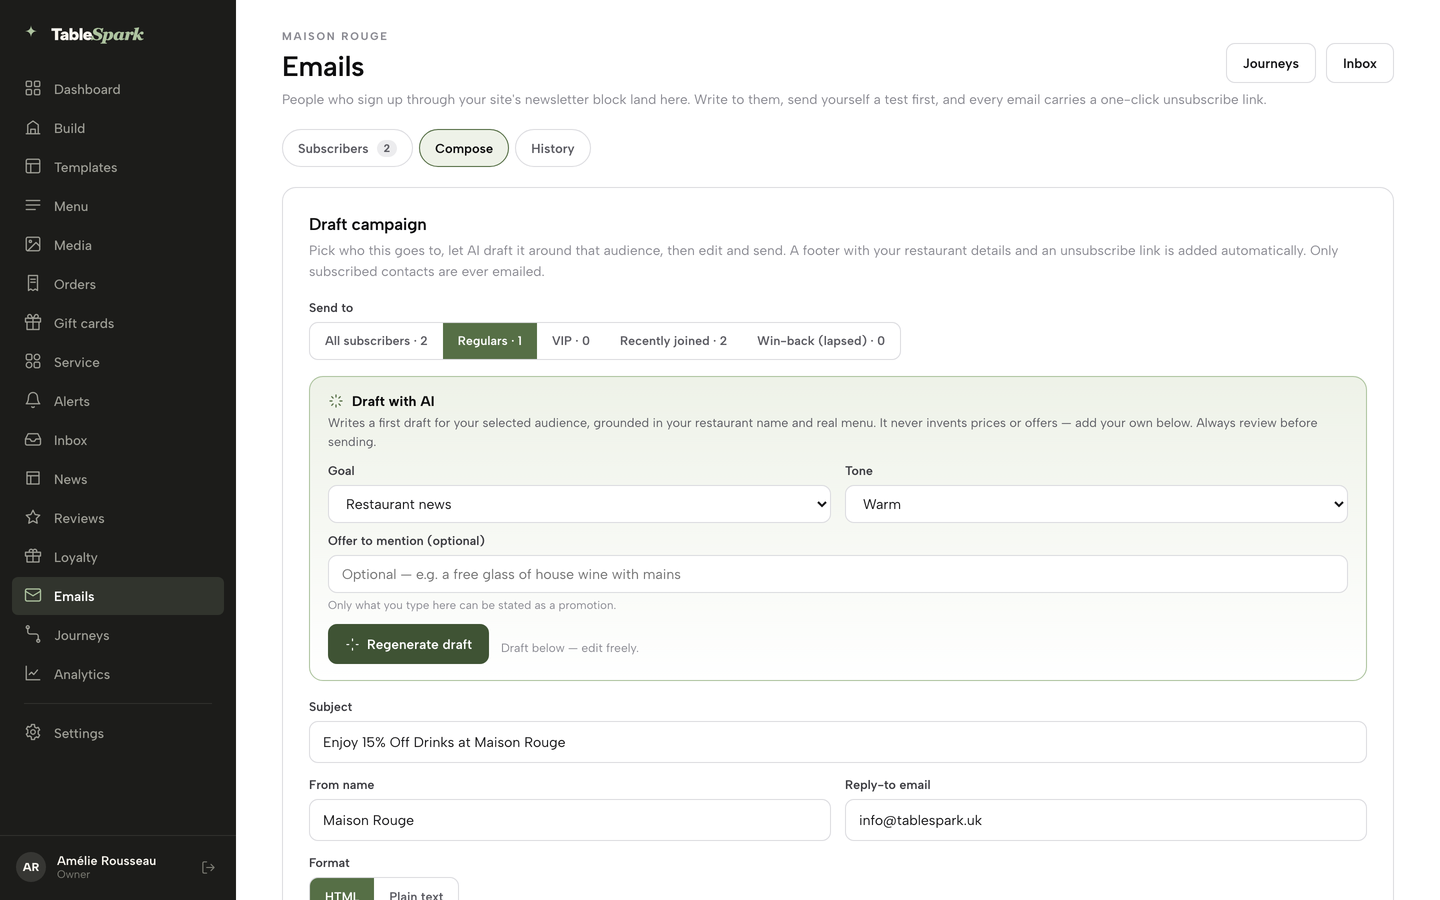
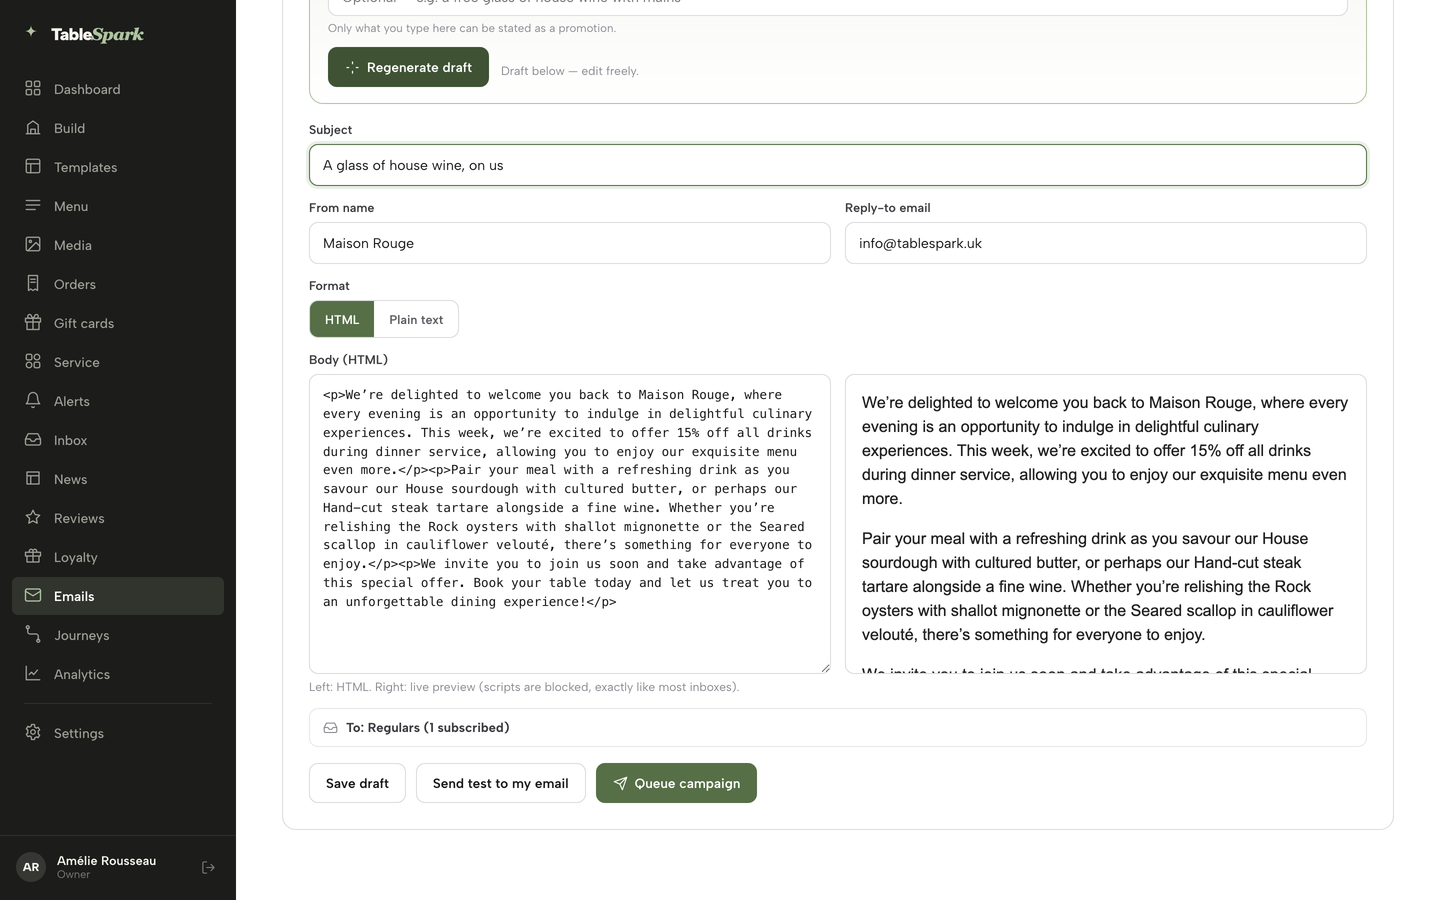
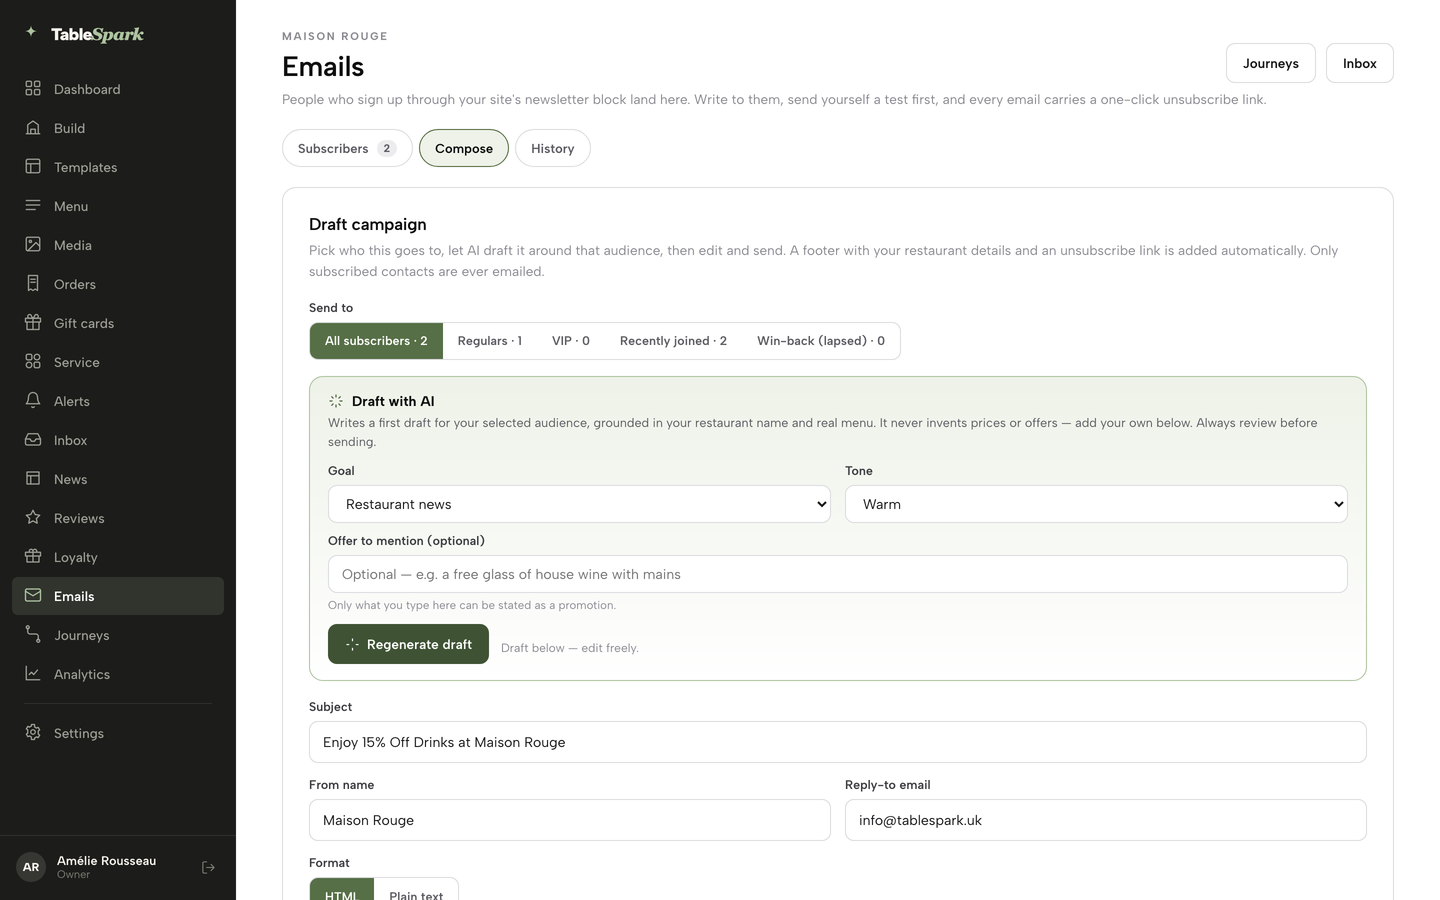
An automatic email reworded, a design chosen, a campaign aimed at your regulars with its test send and Queue step, and a journey built from Trigger through Delay and Email to Publish version. News posts (step 07) work the same way: open News, then New draft.
- WHAT YOU NEED
- Nothing, to start the 14 already work
- TIME
- About 8 minutes
- HOW HARD?
- Like editing a template fill in the blanks
- CAN I BREAK IT?
- Mostly no send a test before you Queue
IN PLAIN WORDS / TAP A TERM
What’s a “merge tag”?
A placeholder like {{guest_name}} that swaps in the real detail the moment an email actually sends. Click one to drop it into the wording instead of typing it by hand.
What’s an “audience segment”?
A slice of your subscriber list — All subscribers, Regulars, VIP, Recently joined, Win-back — so a campaign reaches only the guests it’s actually meant for.
What’s a “sending domain”?
The part of the email address after the @. Connect your own and guest emails arrive from bookings@your-domain instead of a shared TableSpark address, which inboxes trust more.
What’s a “journey”?
An automated sequence that starts on its own from one trigger — like an order finishing — and can wait, branch, or message a guest without you pressing send each time.
The emails you don’t have to send
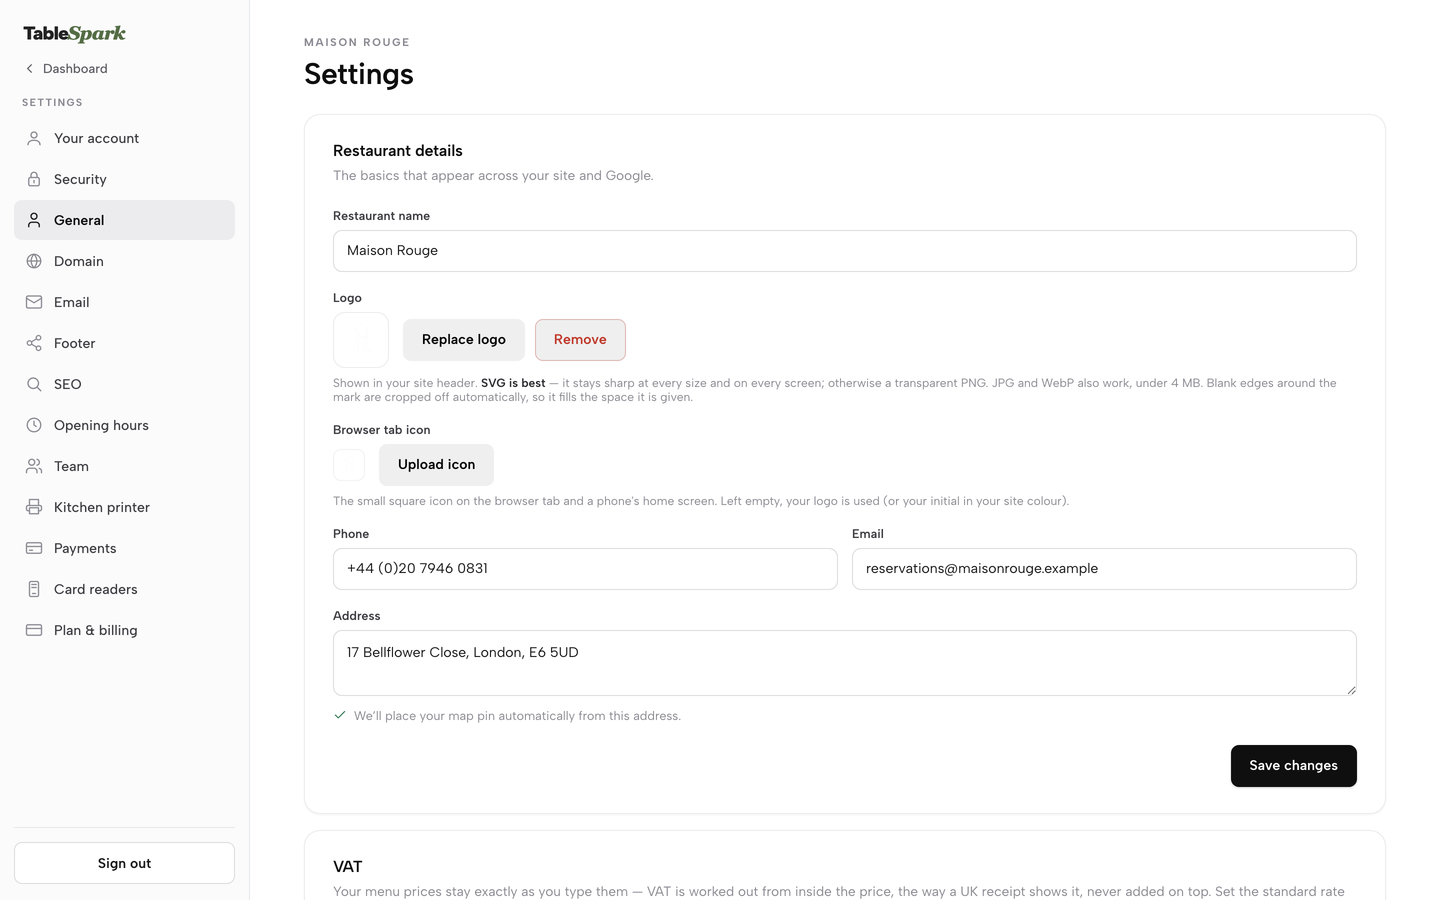
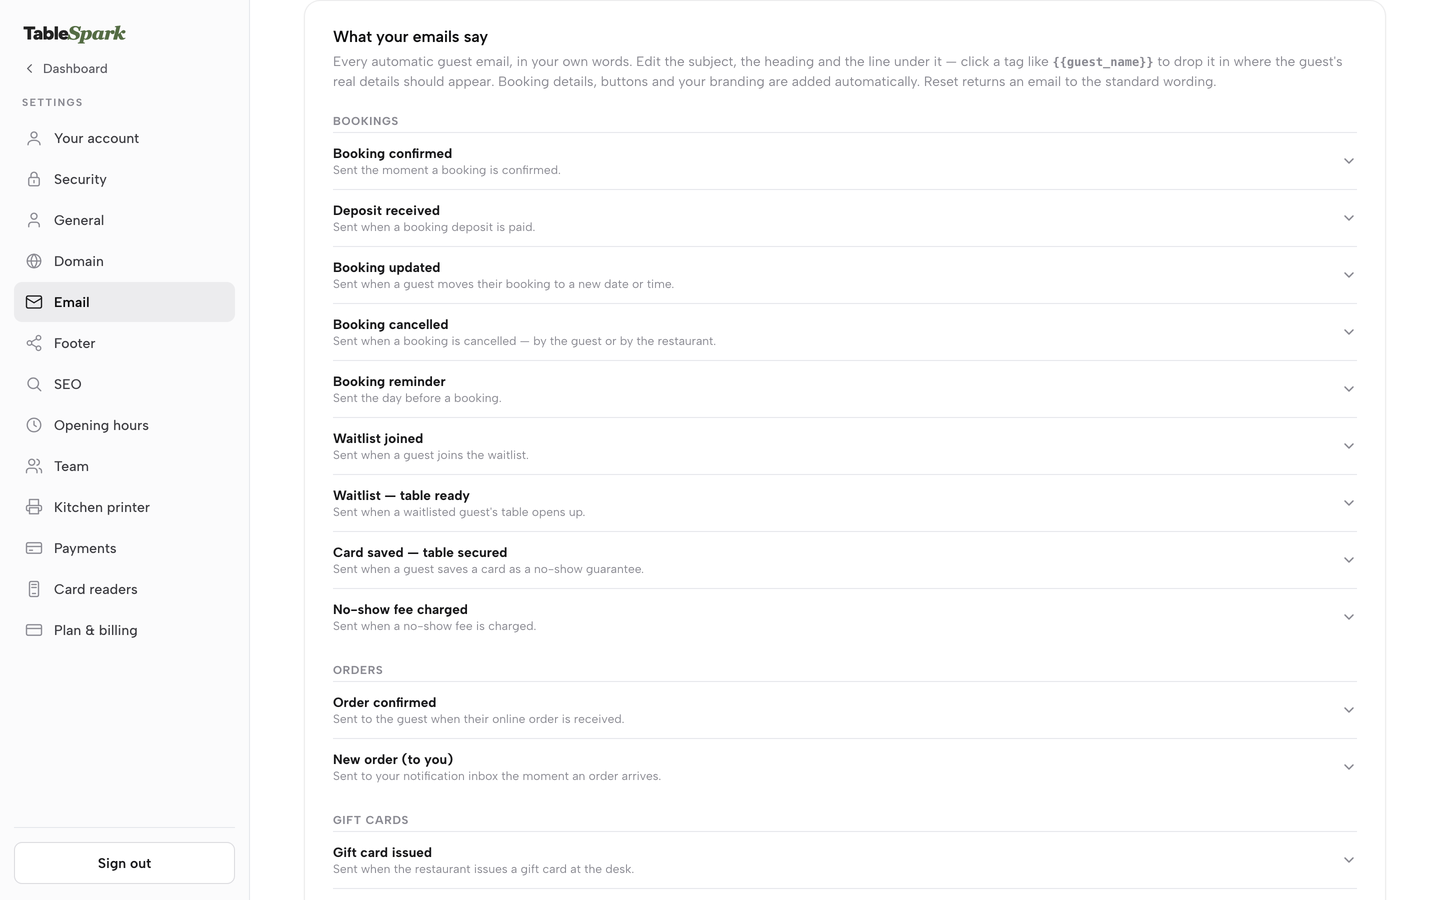
Open Settings → Email. The page runs top to bottom: Mailboxes on your domain, then “Emails we send your guests” (the name on the email, where replies go, and the address they are sent from), then “What the emails say”, and last Email design. TableSpark emails guests automatically — you never write or trigger a single one. There are 14, grouped exactly the way the booking, order and gift-card engines that fire them are grouped:
Editing what each one says
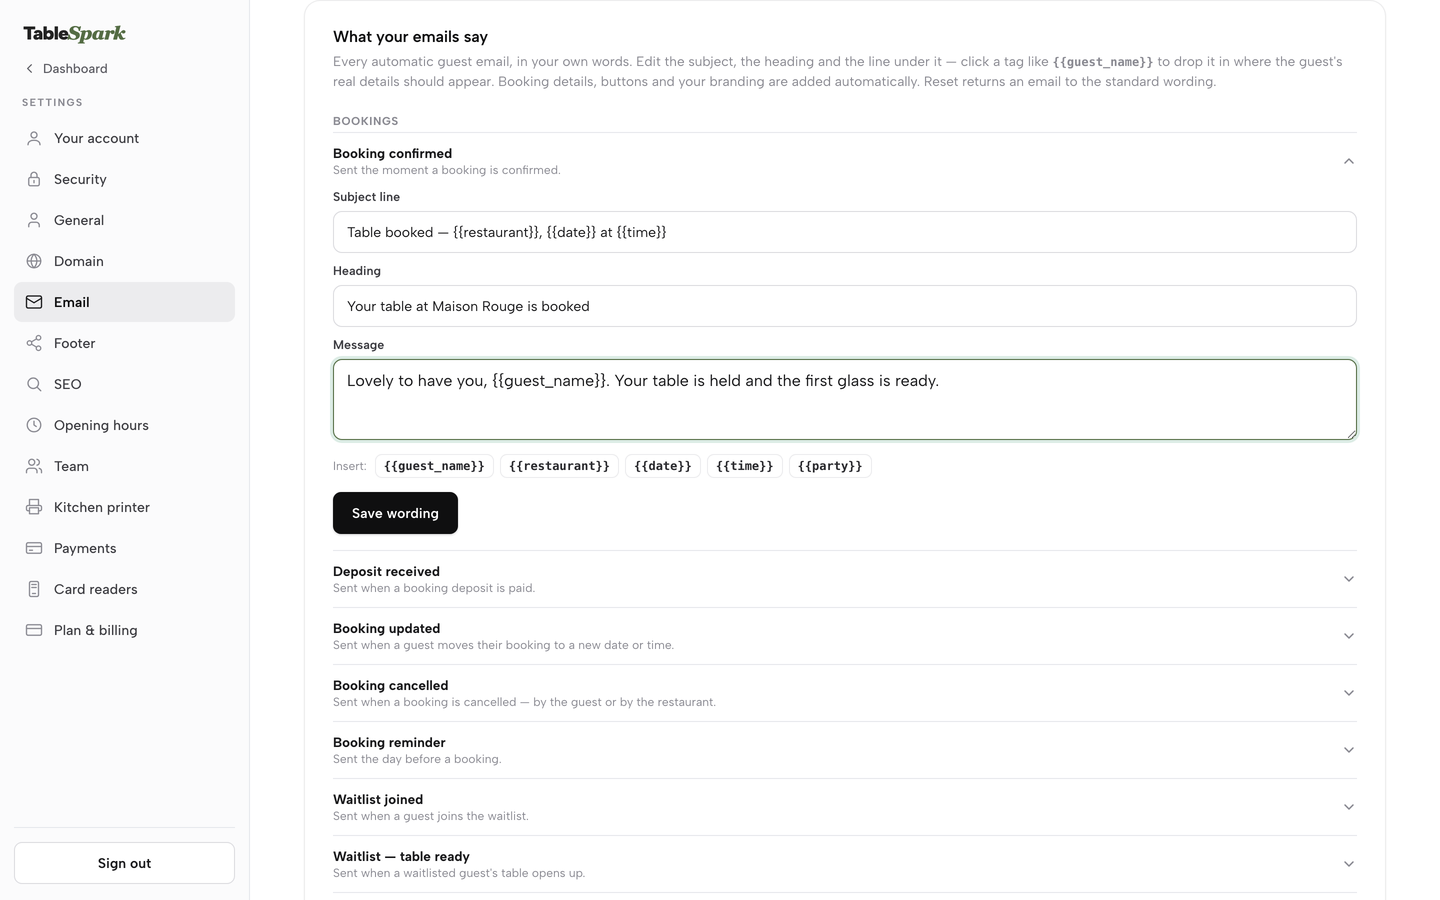
Still on Settings → Email, scroll to the What your emails say card. Click any email to expand it — Booking confirmed, say — and you get three fields: Subject line, Heading and Message. Under Insert, click a tag like {{guest_name}}, {{restaurant}}, {{date}}, {{time}} or {{party}} to drop it in at the cursor — the exact set of tags on offer changes per email. Press Save wording and new emails use it right away.
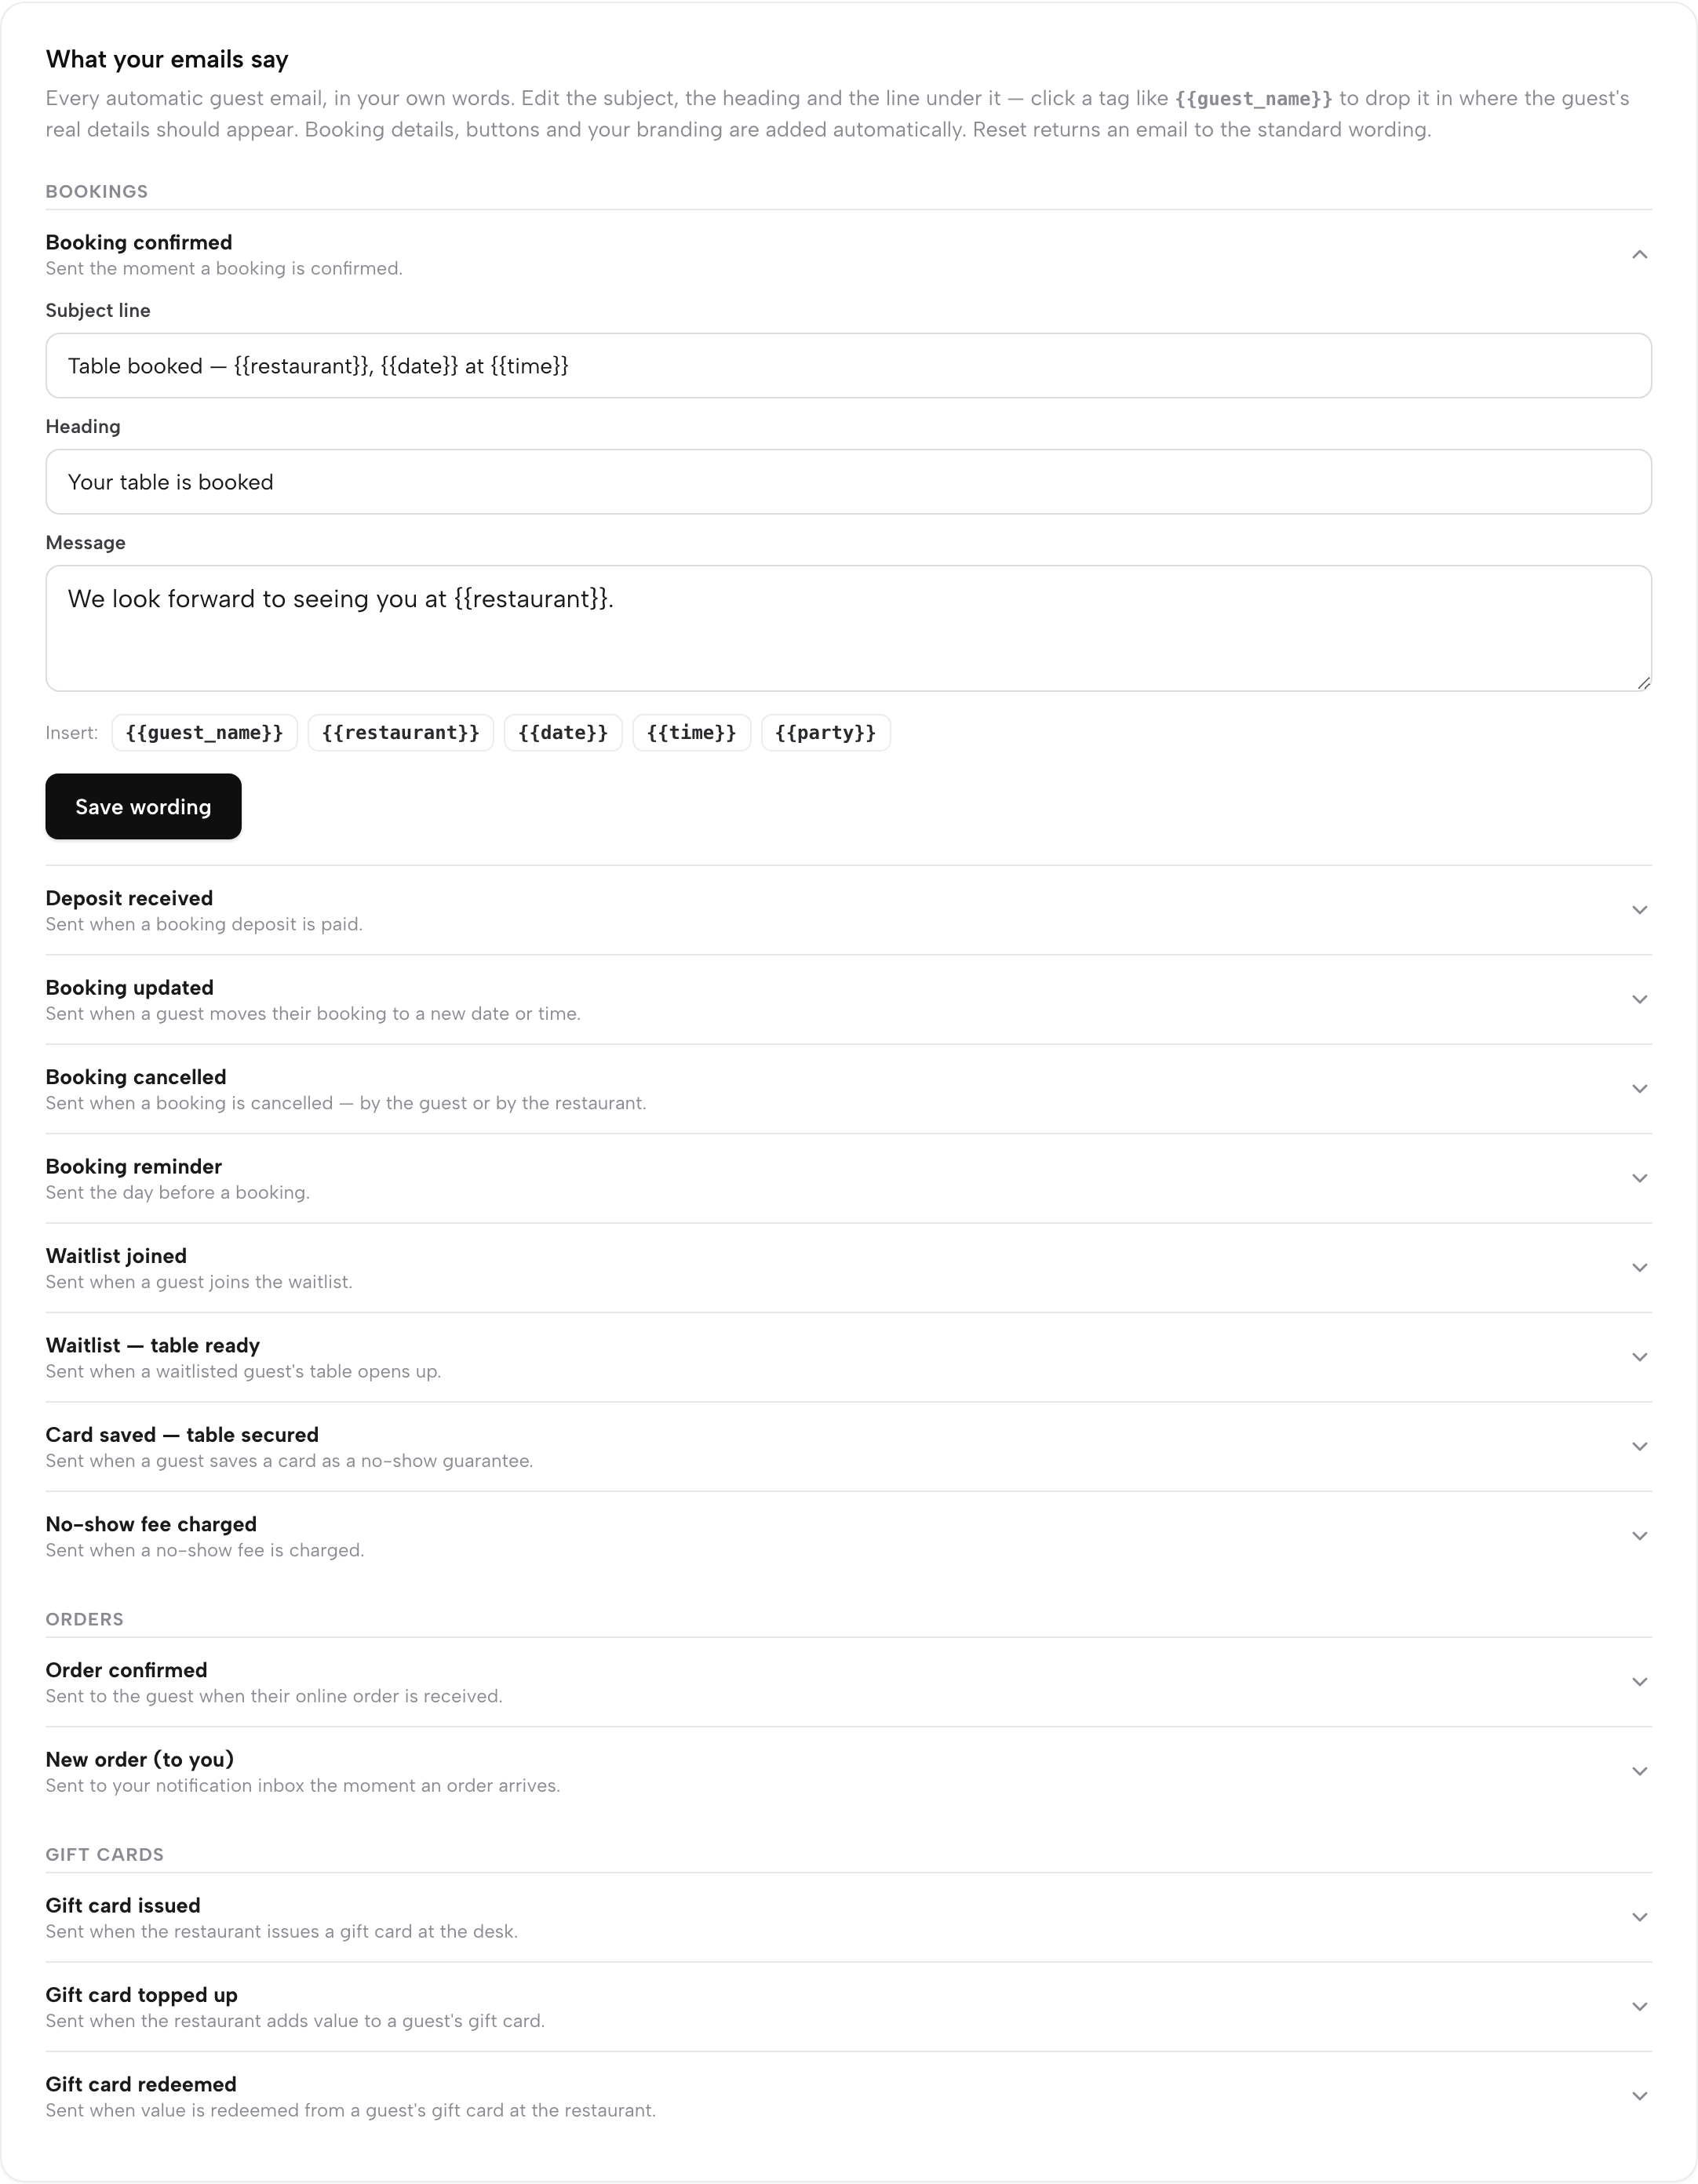
Once you save, a “Customised” pill marks that email in the list. Nothing here can break sending — booking details, buttons and your branding are still added automatically, and Reset to standard deletes your version and puts the shipped wording straight back.
Choosing how they look
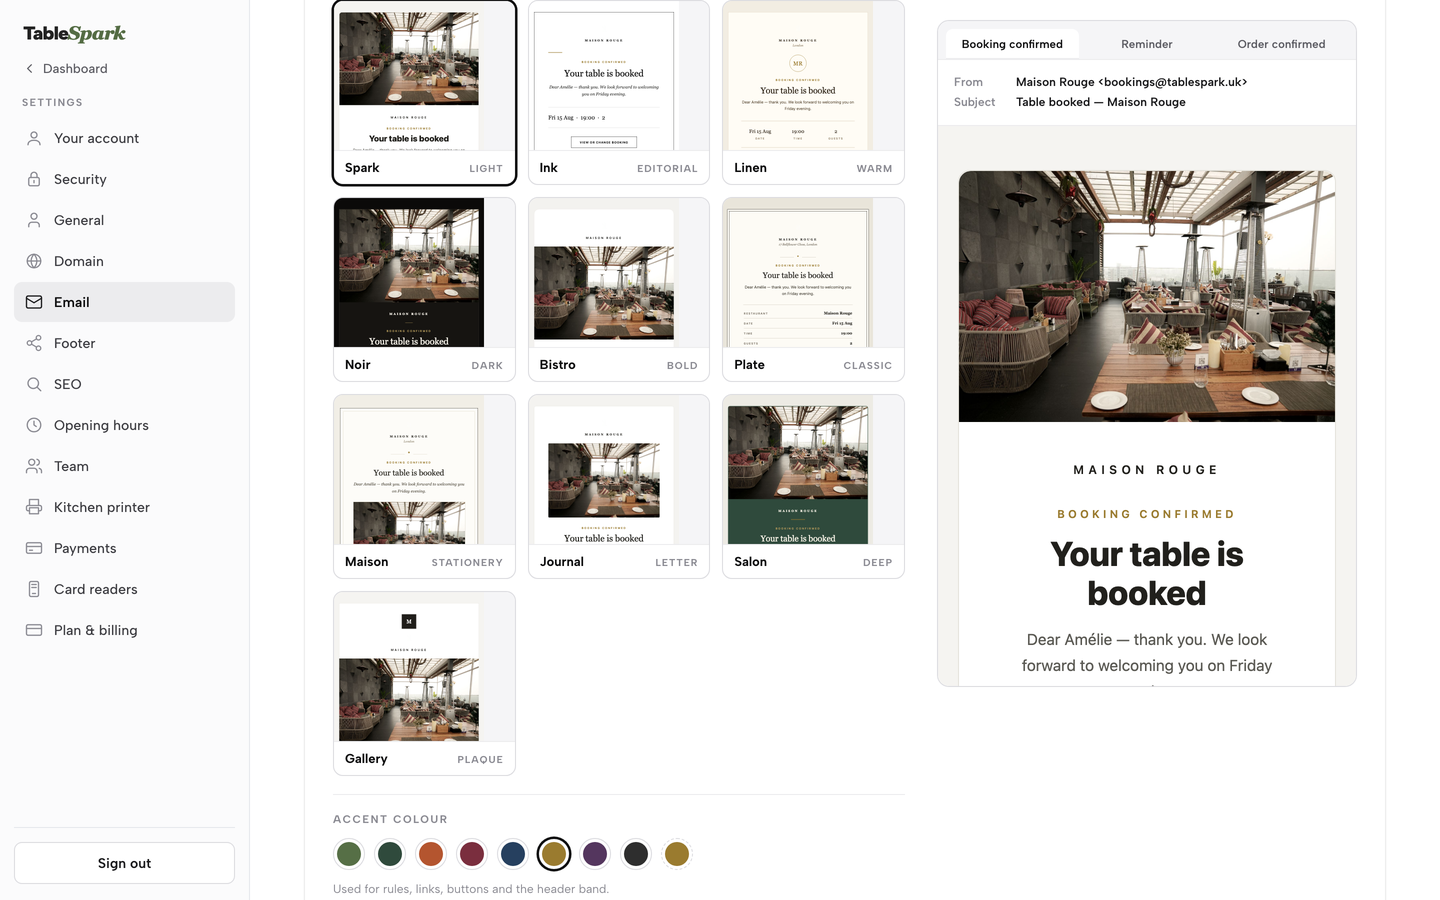
At the bottom of the page sits “Email design” — the visual shell every booking, reminder, order and newsletter email wears. Pick a template from a gallery of ten: Spark, Noir, Bistro, Journal, Salon, Maison and Gallery open on a cover photograph; Ink, Linen and Plate keep it to type. Set an accent colour for rules, links and buttons; choose a header (Left, Centred or Colour band) and Soft or Sharp corners; upload a logo (a PNG works in every inbox) and tick whether it shows in the header and whether the “Find us” address block appears; replace the cover photo, or click Use my website photo; add a closing sign-off line, up to four footer links and up to eight social icons. The panel on the right is the real send-time template rendering your choices — what you see there is what lands in the inbox.
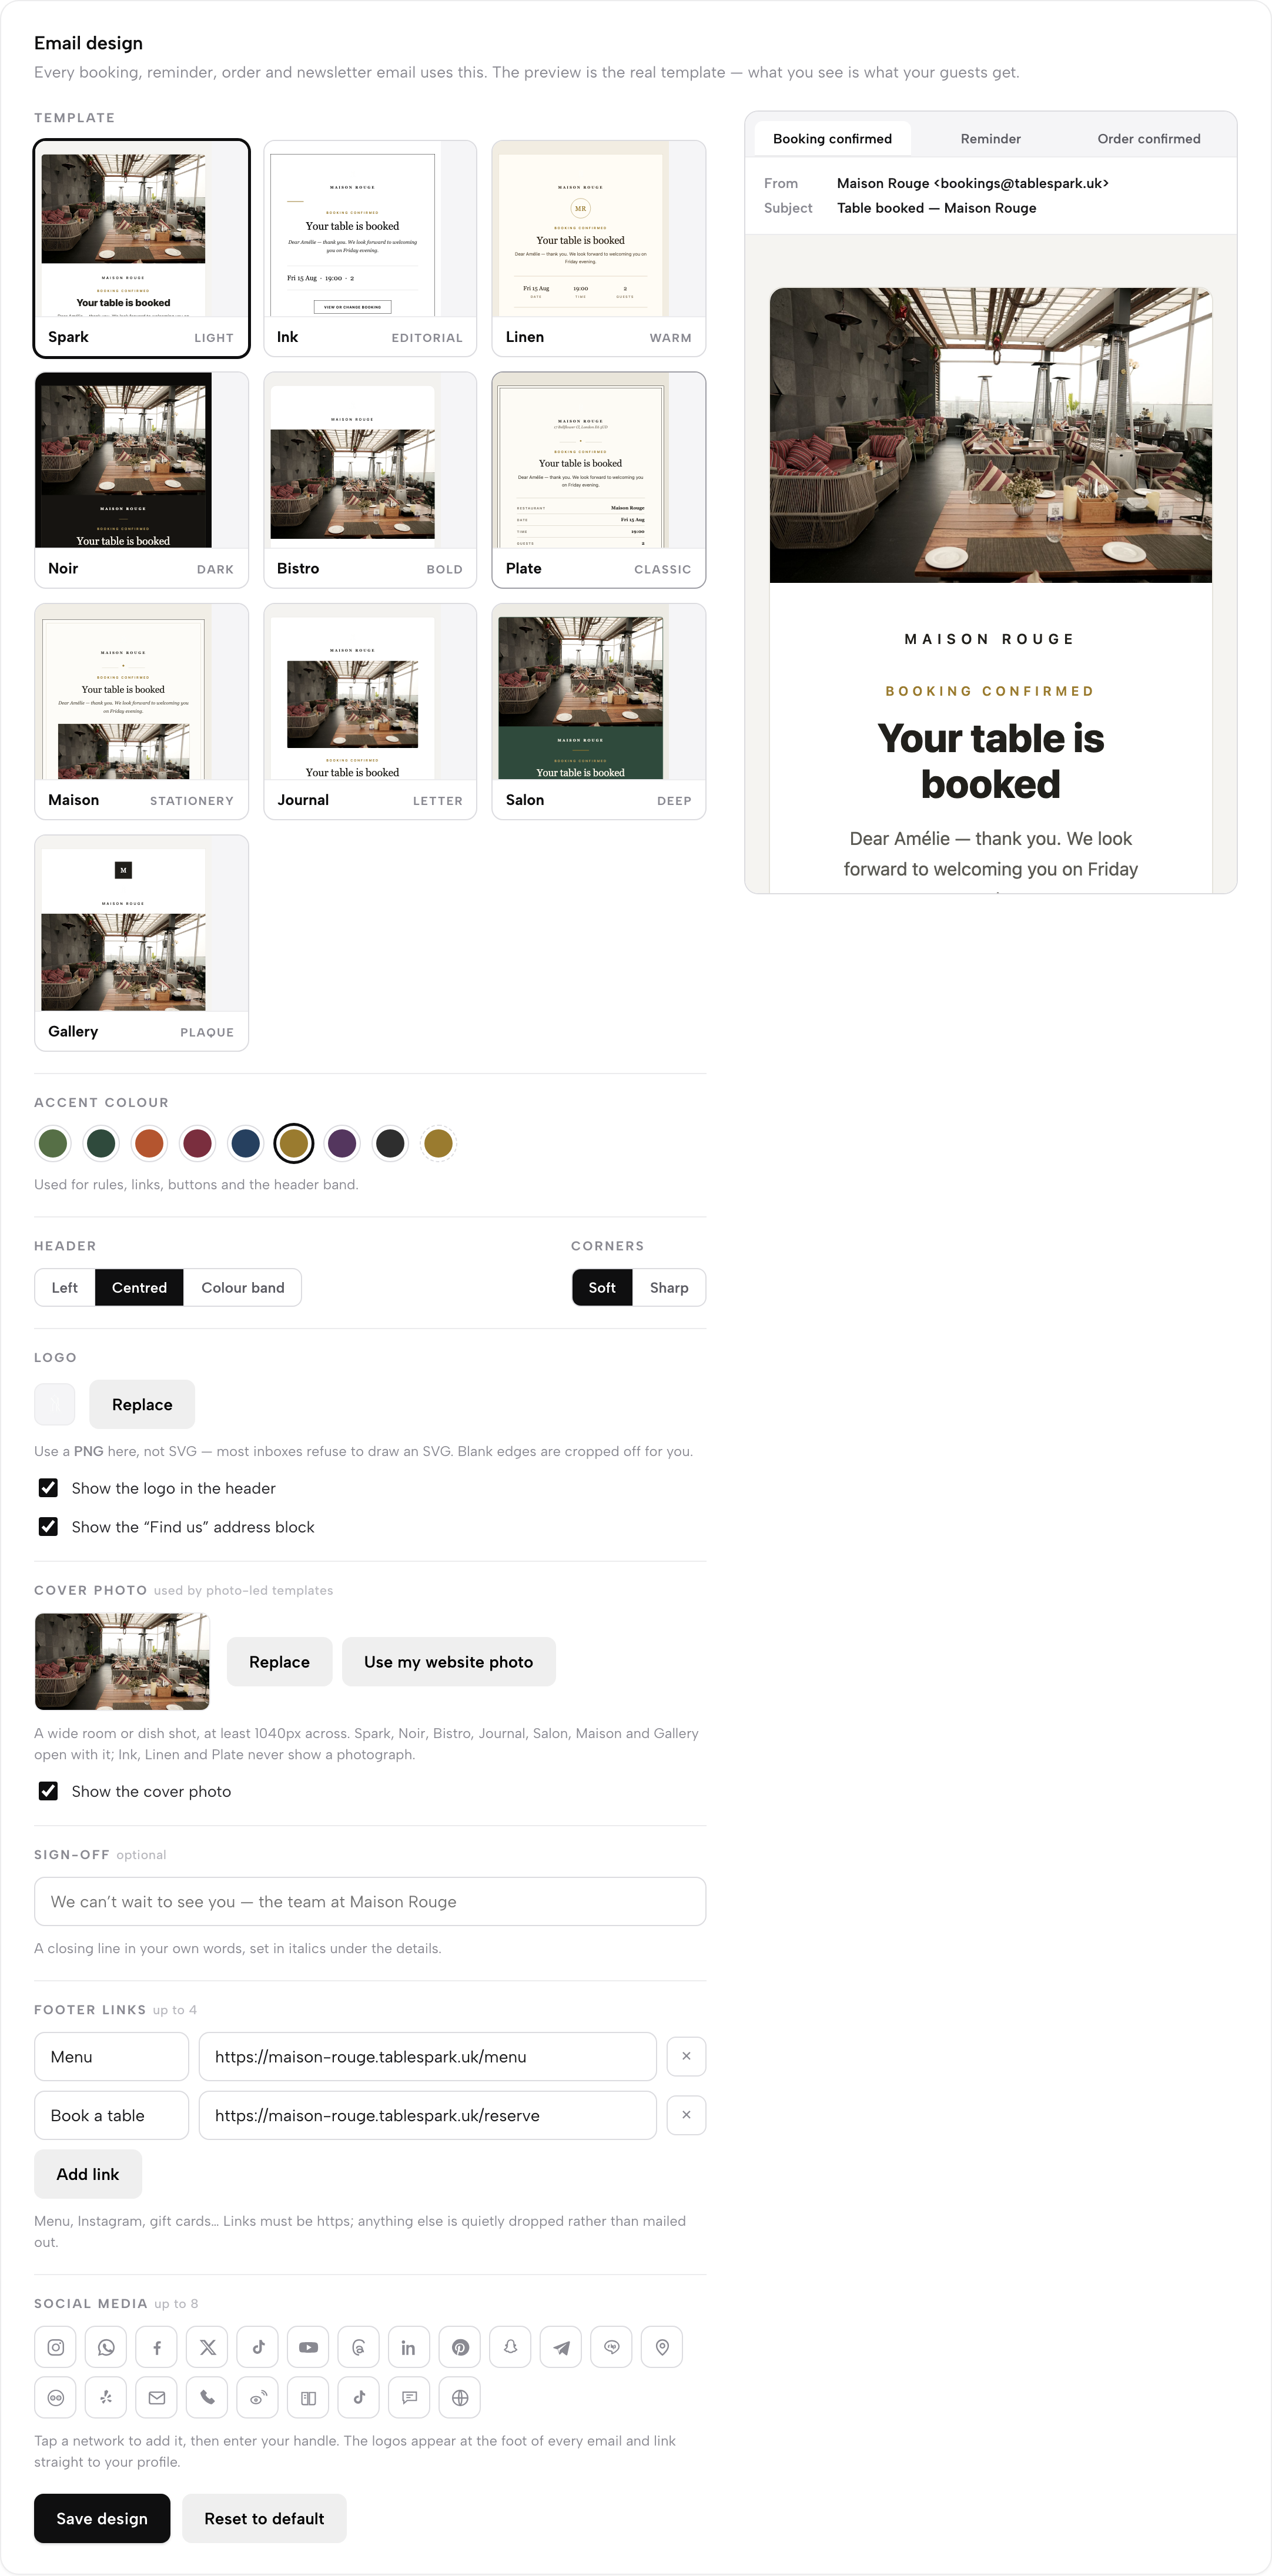
Switch the preview’s tab between Booking confirmed, Reminder and Order confirmed to see the same design carry across email types, then press Save design. Reset to default puts the TableSpark look back and keeps your logo in Media.
Sending as your own restaurant
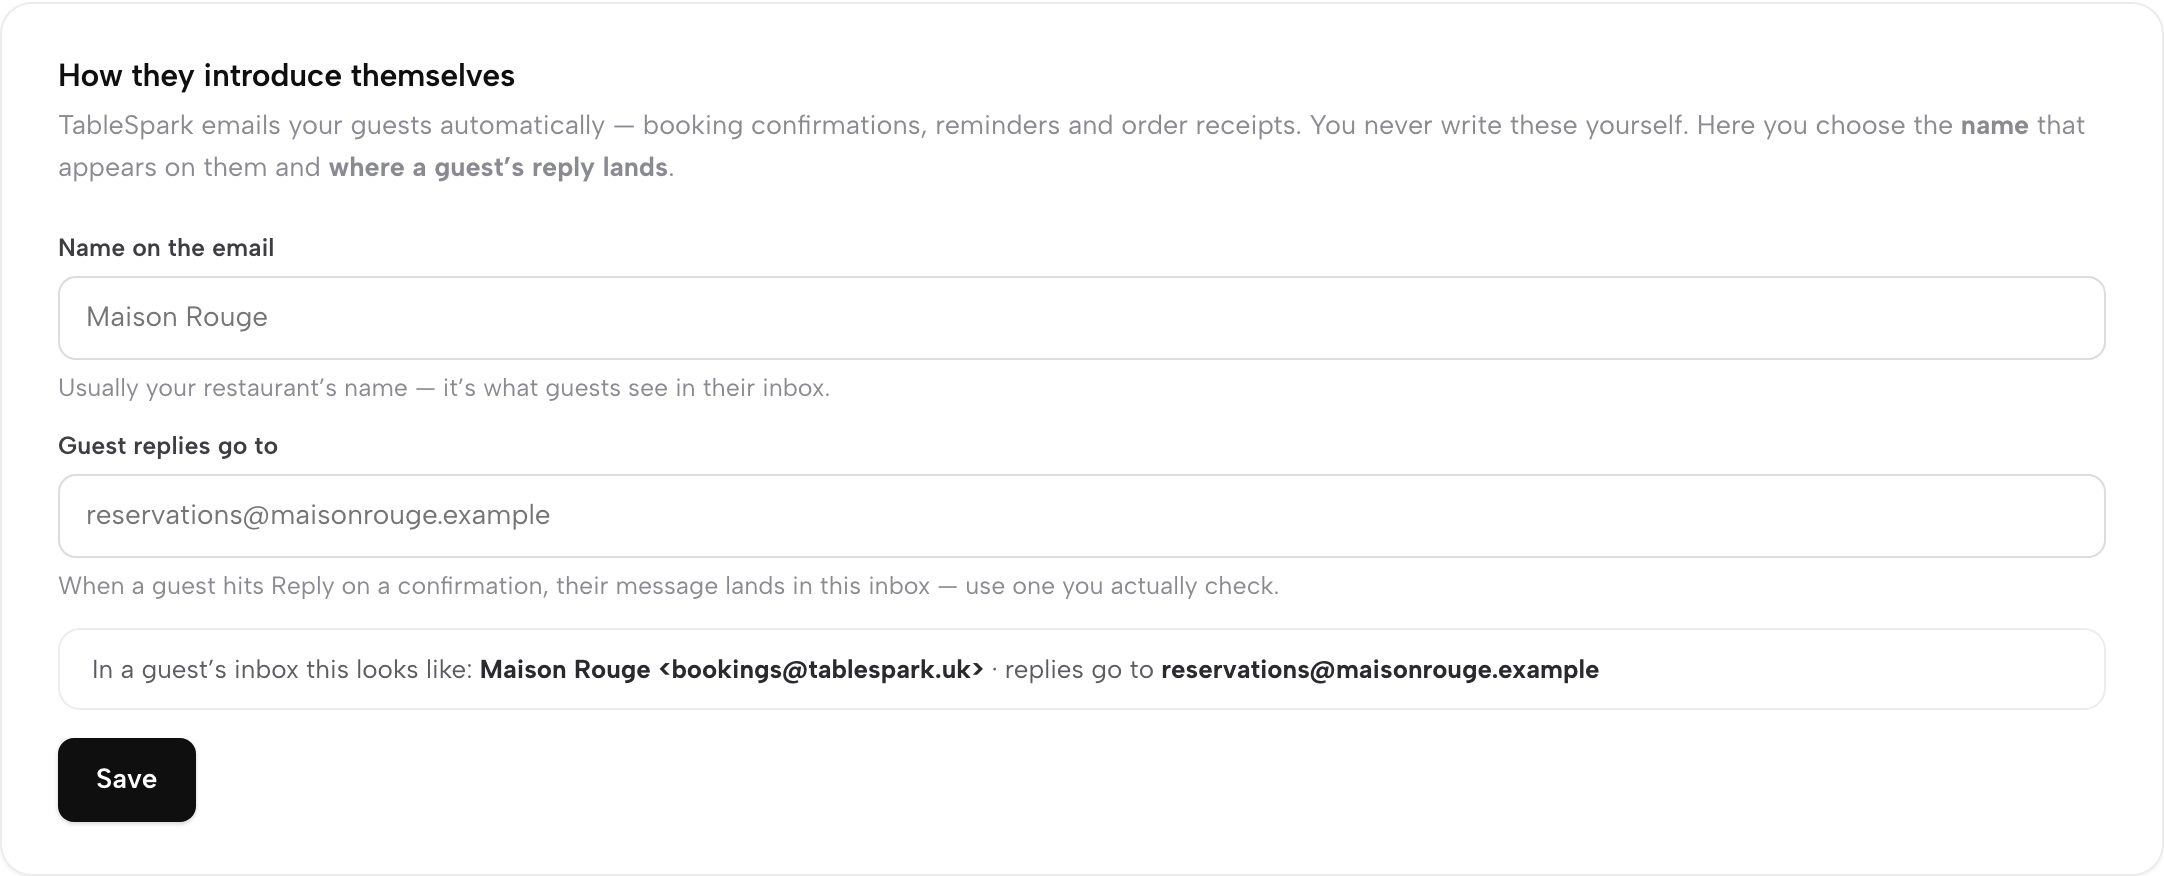
At the top of the page, Mailboxes on your domain adds a real inbox such as info@ that you read from your phone, computer or any browser — each mailbox is billed monthly, and the button shows the price before you add one. Two more cards, above the wording, set the identity behind all 14 emails. “How they introduce themselves” sets the name on the email (usually your restaurant’s name) and where guest replies go — an inbox you actually check, such as the info@ mailbox from the email-address guide. A live line shows exactly how it reads in an inbox.
Below it, “The address they’re sent from” shows where those 14 emails actually come from — bookings@tablespark.uk until you connect your own. Type a domain you already own and press Connect: TableSpark shows the DNS records to add (or writes them for you, if the domain was bought through TableSpark), and once verified every automatic guest email sends from bookings@your-domain instead — your name end to end, and inboxes like Gmail trust it more. After you press Connect the card lists the records to add, with Check status to re-run verification and Remove domain if you change your mind; verification takes a few minutes to about an hour, and your guest emails keep sending from bookings@tablespark.uk until it completes. Connecting your own sending domain is included from the Growth plan.
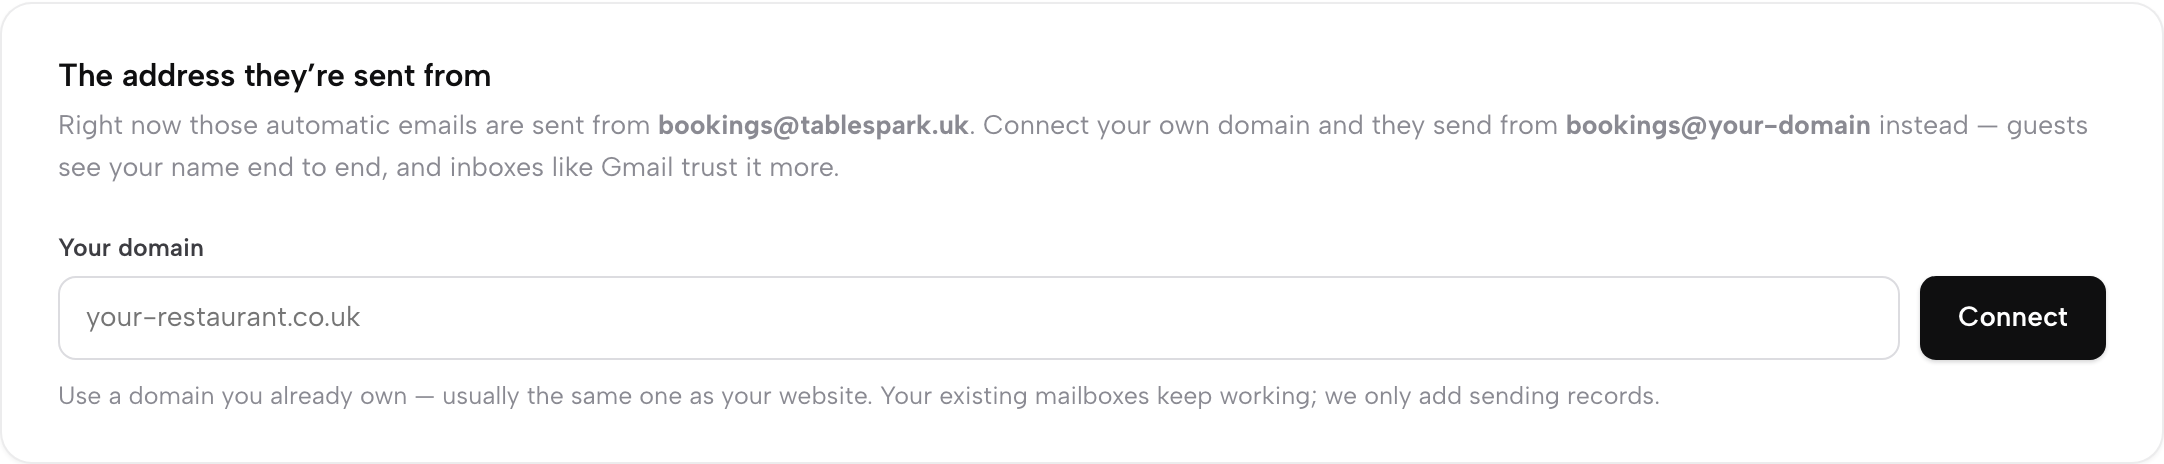
This is the same identity the email-address guide sets up from the domain-and-mailbox side — if you haven’t bought a domain or a mailbox yet, that’s the two-minute prerequisite for sending on your own name.
Writing a one-off campaign
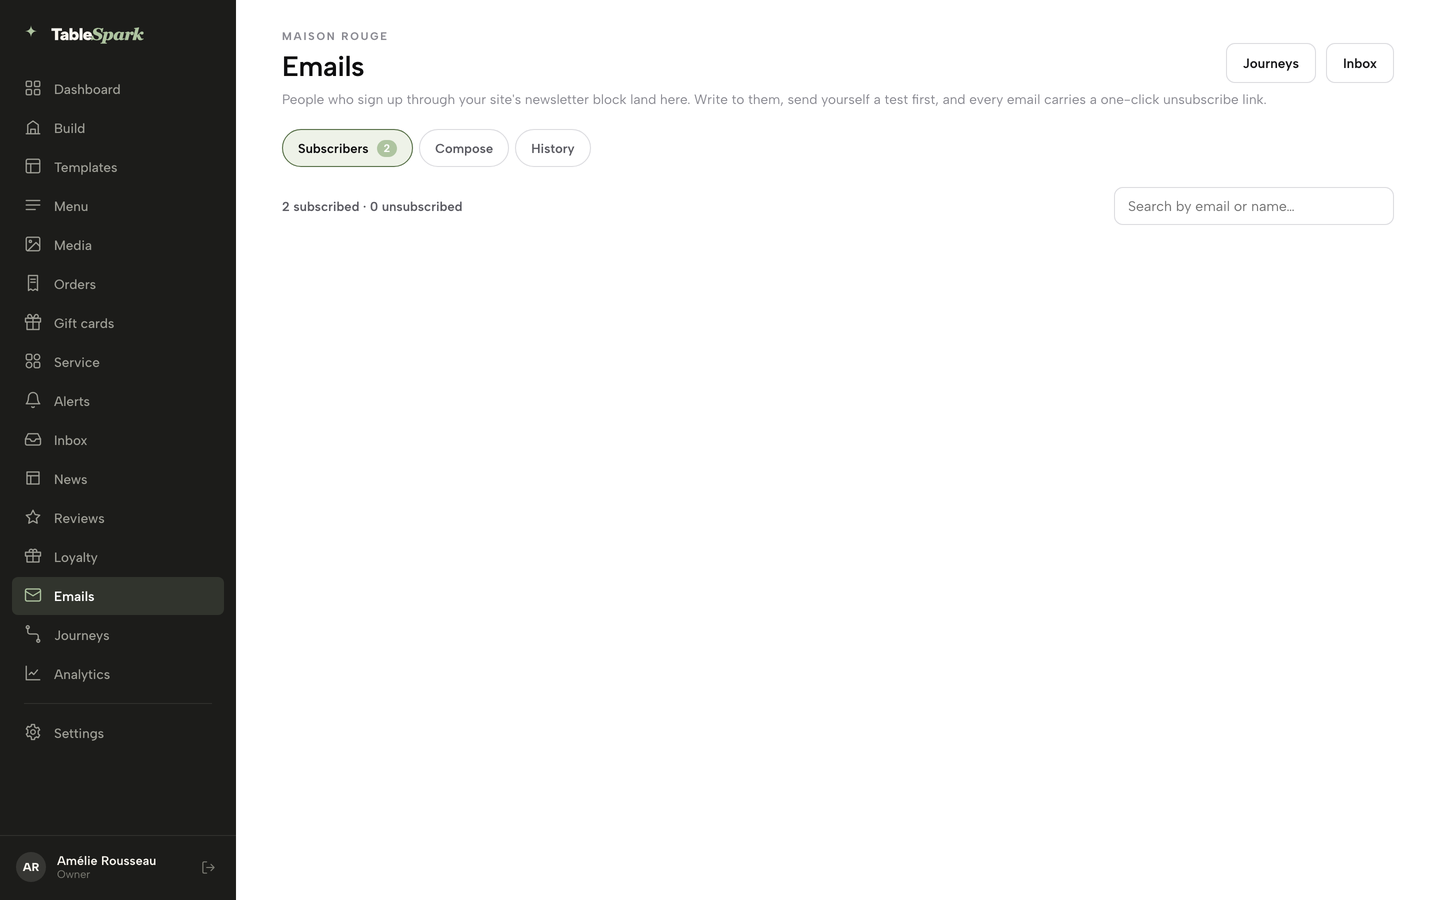
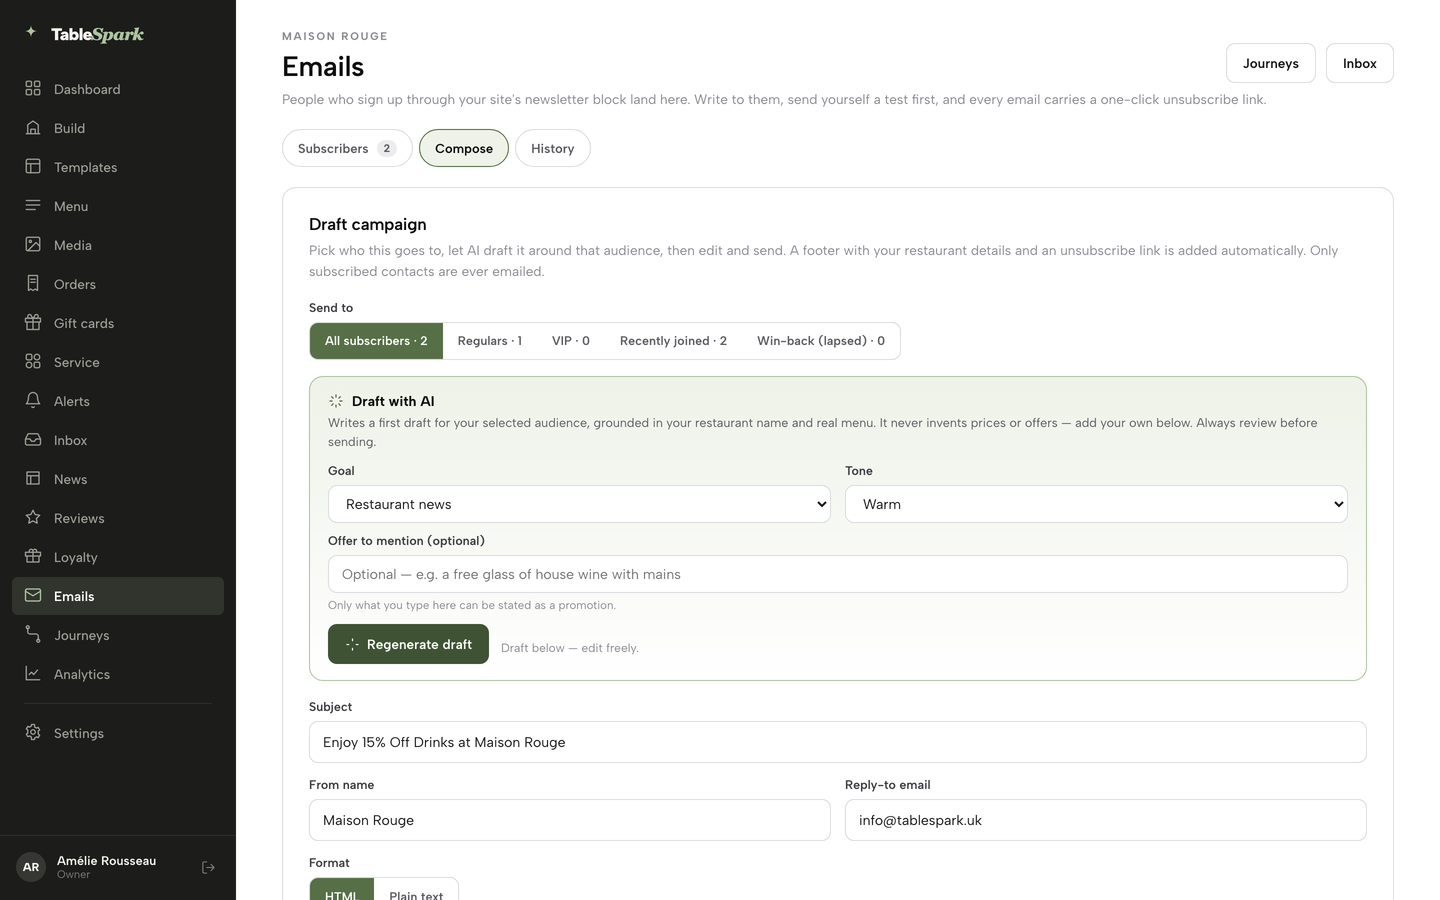
Open Emails from the sidebar for the channel you press send on yourself — a single email to your newsletter list, separate from the 14 automatic emails above. Subscribers lists everyone who joined through your site’s newsletter block, with their consent date and source; a search box finds a guest by email or name, Unsubscribe stops their emails and Delete removes them and their consent record. Open Compose and it shows your saved draft if you have one. On Compose, choose an audience — All subscribers, Regulars, VIP, Recently joined or Win-back (lapsed) — each pill showing its live subscribed count.
In “Draft with AI”, pick a Goal (restaurant news, an event invite, an offer, encourage a return, seasonal) and a Tone (Warm, Elegant, Playful or Concise), optionally type an offer to mention, and press Generate draft (the button reads Regenerate draft once a draft is open). It writes a subject and a full HTML body grounded in your restaurant’s real name and menu — it only states a promotion you typed yourself, and the draft is yours to edit freely before anything goes out. Set the From name and Reply-to email, choose HTML or Plain text as the format, and write in the Body: the live preview on the right updates as you type.
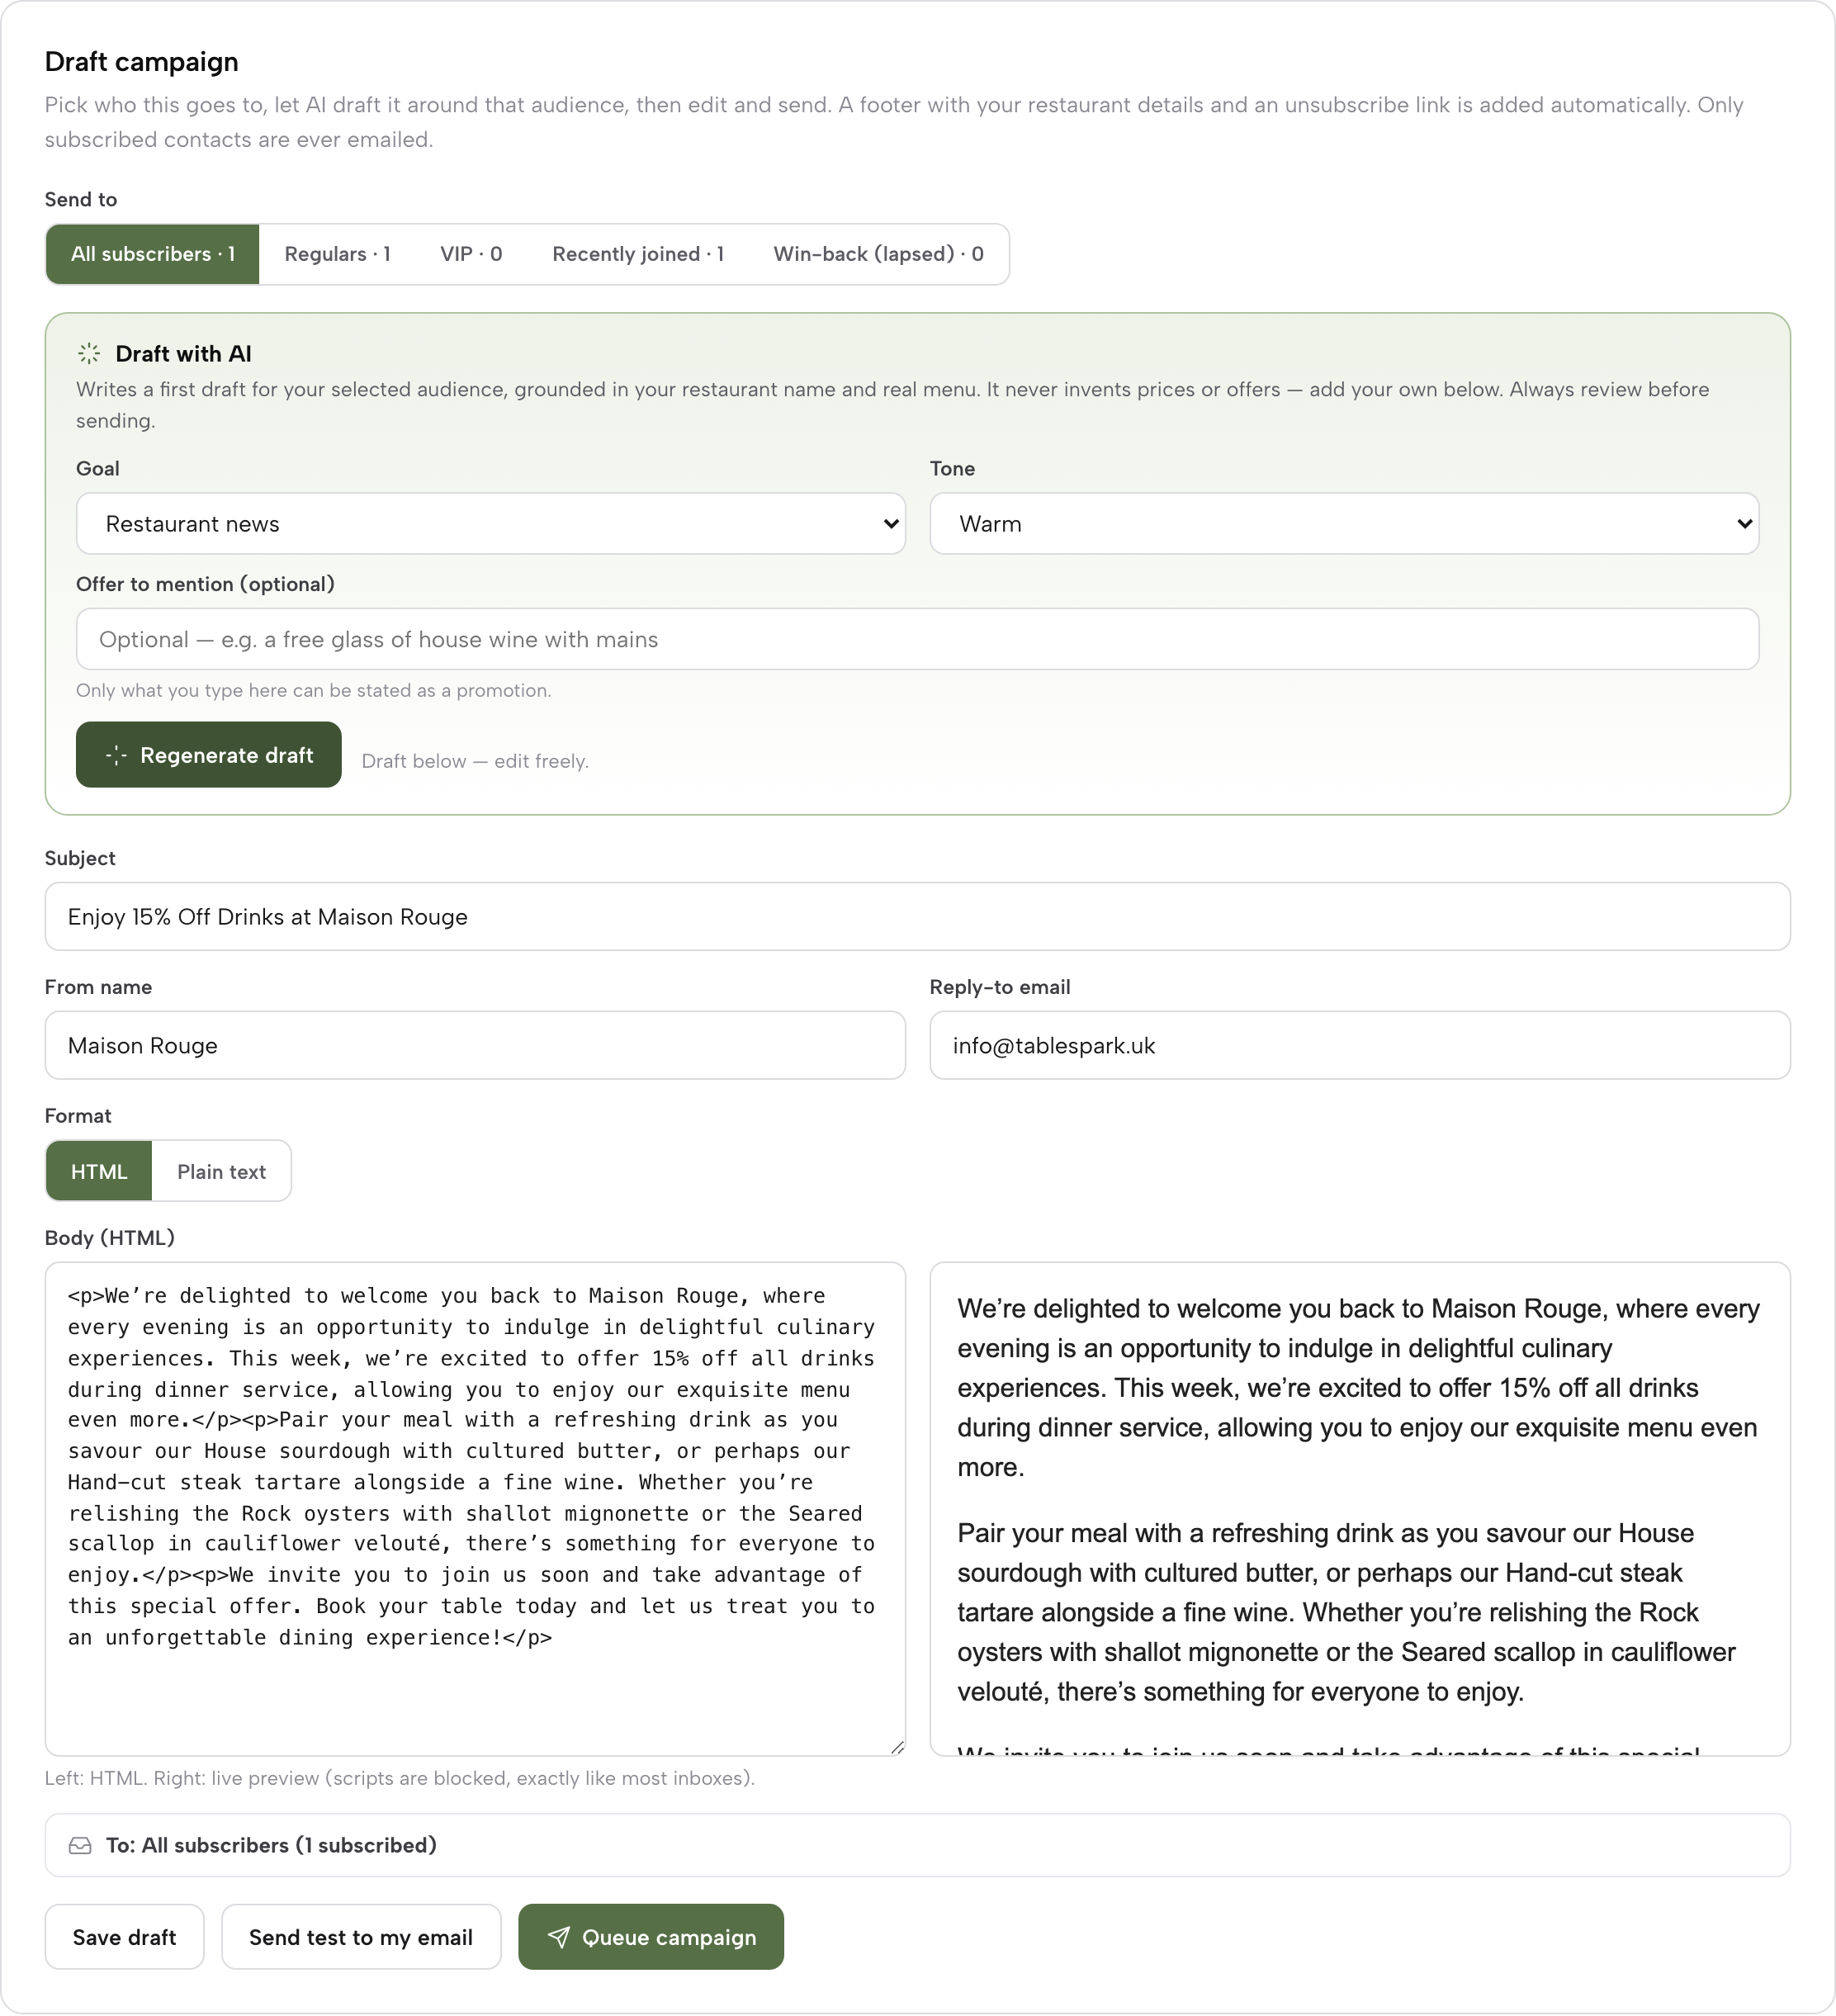
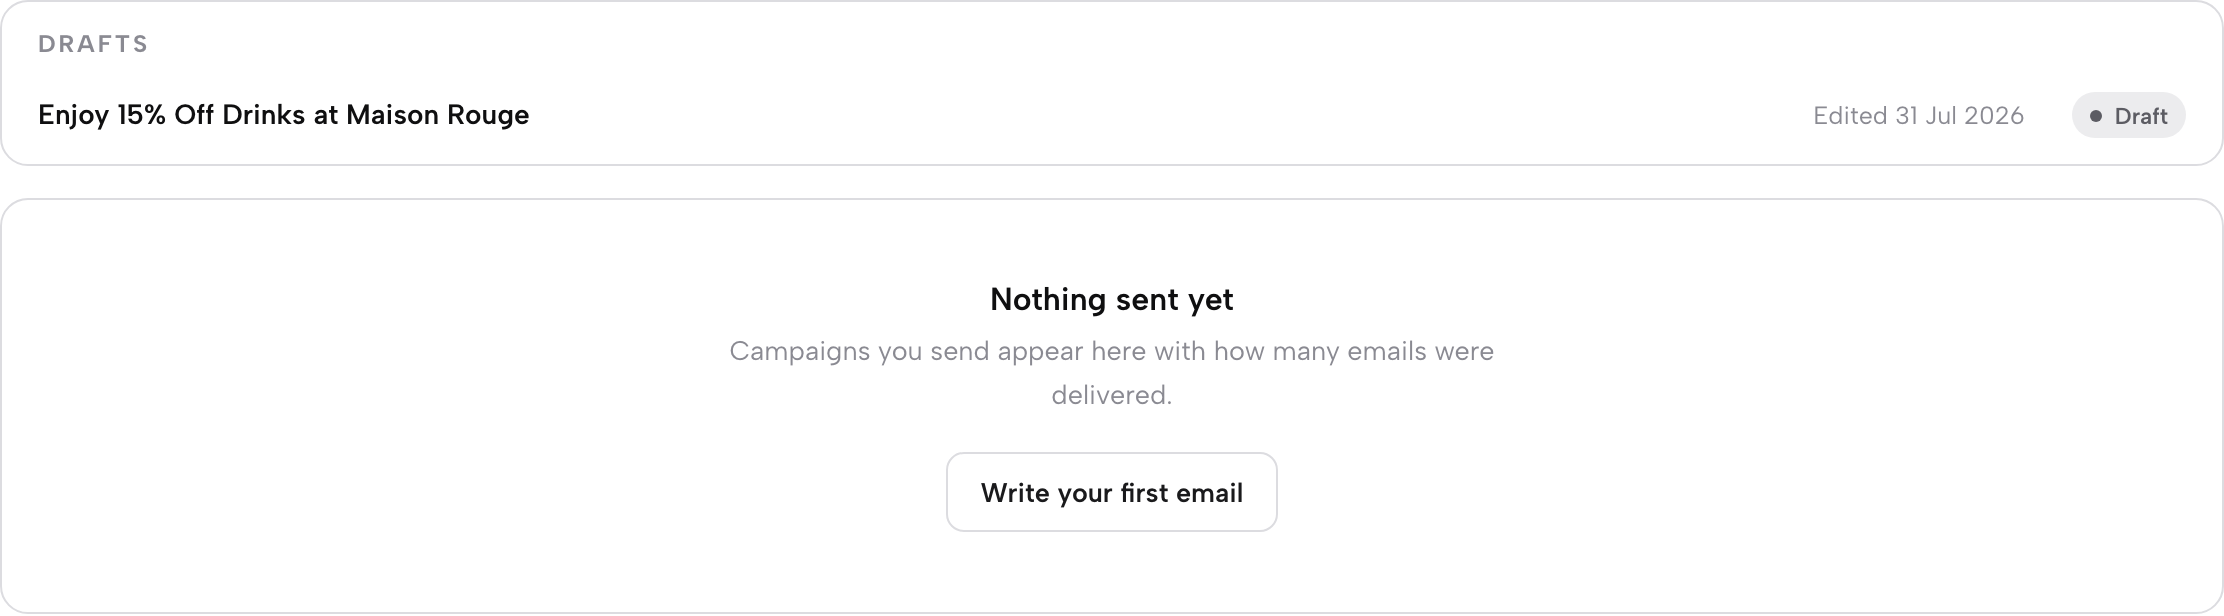
A line above the buttons confirms To: audience (n subscribed). Save draft keeps your work. Press Send test to my email first — it sends one copy straight to your own signed-in address so you can check it in a real inbox. When you’re happy, press Queue campaign: a dialog names the exact subscriber count and audience before it queues recipient-level delivery, and every email carries your restaurant’s details and a personal unsubscribe link, as UK anti-spam rules require. History keeps your drafts ready to reopen, and lists each sent campaign with how many emails were delivered.
Building an automated journey
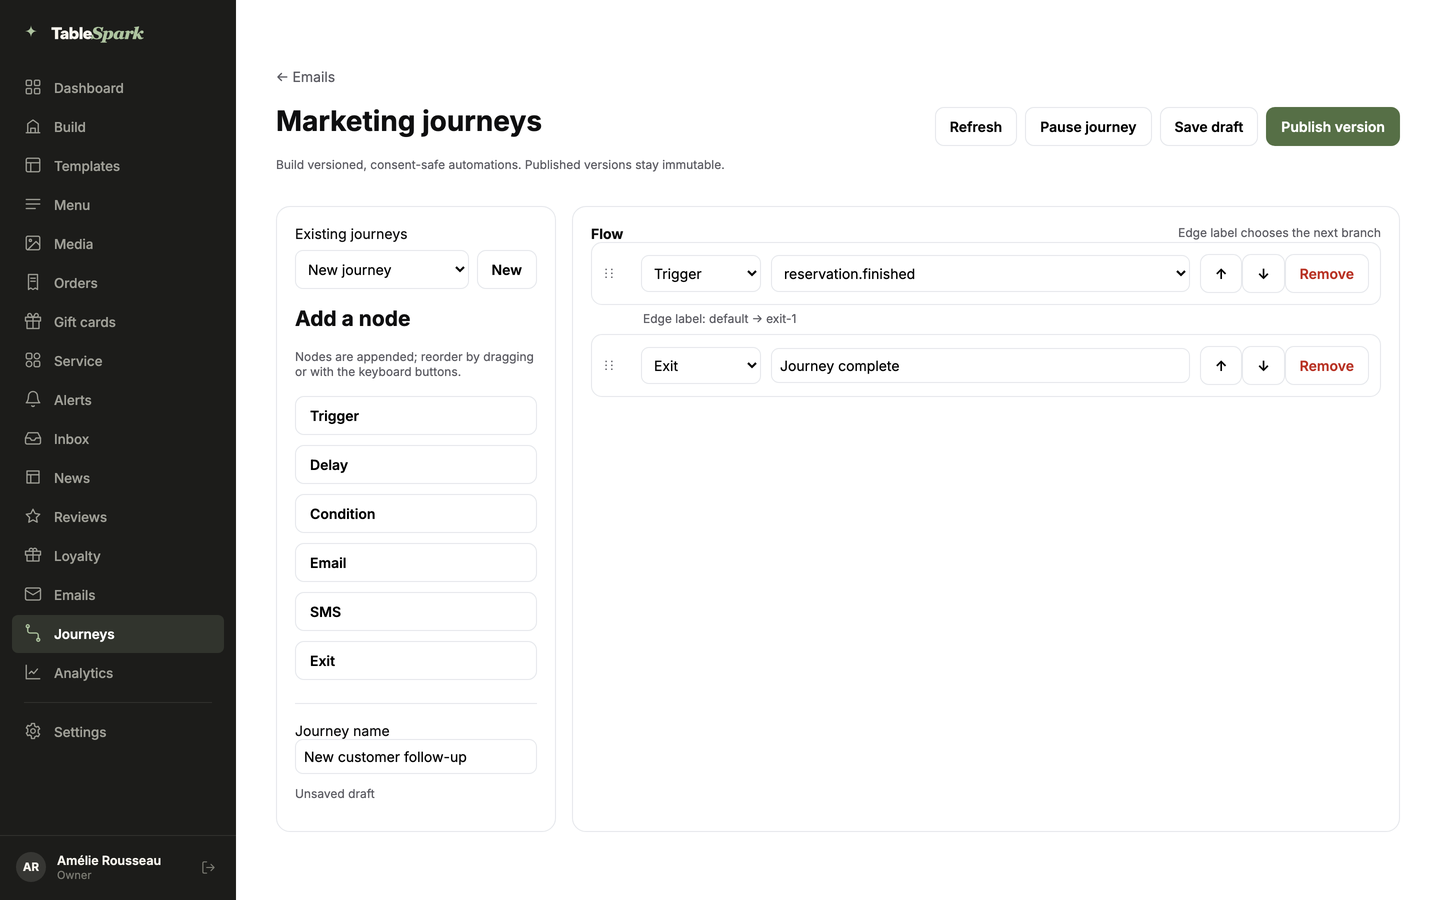
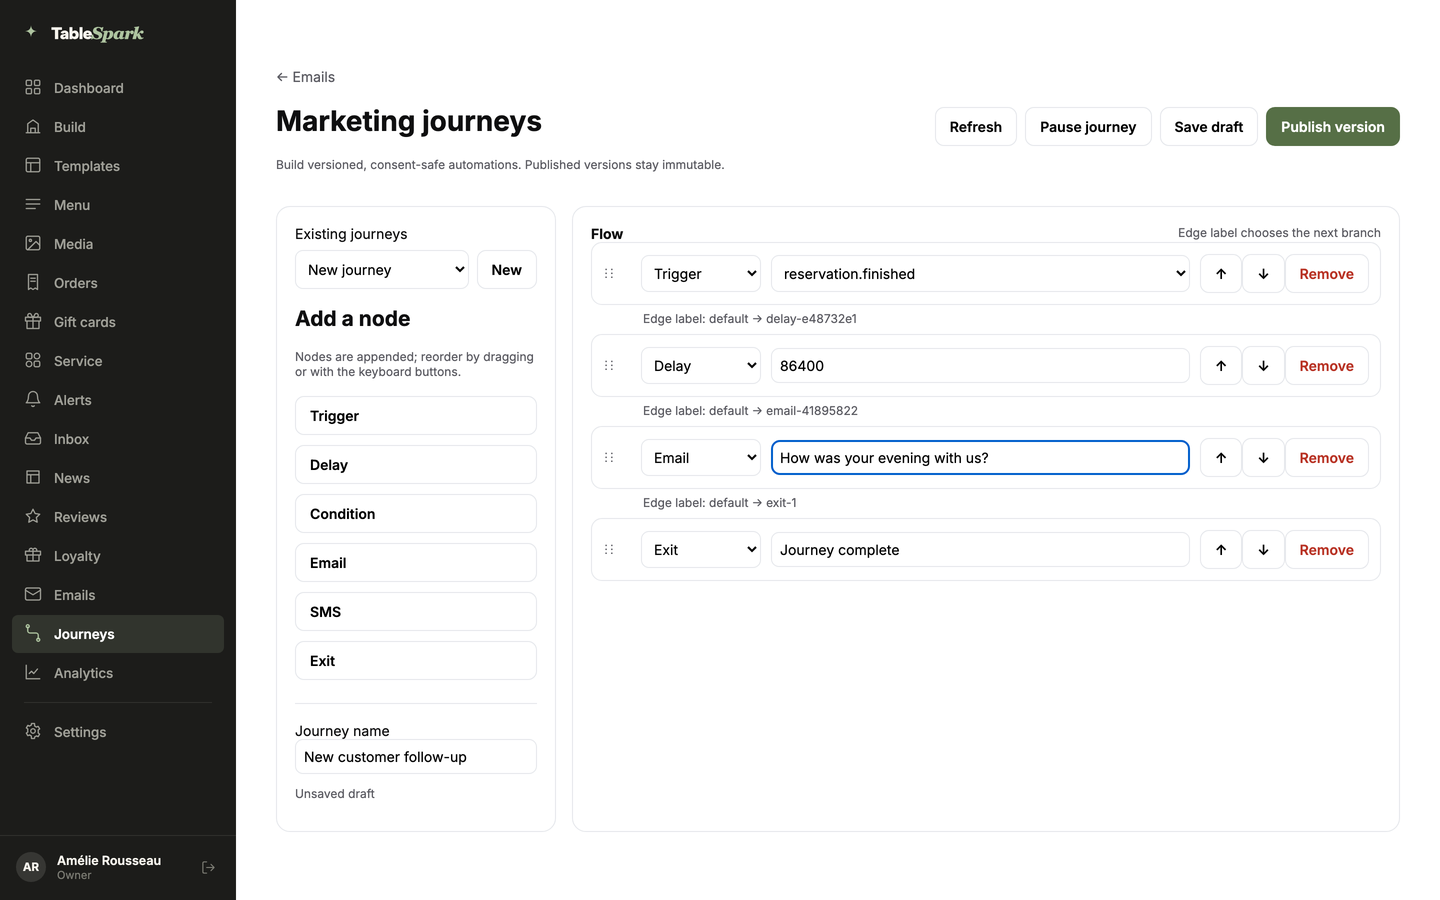
Open Journeys from the sidebar (or the link at the top of Emails) for a versioned, branching sequence that starts itself — set up once, it runs on every matching guest without you sending anything. A fresh journey already holds a Trigger and an Exit. Use Existing journeys to reopen one or New to start another, name it under Journey name, then build the flow with Add a node: Trigger, Delay, Condition, Email, SMS or Exit. Nodes append to the flow; reorder by dragging the handle or the ↑/↓ buttons.
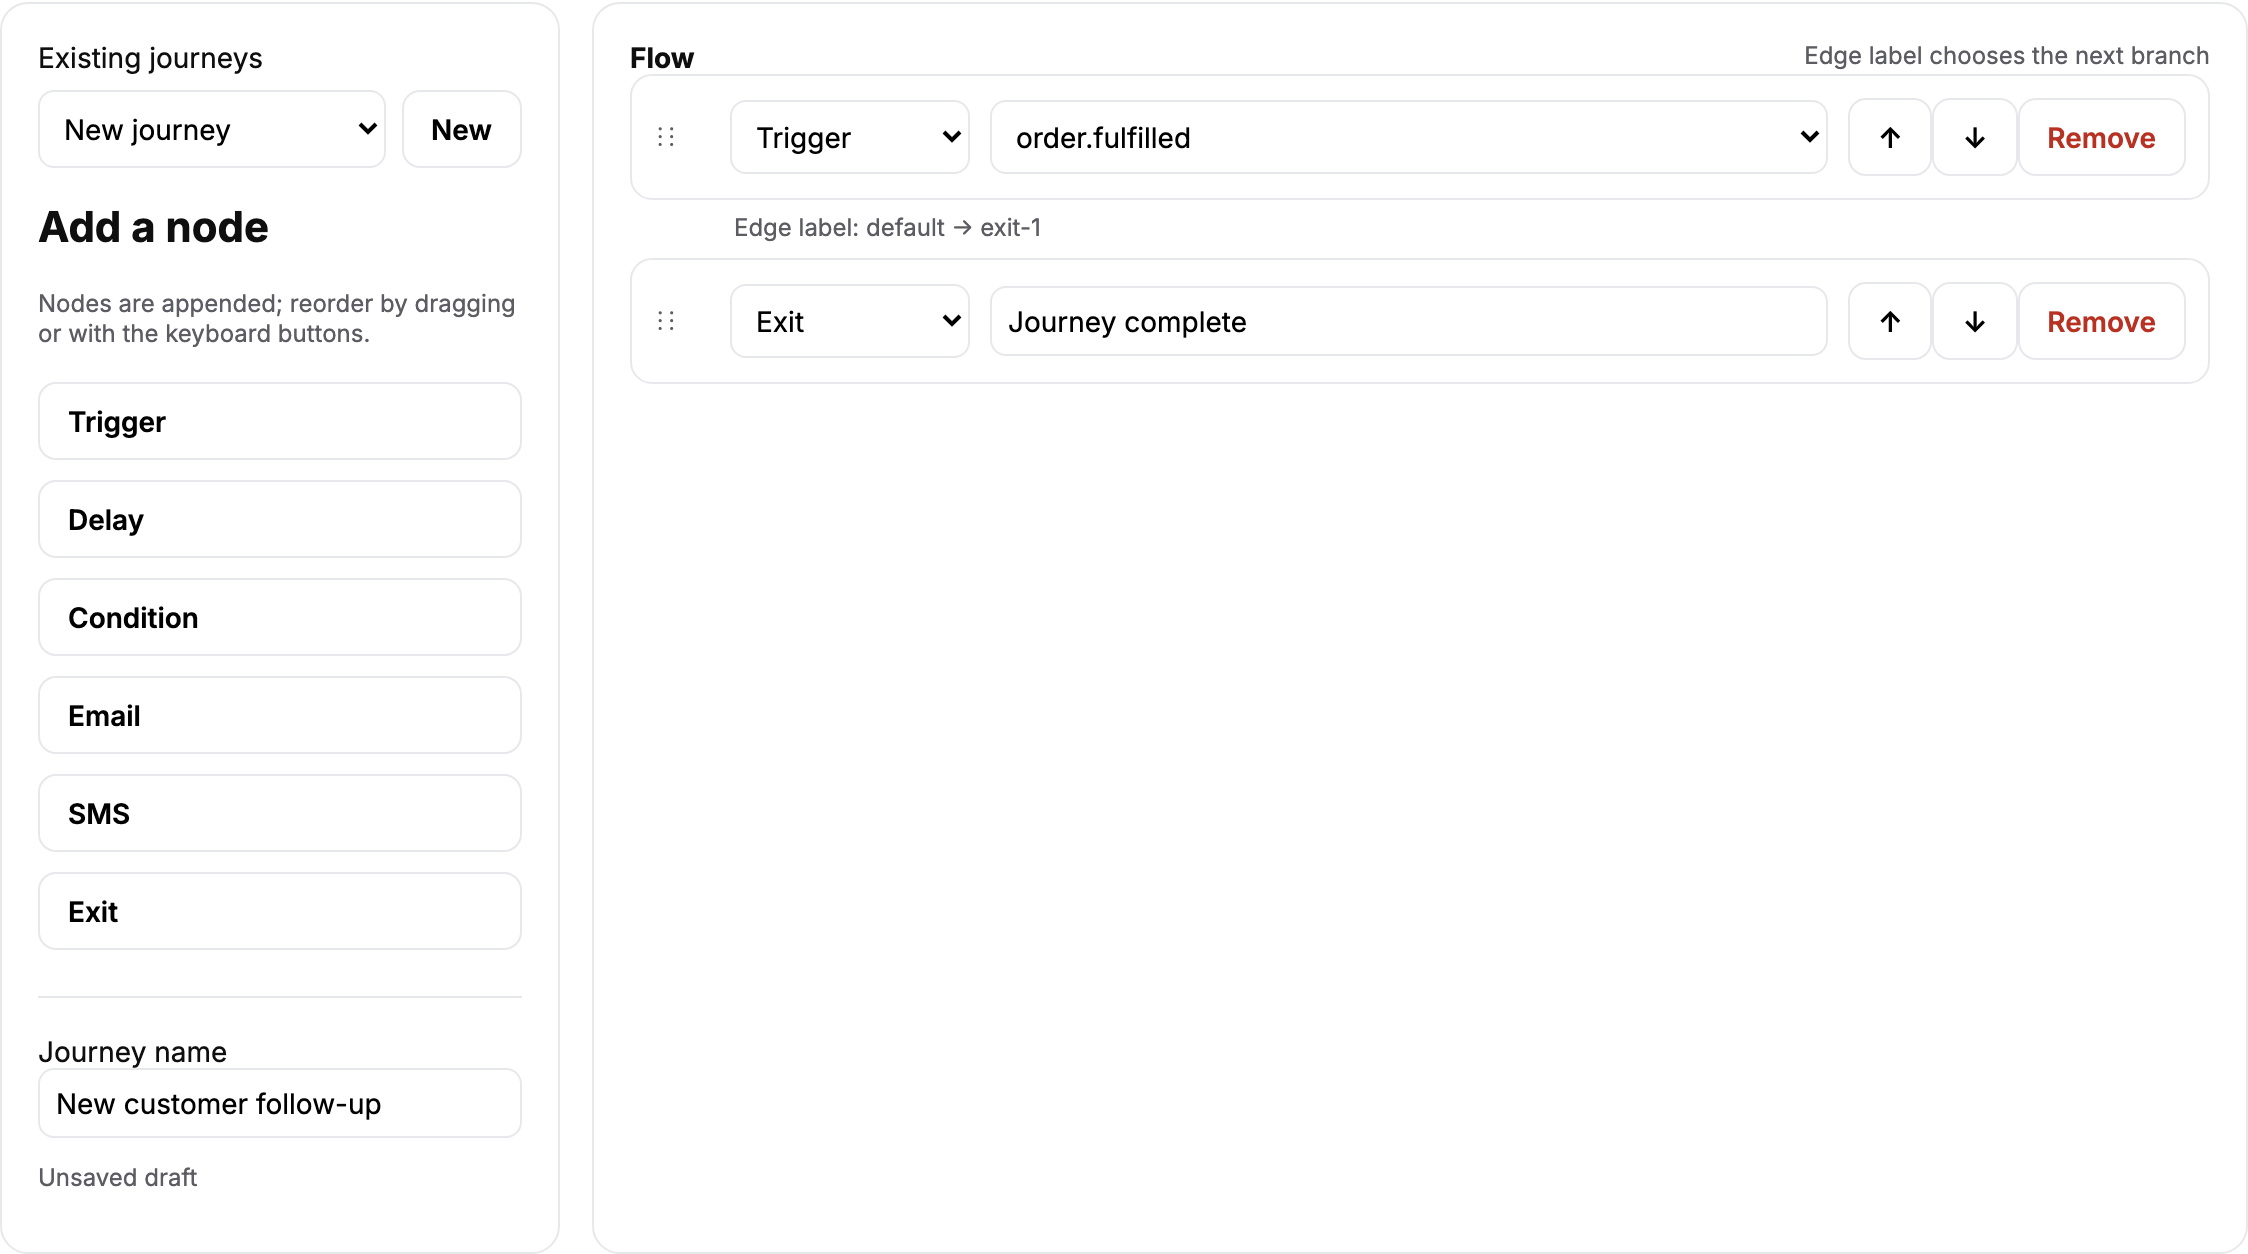
Every journey needs exactly one Trigger, chosen from a fixed list — order.fulfilled, order.refunded, order.cancelled, reservation.finished, reservation.no_show — and at least one Exit. A Delay waits before the next node (type the wait in seconds, so 86400 is one day); a Condition tests a field against a value (typed as, for example, total_pence gte 5000) and splits the flow into a yes branch and a no branch, each pointed at its own next node. An Email node holds the subject and an SMS node the message, sent at that point in the sequence. Under each node a line shows where it leads next; drag nodes into order or use the ↑/↓ buttons until the chain runs Trigger to Exit. The editor checks the graph live, lists any unreachable step in red, and switches Publish version on once the flow is whole.
Save draft keeps working on an unpublished version. Publish version freezes it — published versions are immutable, so editing a live journey means Continue in new draft, which opens a fresh editable copy without disturbing guests already partway through the version that’s running. Pause journey stops new guests entering without touching the version itself, and Refresh reloads the saved state.
Put together: the 14 automatic emails need no ongoing attention once their wording, look and sender are set — campaigns and journeys are the two channels you drive yourself, one message at a time or on autopilot.
News: posts on your own site
Open News from the sidebar for a third channel — not an email at all, but posts that publish straight onto your own website. Press New draft, and typing a Title fills in a matching Slug automatically (edit it by hand if you want a different one); add a Summary, then a Body with a blank line between paragraphs. The Preview card renders exactly what a reader sees, updating live as you type. Press Save draft to create the article and start its Revision history — every save records a new numbered revision, so nothing you write is ever lost to an edit.
Once an article is saved, three more buttons appear. Publish puts it live immediately at /news/your-slug, on the news block on your own site; pick a date and time and press Schedule to have it publish itself later; Archive takes a published article back down without deleting it. Each article’s card in the list carries a status badge — draft, scheduled, published or archived — alongside its live address, so you can see at a glance what’s actually on the site. News comes with your plan, and your account team switches it on for your site before it appears in the sidebar. Want to reach inboxes instead of your website? That’s the campaign channel in step 05, above.
Keep going
Explore every guide
From your first website to running service at the table — every TableSpark tutorial, in one place.