
When every ticket lands in the kitchen at the same moment, the starters and the mains arrive together, the grill cook is reading lines that belong to cold and pastry, and a dish that ran out an hour ago is still on the menu. Nobody can see what is waiting, what is late or what the table is ready for. The kitchen display gives each station its own board, holds the mains until you fire them, and sells a dish out when the last portion goes.
Sidebar → KitchenGrowth and Full plans
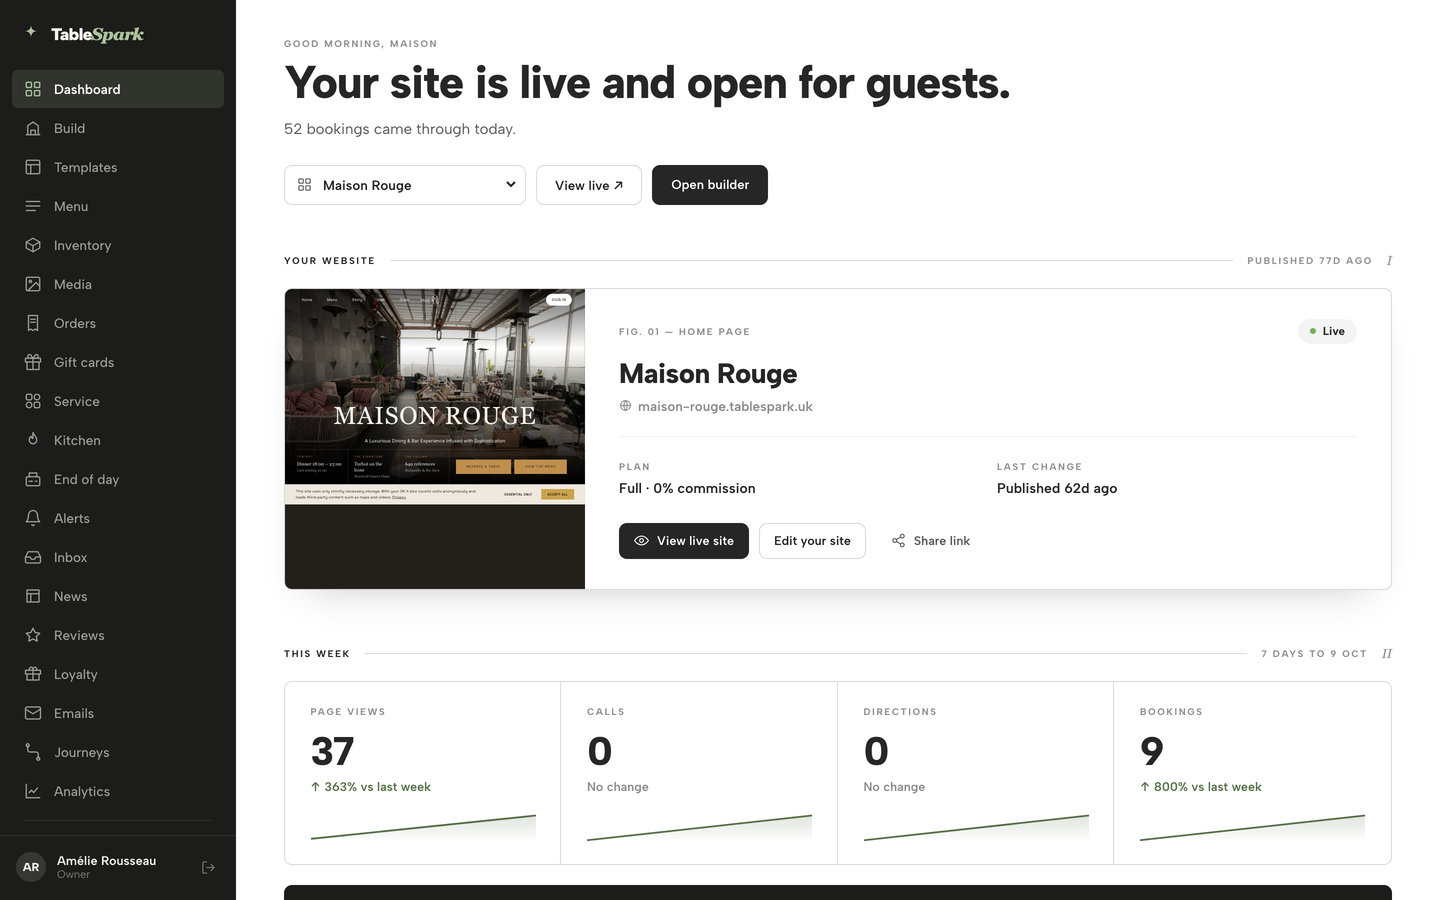
In the sidebar, click Kitchen — the kitchen display opens full screen.
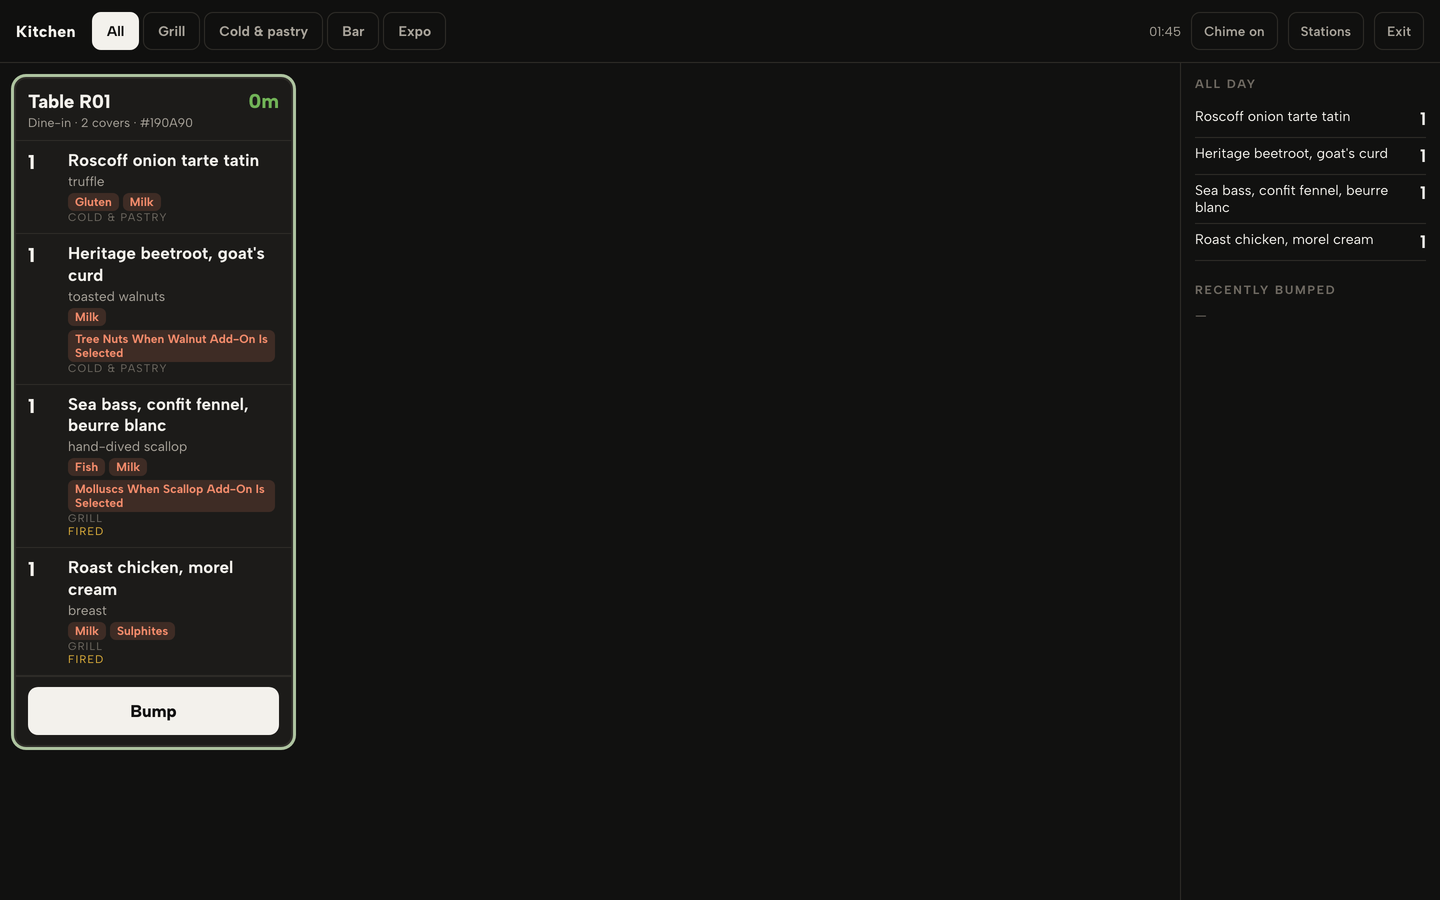
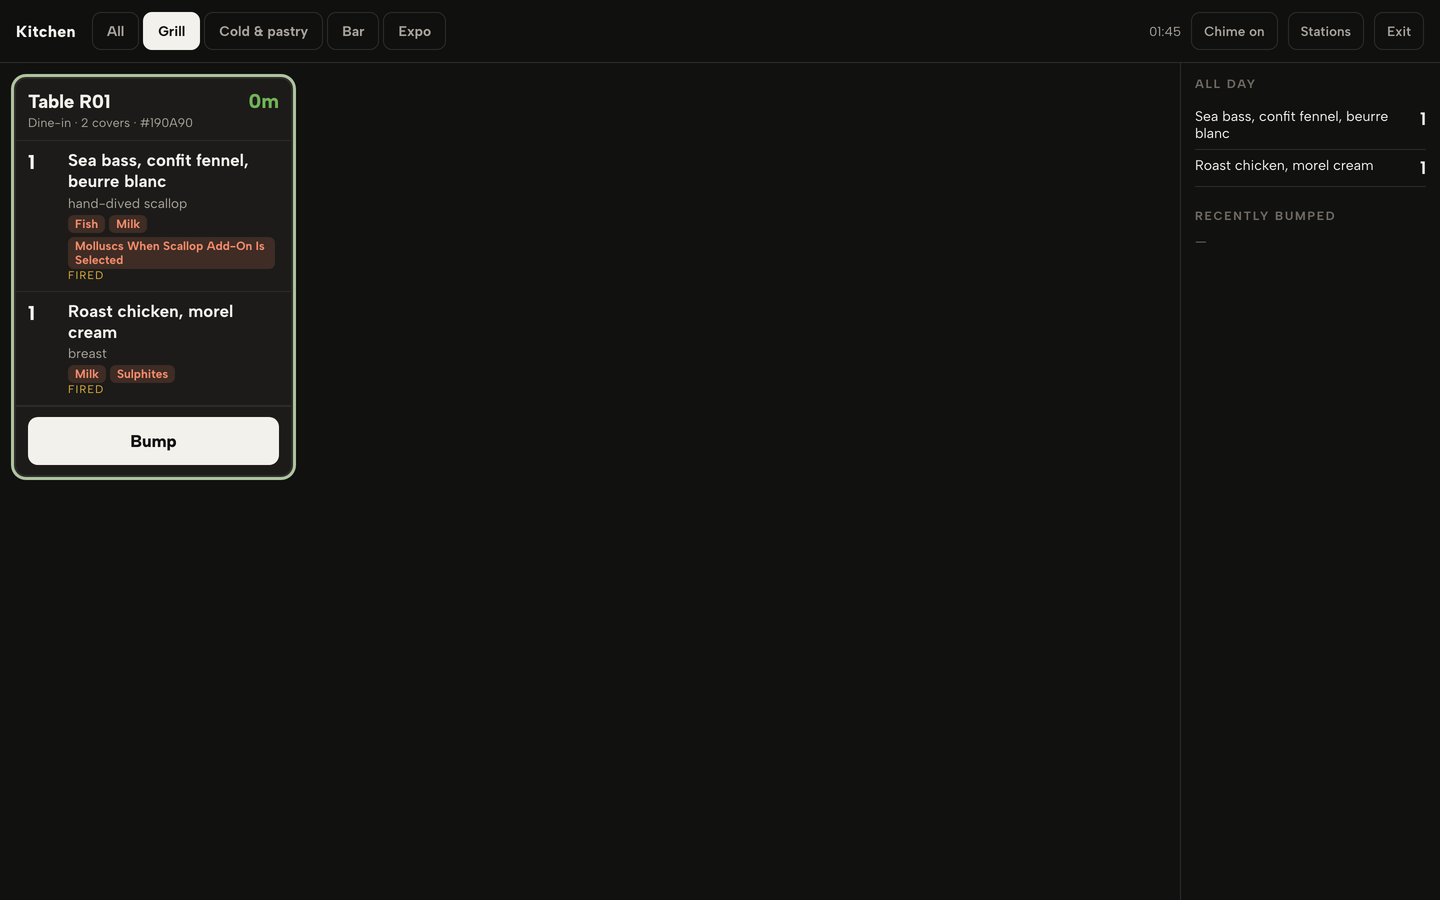
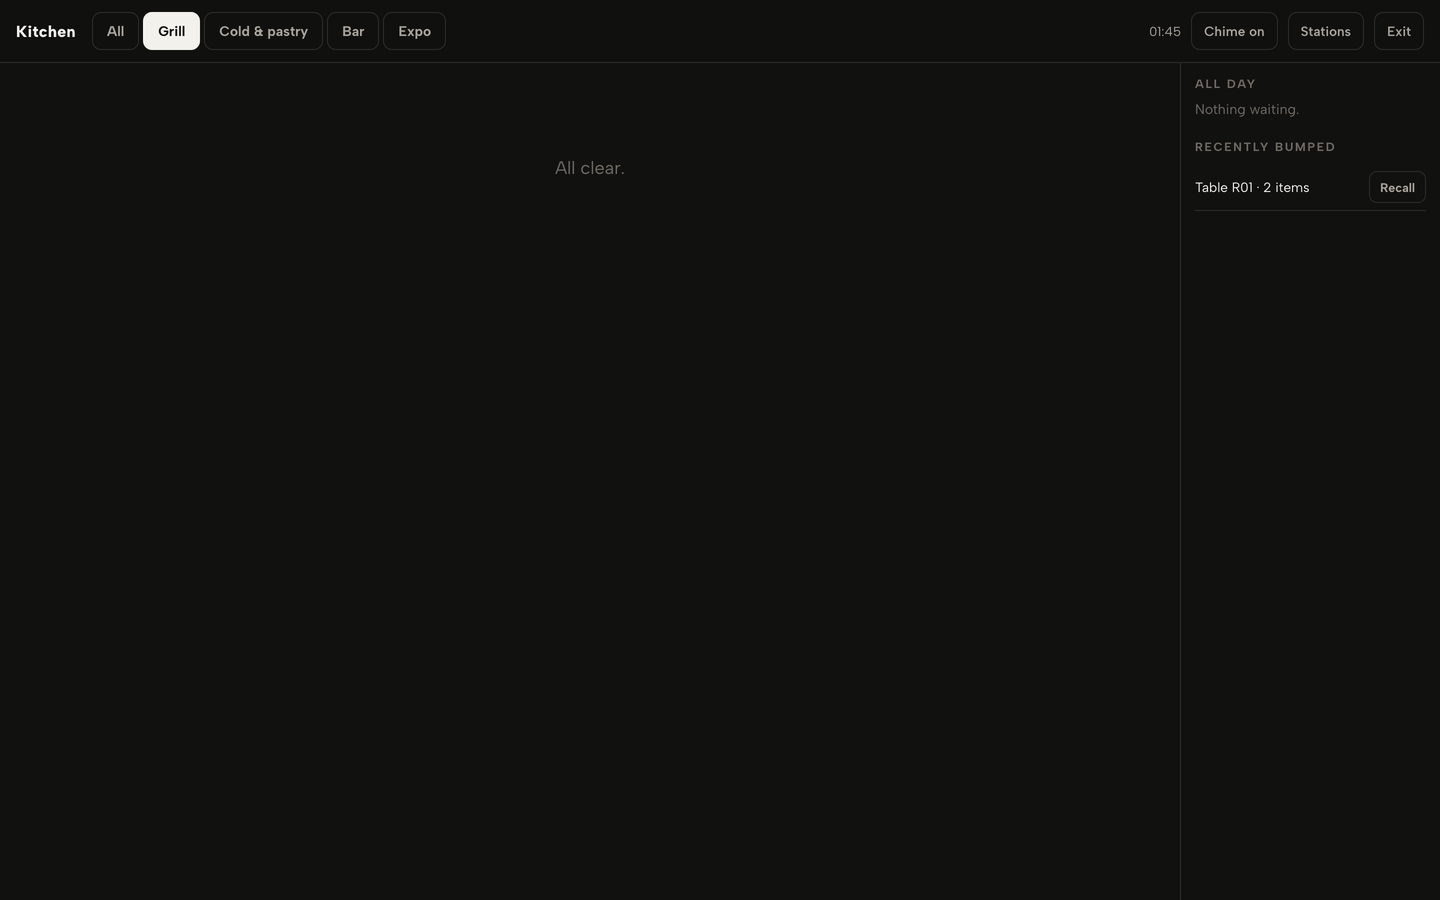
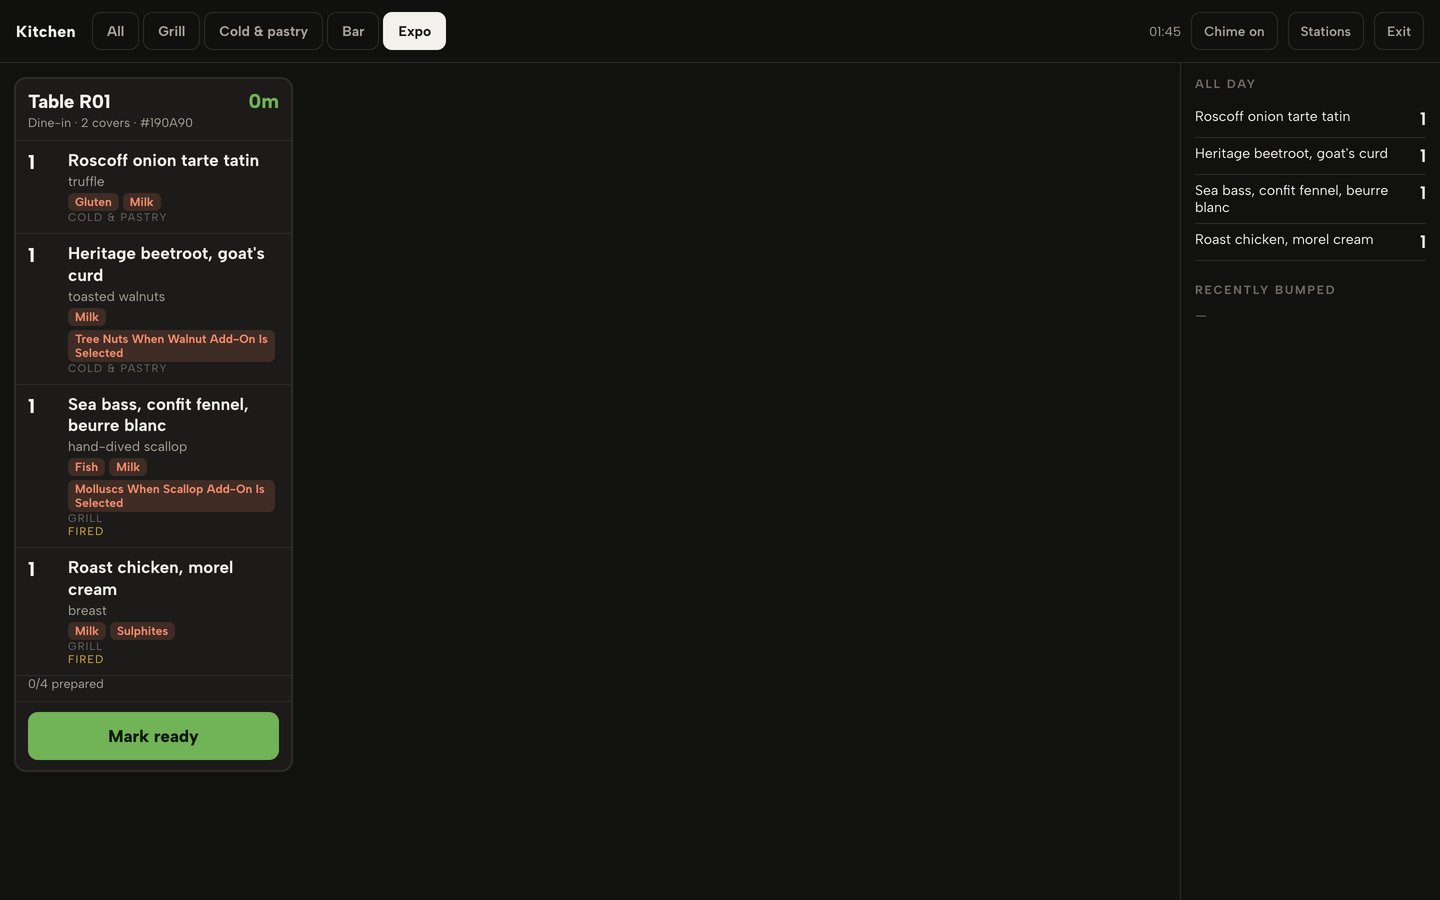
Stations created and routed, mains held and fired, a ticket bumped and recalled, Expo read, and a dish counted — every cook sees their own dishes on one board.
- WHAT YOU NEED
- A screen in the kitchen a tablet or a wall display
- TIME
- About 10 minutes
- PLAN
- Growth or Full the kitchen display is part of both
- CAN I BREAK IT?
- No a bump can be recalled
IN PLAIN WORDS / TAP A TERM
What is a station?
One part of the kitchen with its own screen, such as the grill, cold and pastry, or the bar. Each menu section is routed to the station that makes it, so a cook sees only their own dishes.
What does bump mean?
Telling the screen a ticket is done. The dishes are marked prepared and the ticket leaves the station’s board.
What do hold and fire mean?
Hold keeps a dish back when the order is sent, usually the mains, so the kitchen starts on the starters first. Fire releases the held dishes to their stations when the table is ready.
What is the pass, or Expo?
The place where finished dishes are checked and gathered before they go to the table. The Expo tab shows each whole table so the person on the pass can see what is still missing.
What does 86 mean?
Kitchen shorthand for a dish that has run out. In TableSpark it is the Sold out button, or a portion count reaching zero.
Open the kitchen screen
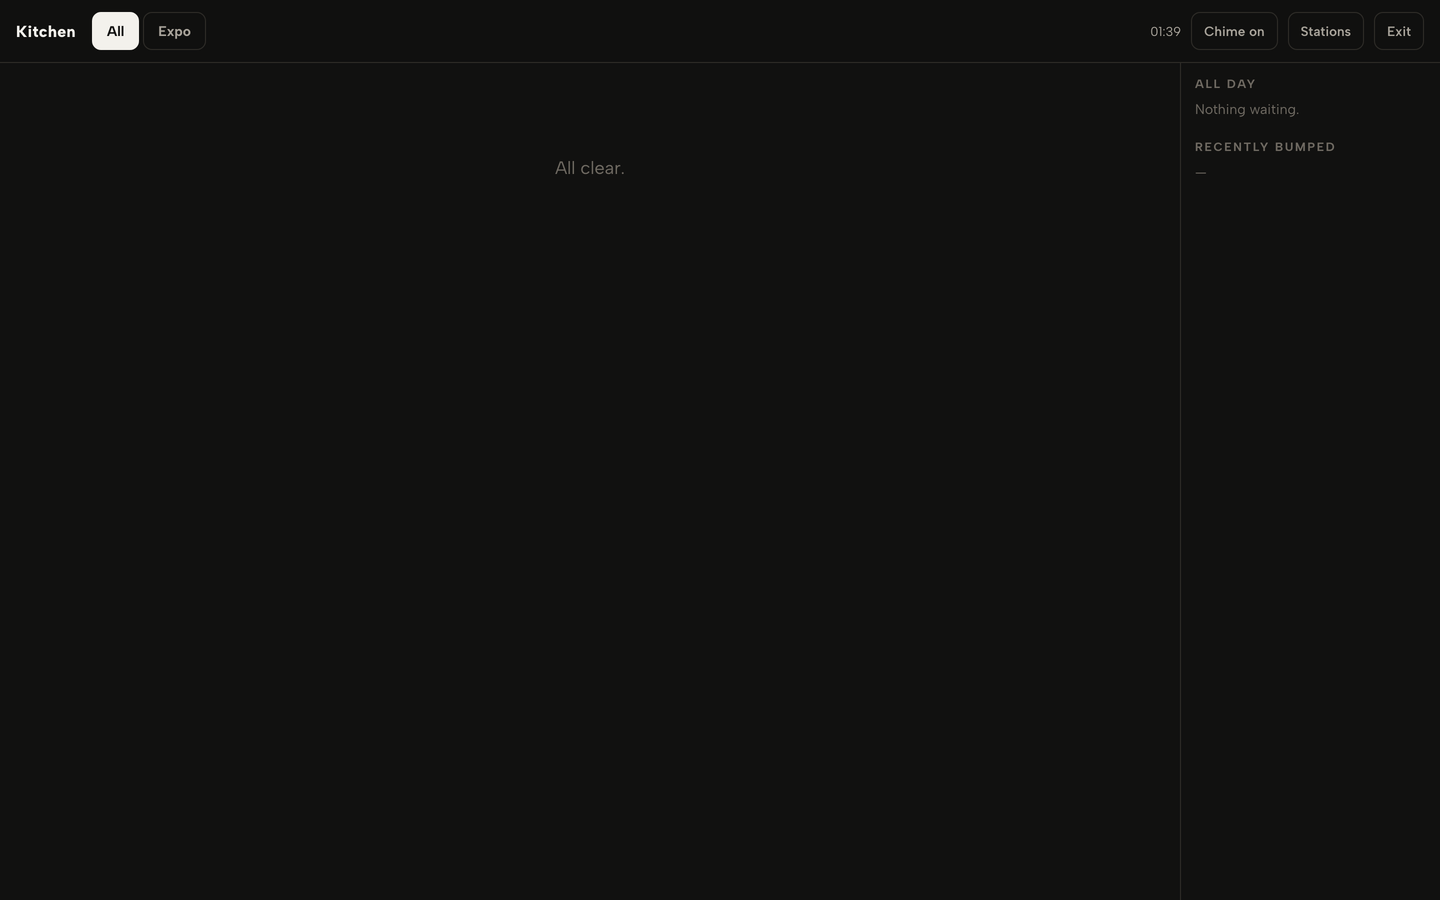
Click Kitchen in the sidebar, between Service and End of day. The kitchen display opens full screen on a dark board made to be read from across a pass, on a wall screen or a tablet. Sign in with your TableSpark account on the screen in the kitchen and leave it open. The kitchen display comes with the Growth and Full plans.
The top bar carries a tab for All, one tab for each station and an Expo tab, then the clock, a Chime on / Chime off button, Stations and Exit, which takes you back to Service. The board lists every open order as a ticket, whichever way it arrived: dine-in orders from the order pad, collection and delivery orders from your website. The screen refreshes by itself as orders arrive, and a short chime sounds for each new ticket while Chime is on.
If the connection drops, a banner across the top says the screen is offline and shows the last tickets it received, and the board updates again as soon as the connection is back.
Create stations and route your menu
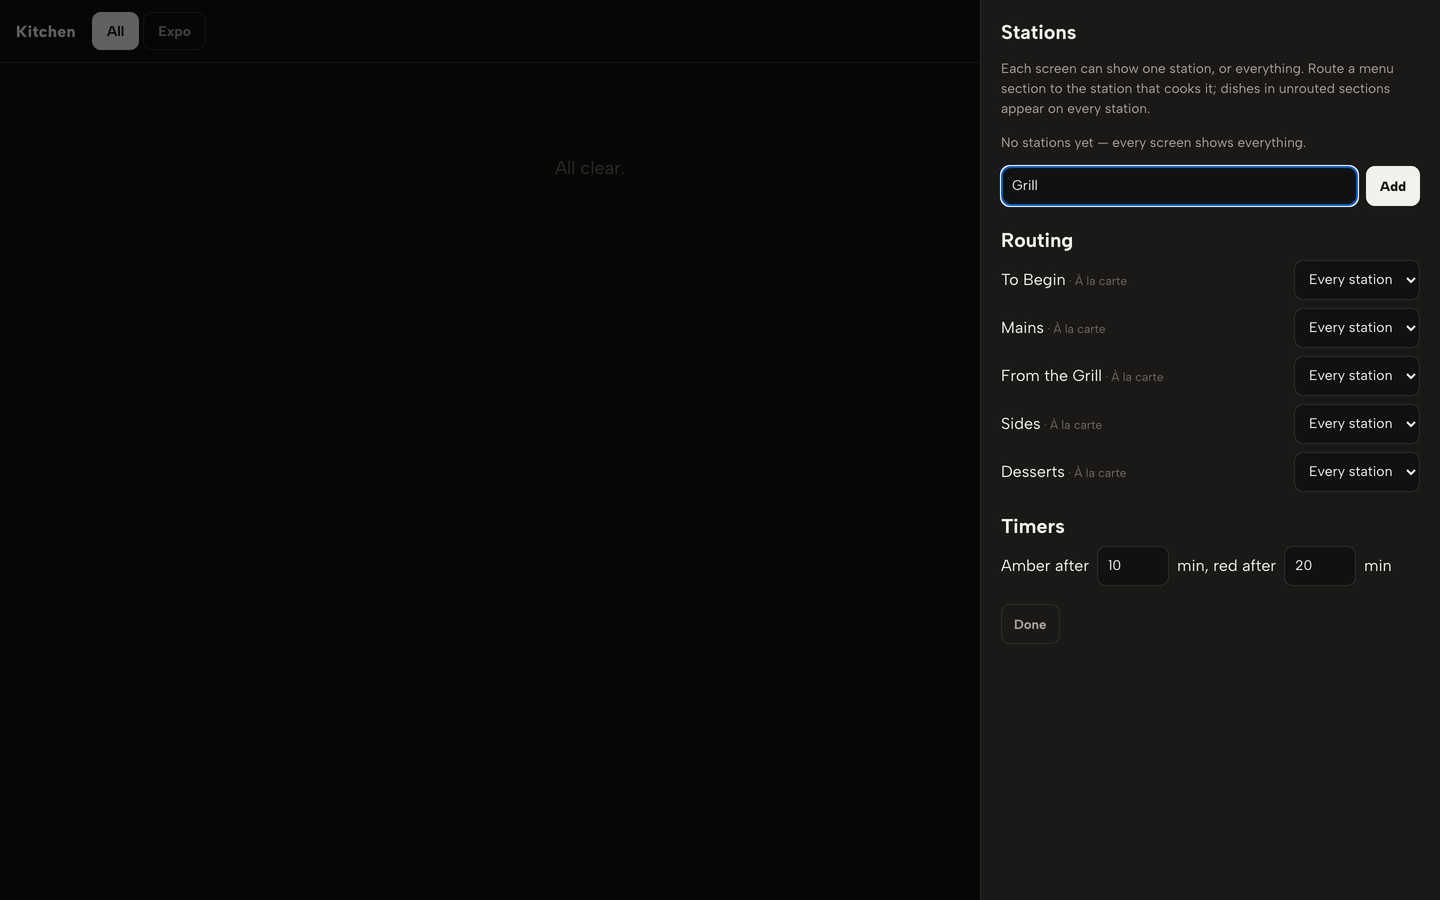
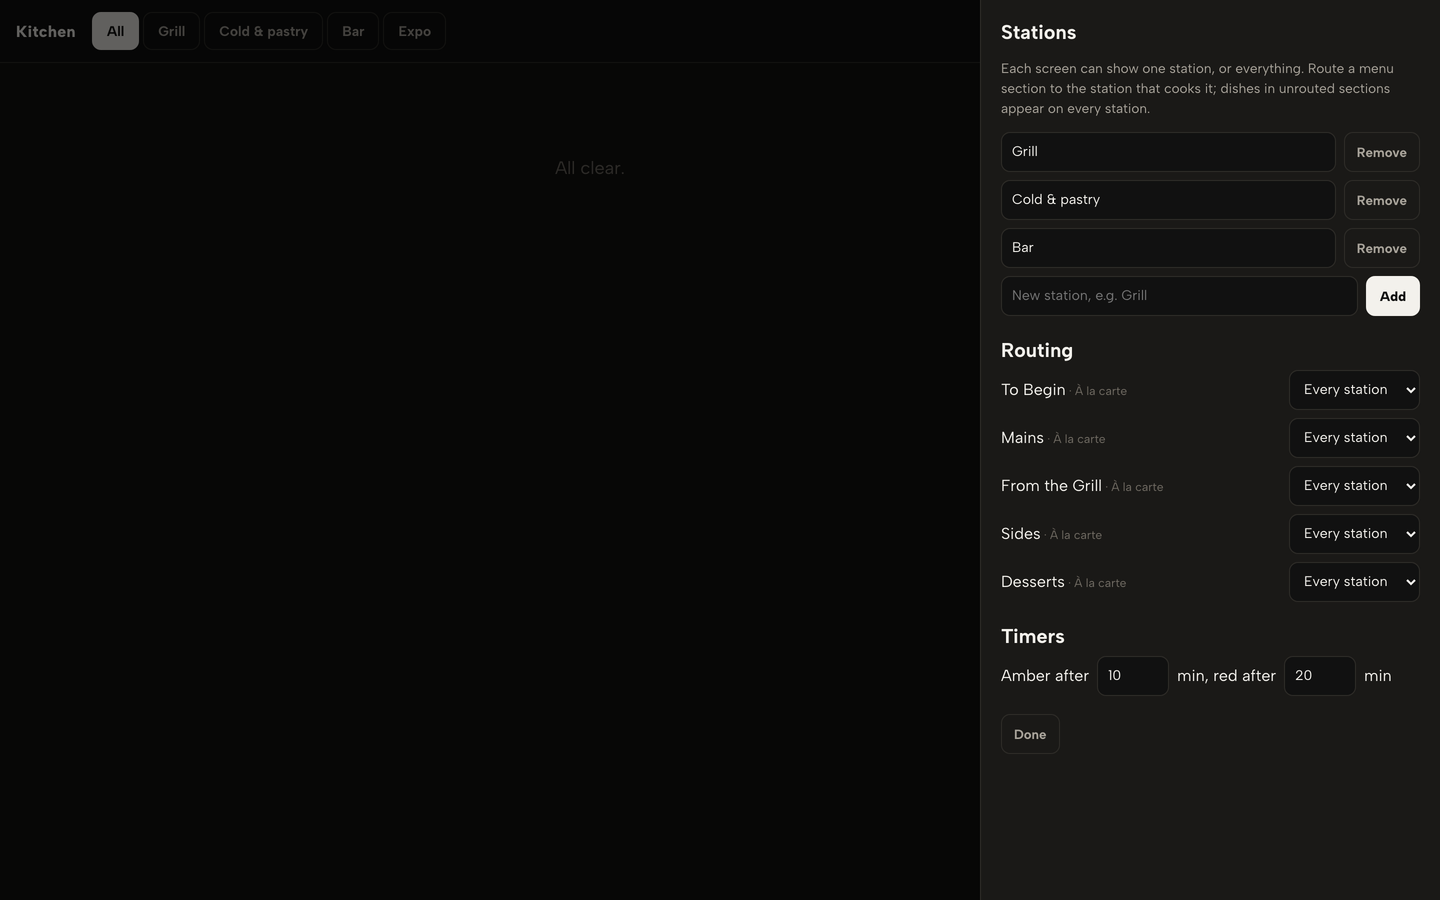
A station is one part of the kitchen with its own screen: the grill, cold and pastry, the bar. Click Stations in the top bar and a drawer opens on the right. Type a name in New station and click Add. Add as many as you need; each appears as a tab in the top bar. Maison Rouge uses Grill, Cold & pastry and Bar.
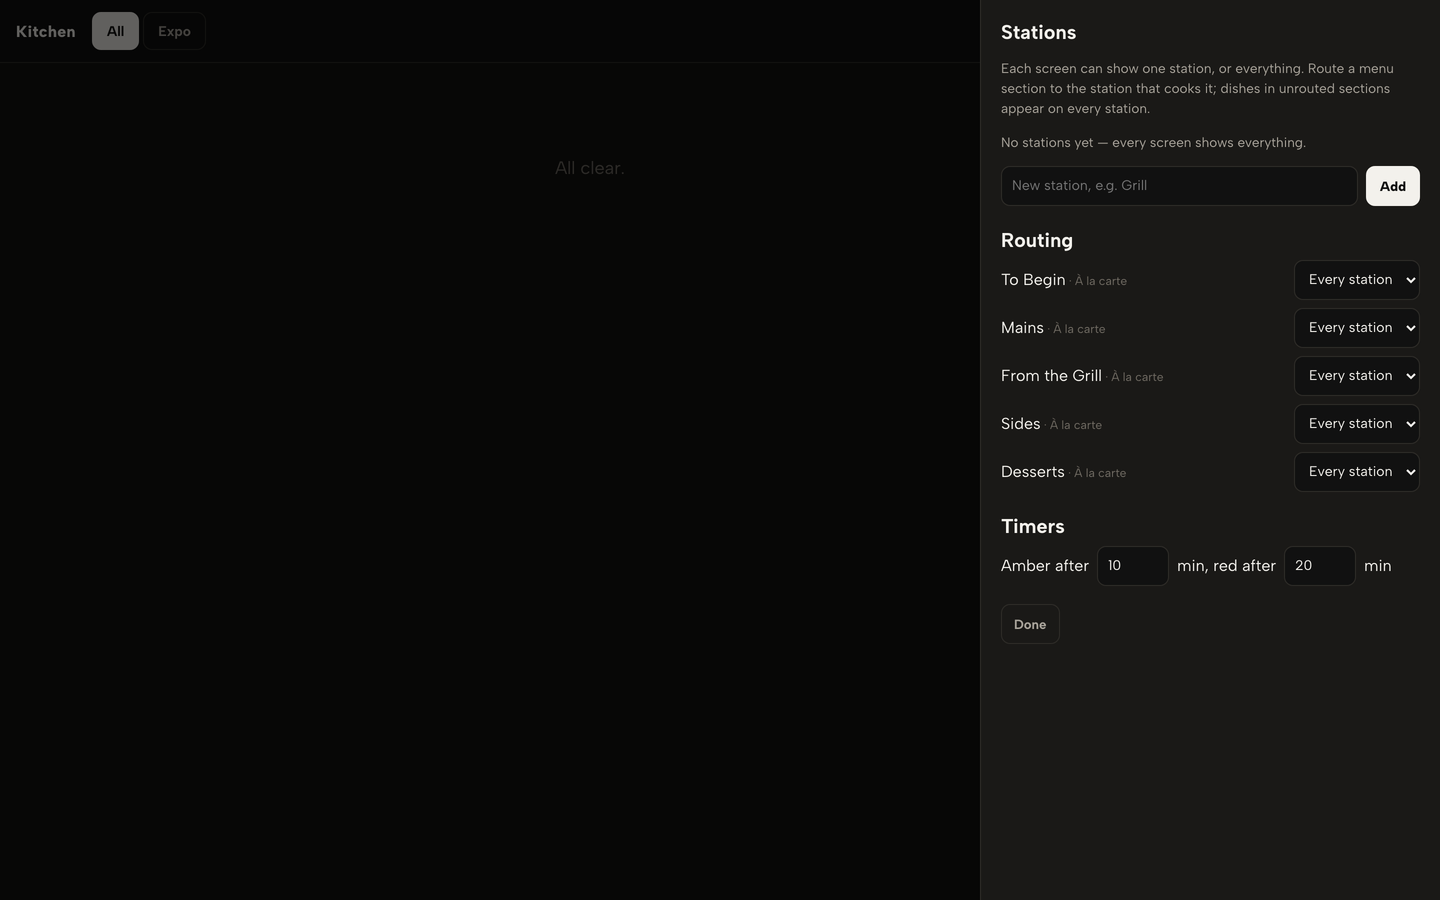
To rename a station, type over its name in the drawer; it saves when you click away. To delete one, click Remove, then click again where it says Tap again. Owners, admins and editors can change stations; the rest of the team sees them read-only.
Under Routing, every menu section has a list. Choose the station that cooks it: here To Begin and Desserts go to Cold & pastry, and Mains, From the Grill and Sides go to Grill. A section left on Every station appears on every station, so nothing is ever invisible to the kitchen.
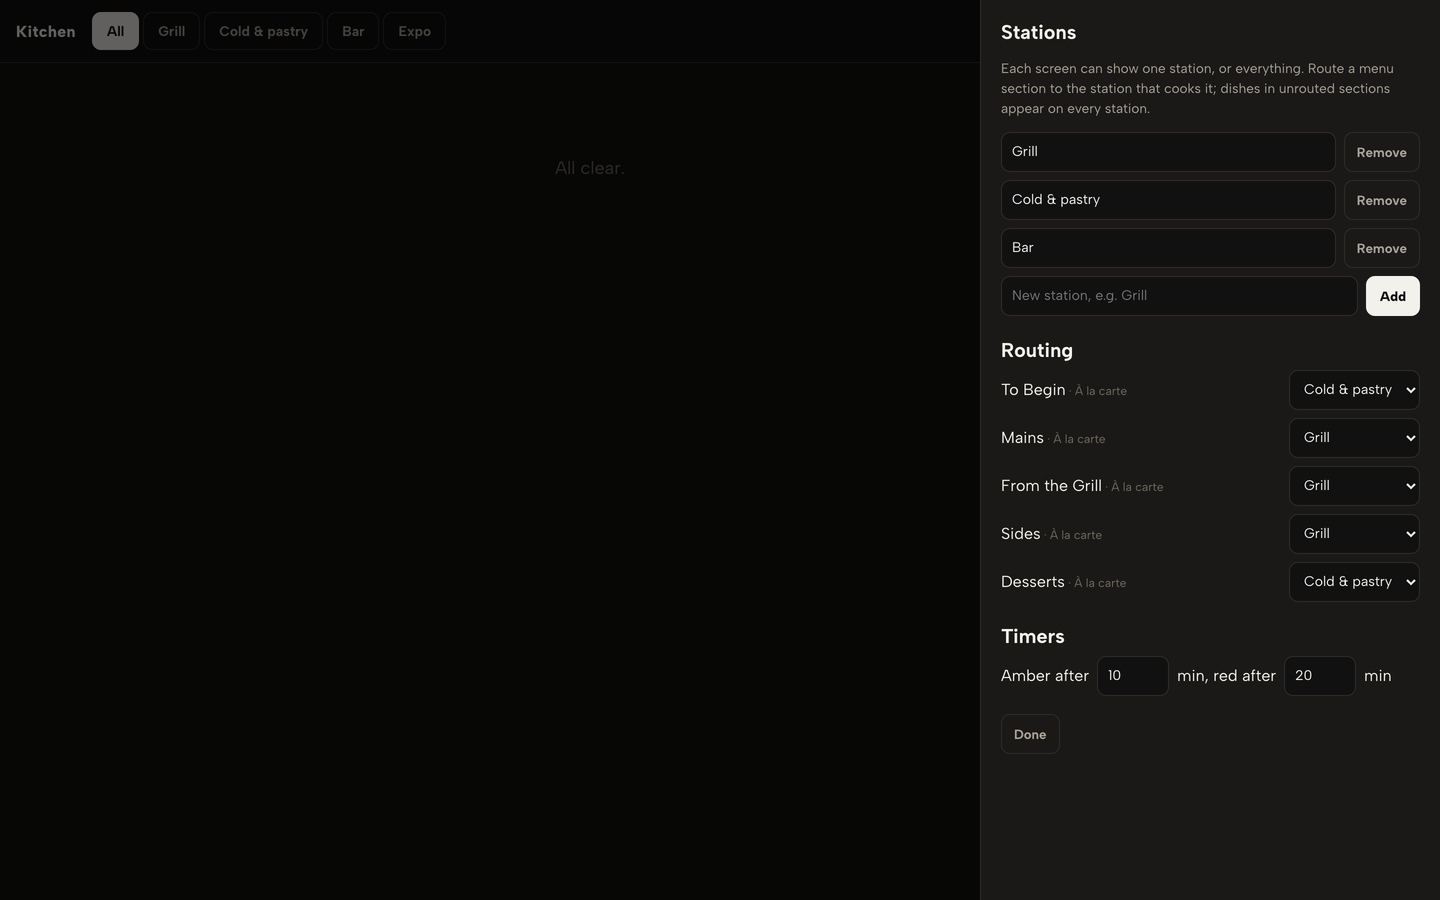
The last block, Timers, sets when a ticket turns amber and red: Amber after and red after a number of minutes (the screen starts at 10 and 20). Click Done to close the drawer. The timers are saved on that screen, so the pass can run tighter than the cold section if you set them there.
Read a ticket and bump it
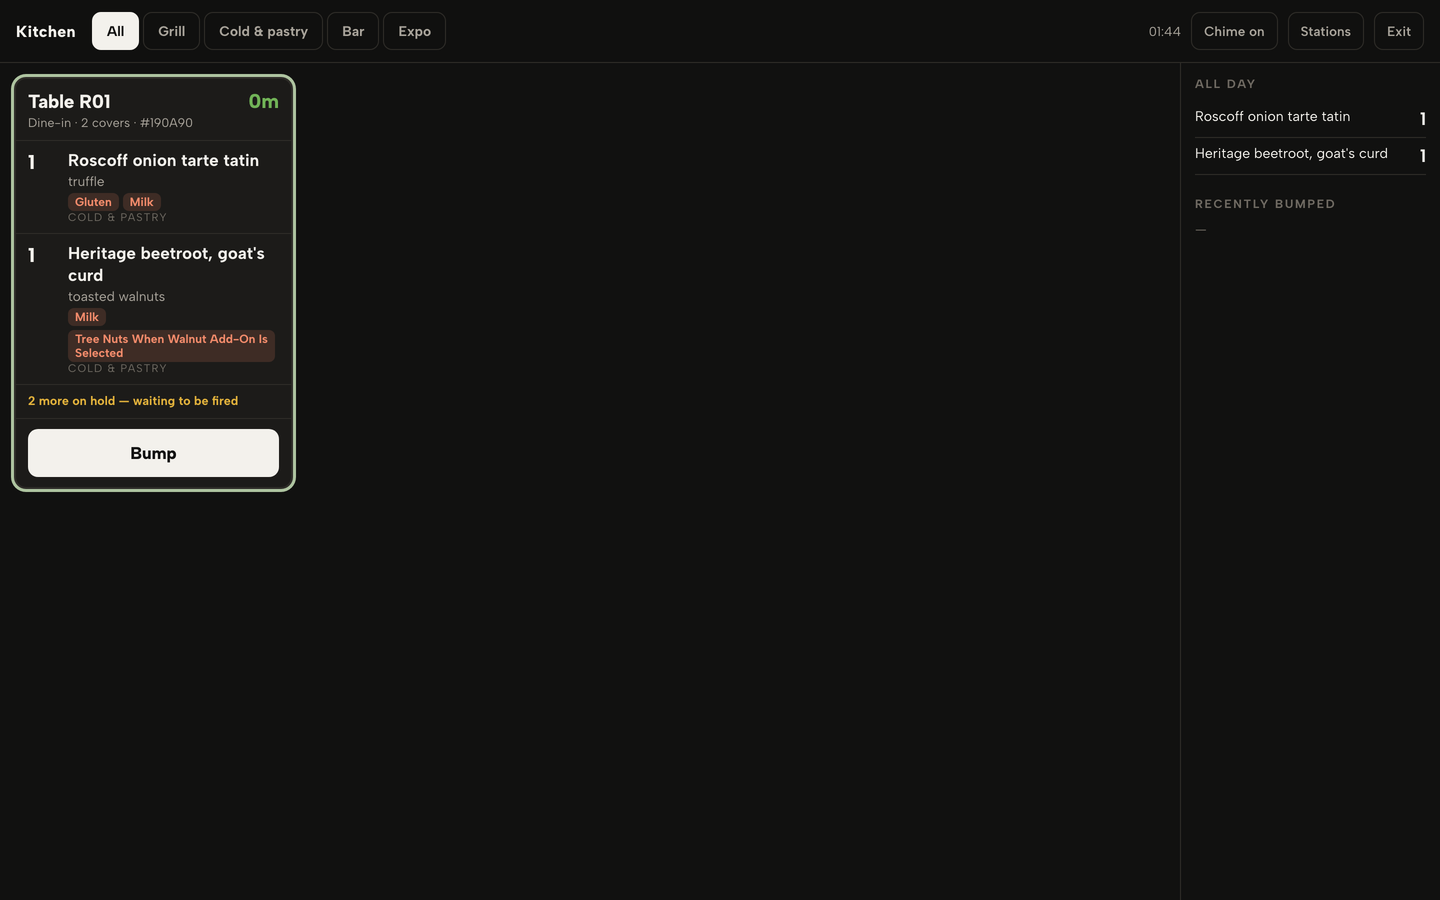
Each ticket is one order. The heading gives the table (or the guest’s name for a collection or delivery order), the channel, the number of covers and a short order code, and a timer counts the minutes since the order was placed. The timer is green, turns amber after your first limit and red after your second, and the ticket’s border changes with it.
Every dish shows its quantity and name, its options on a second line, any note the server typed, and its allergens as small labels, so the cook does not have to go and ask. On the All tab each dish also carries the name of its station. Tap a dish to tick it off as done; tap it again to undo. The first tick moves the order to preparing, and when every dish is ticked the order becomes ready.
Click a station tab and the board shows only that station’s dishes. A ticket with nothing for the station is not shown there at all.
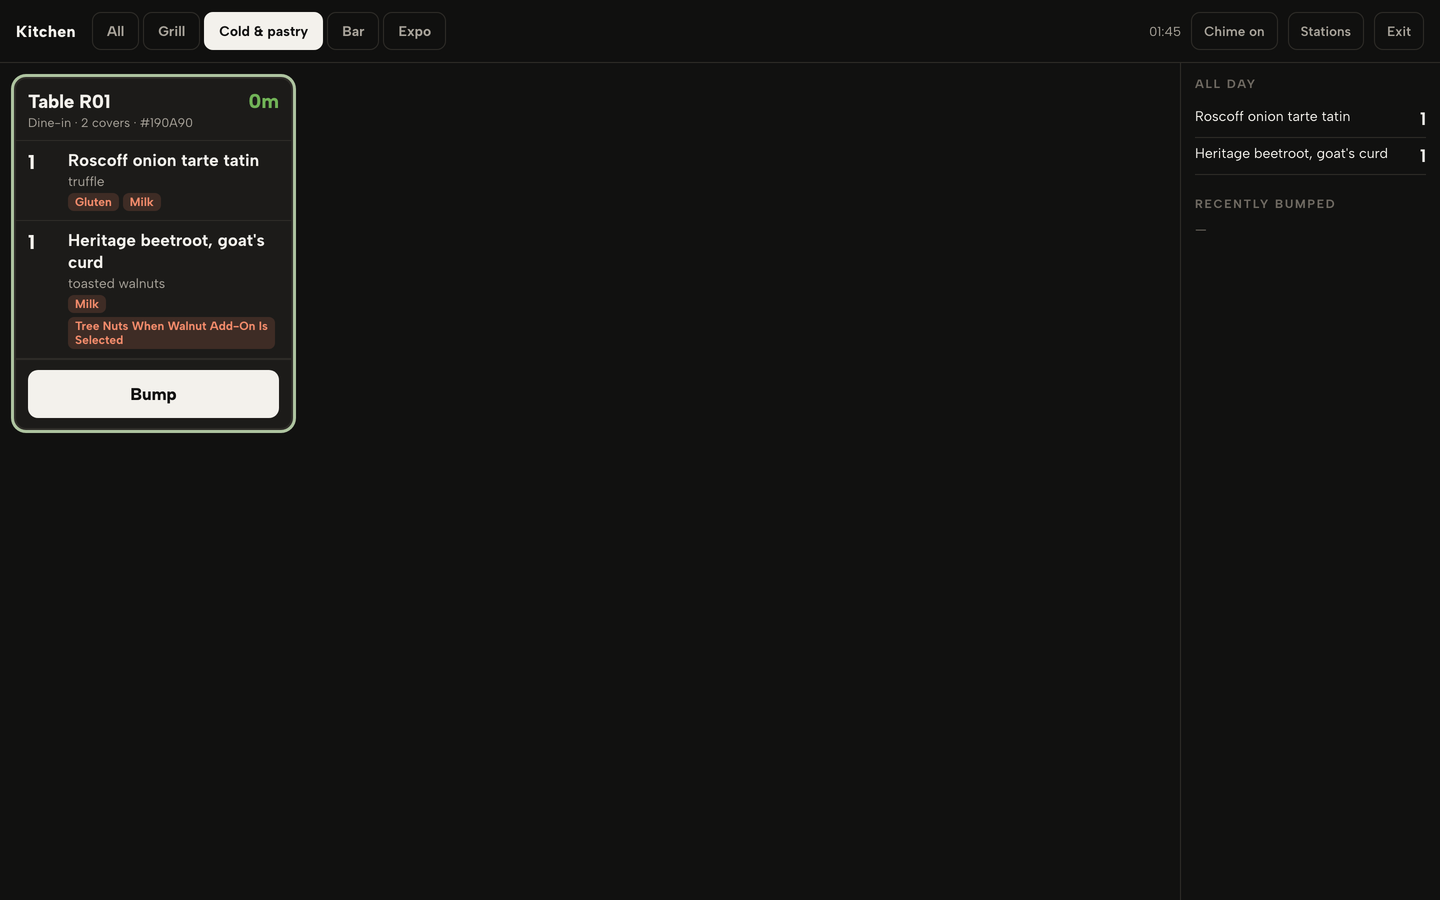
When the station has plated up, click Bump at the foot of the ticket. Every dish on that ticket for this station is marked prepared and the ticket leaves the station’s board. The rest of the table keeps going on the other stations, and the order is ready once every station has bumped its part.
Hold the mains, then fire them
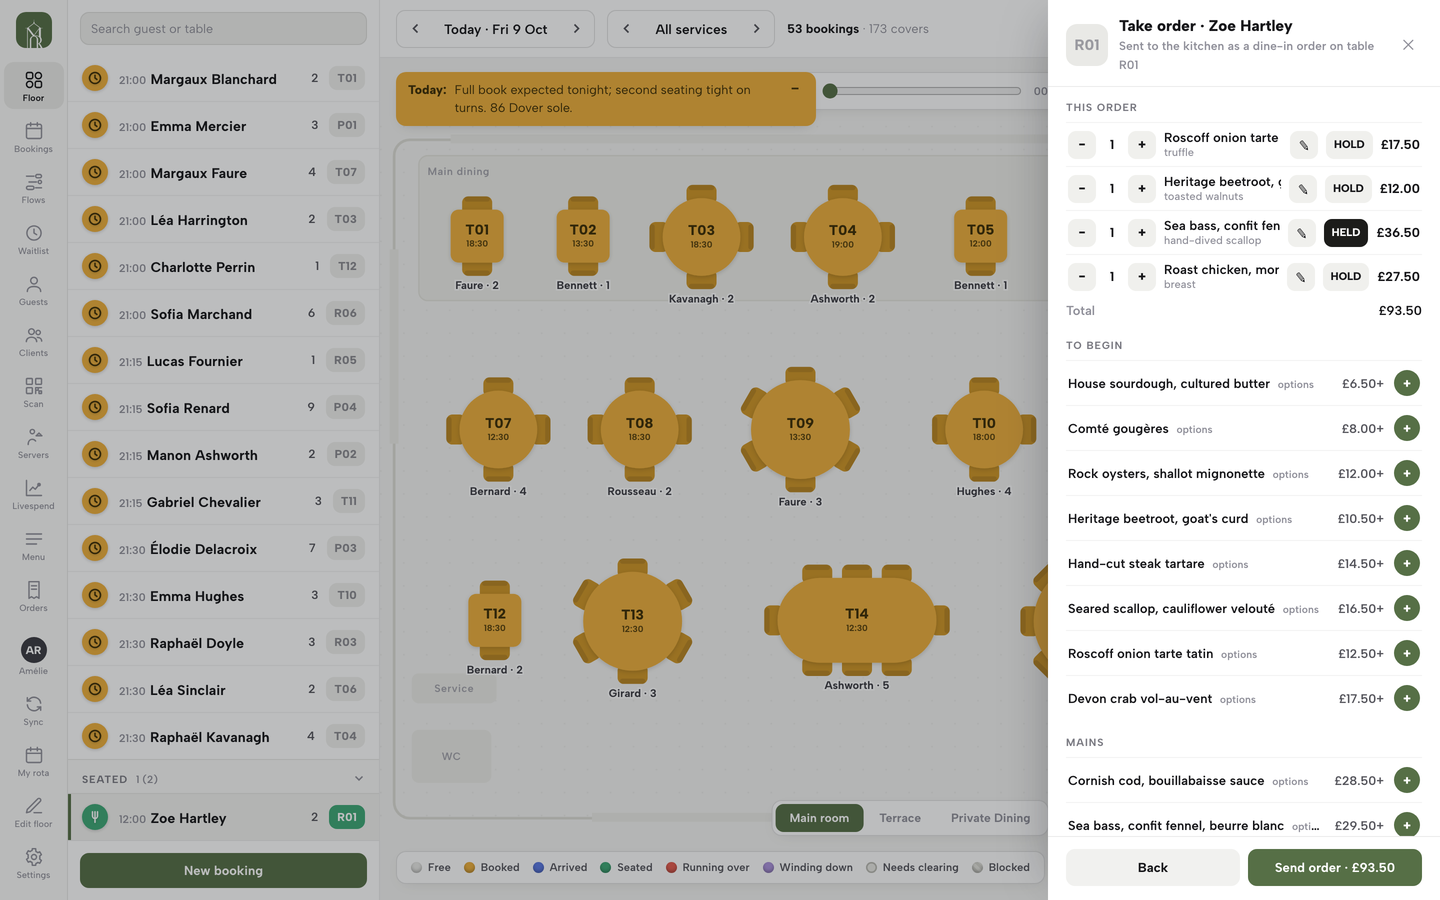
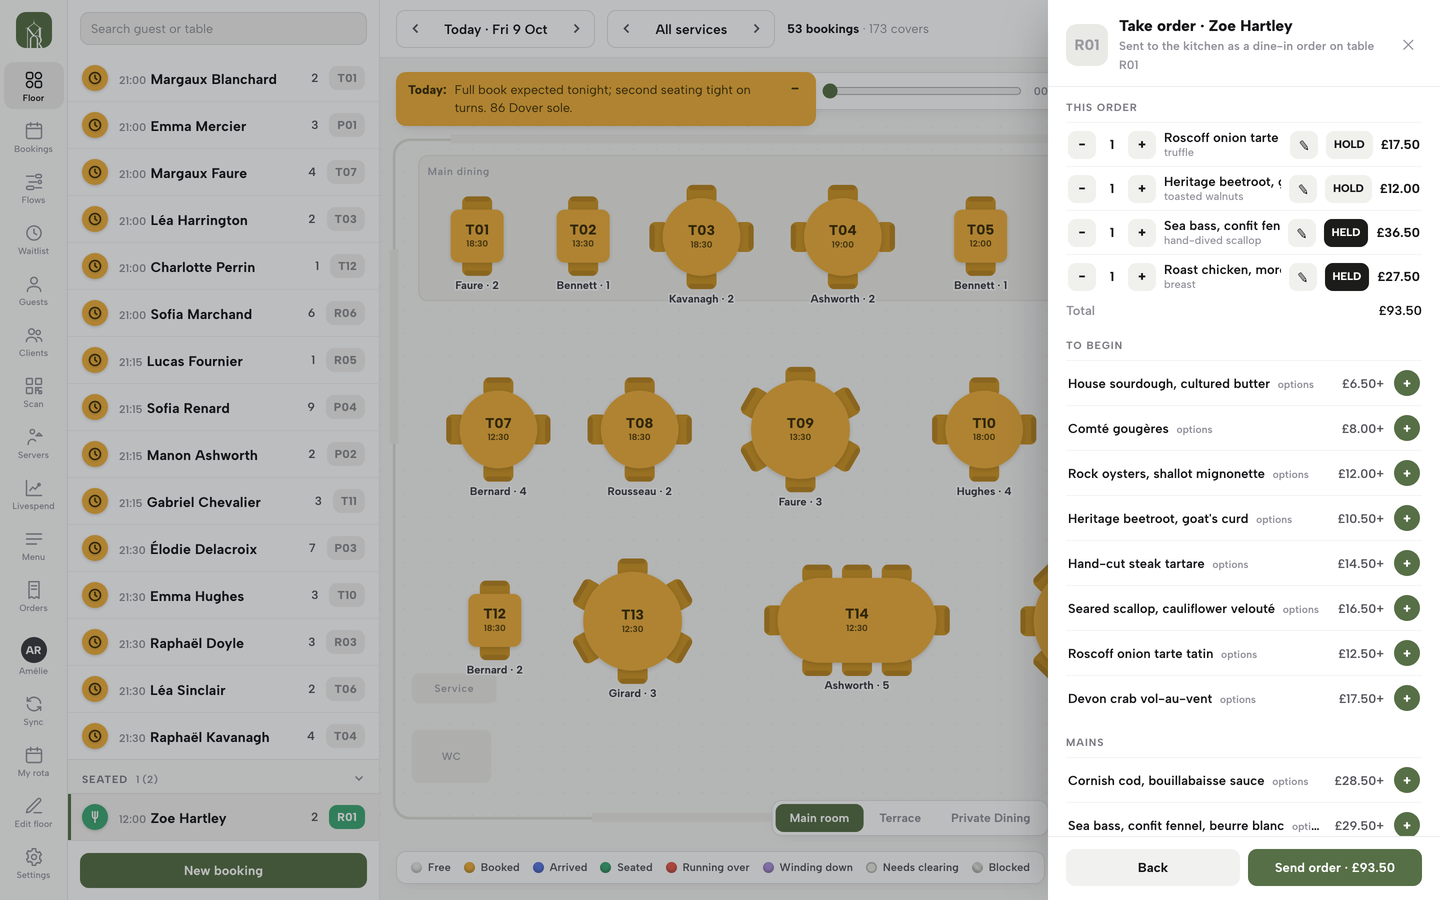
Courses are set in Service, on the table’s order pad. Open the seated table, click Take order and add the dishes as usual. In the cart, every dish has a HOLD button. Click it on the mains and it changes to HELD; click it again to release the dish. Then click Send order.
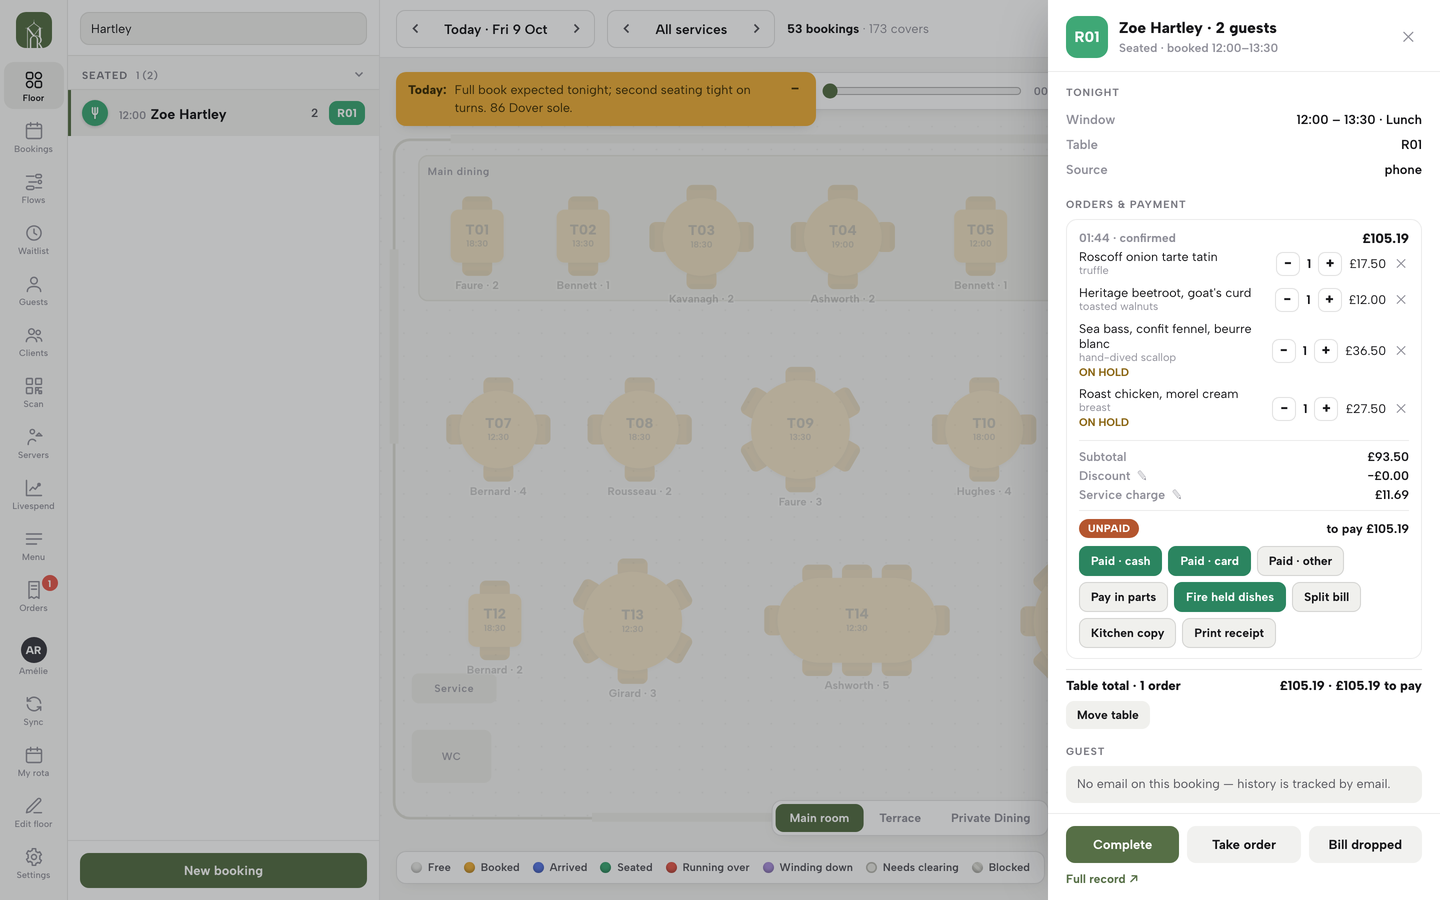
The starters go to the kitchen straight away. The held mains are saved on the order, shown on the table’s sheet as ON HOLD, and kept off the stations. On the kitchen display the ticket shows the starters and a line at the foot that counts the rest: 2 more on hold — waiting to be fired.
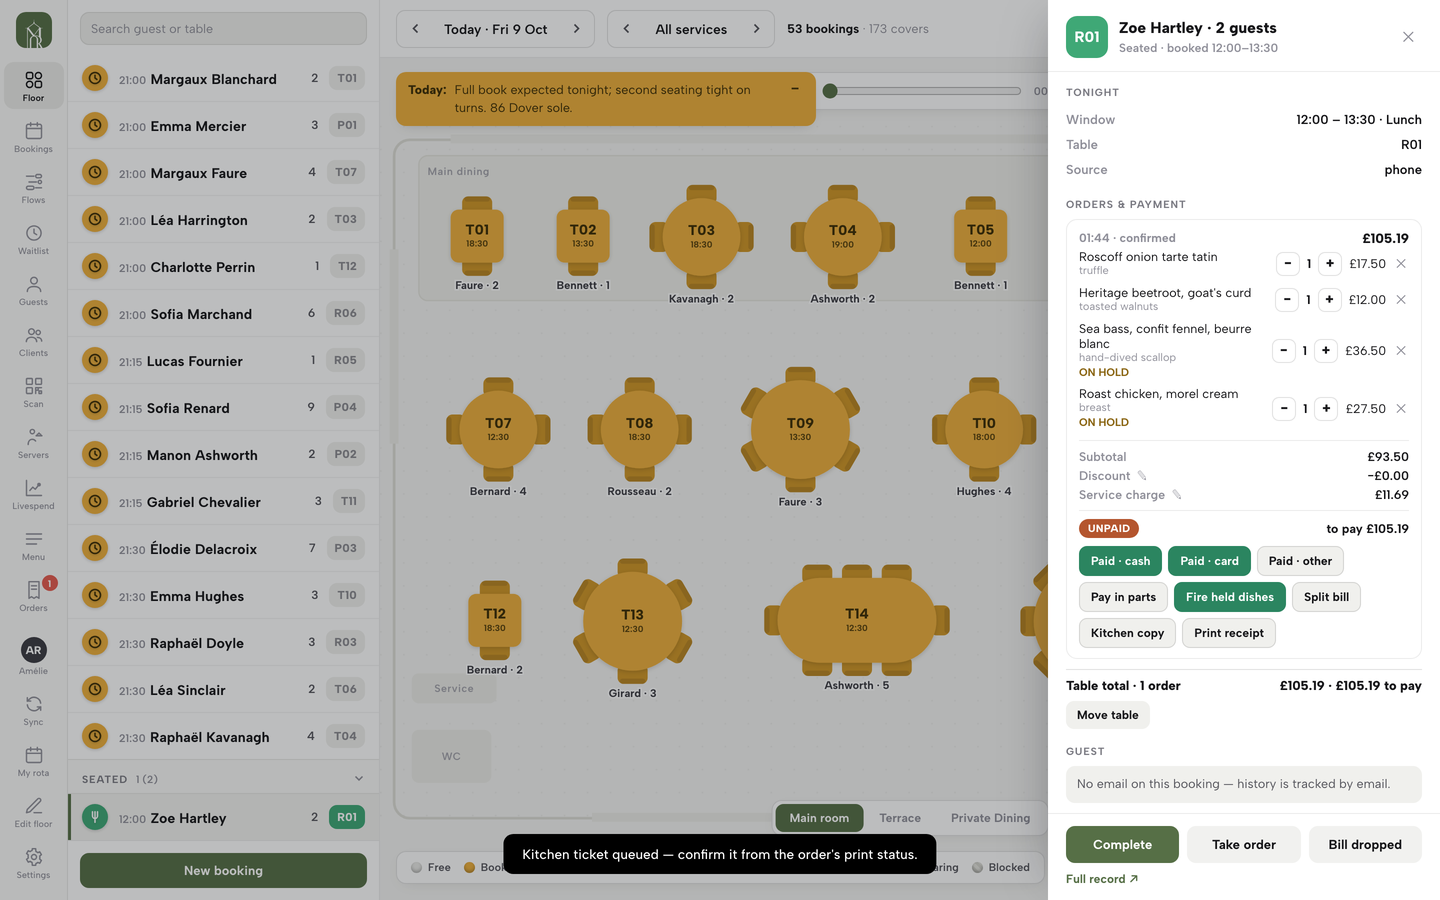
When the table is ready for its mains, open the table’s sheet in Service and click Fire held dishes among the buttons under the order. A message confirms how many dishes were fired, and the held dishes are released to their stations.
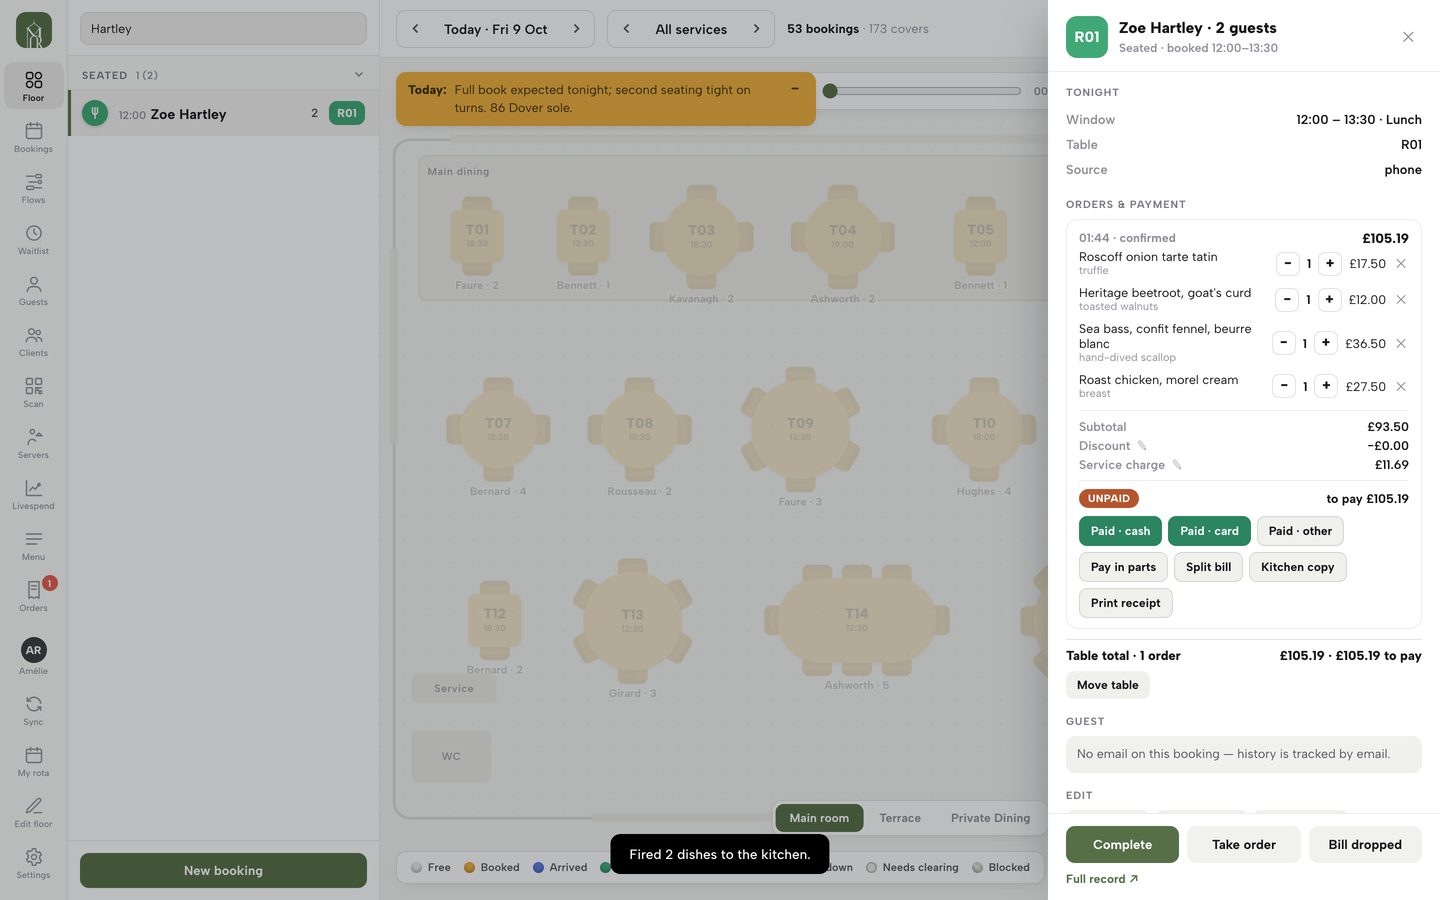
On the kitchen display the mains appear on the Grill tab marked FIRED in amber, with the ticket’s timer already running. The cold station is not interrupted, and nobody has to shout across the pass.
Expo and the all-day count
The Expo tab is for whoever runs the pass. It shows every open order as one ticket with all its dishes, whichever station makes them, and a count of how many are prepared, such as 0/4 prepared. Held dishes stay off the ticket until they are fired. Click Mark ready when the table is complete: every dish is marked prepared and the order becomes ready. On a ready dine-in or collection order the button becomes Served / handed over, which completes it.
On the right of every tab, the All day panel adds up the dishes still to cook across all open tickets, largest first, one line per dish with its total. It follows the tab you are on, so the grill sees the grill’s total and the pass sees everything. Dishes that are held do not count until they are fired.
Recall a bumped ticket
Pressed Bump too soon? Under Recently bumped on the right, the screen lists your last bumps, each with the table and the number of dishes. Click Recall beside one and its dishes go back on the board as not prepared, with their timer still running.
The list holds up to eight bumps and belongs to the screen you are using, so each station recalls its own. For a single dish, tap it on the ticket to untick it.
Count portions
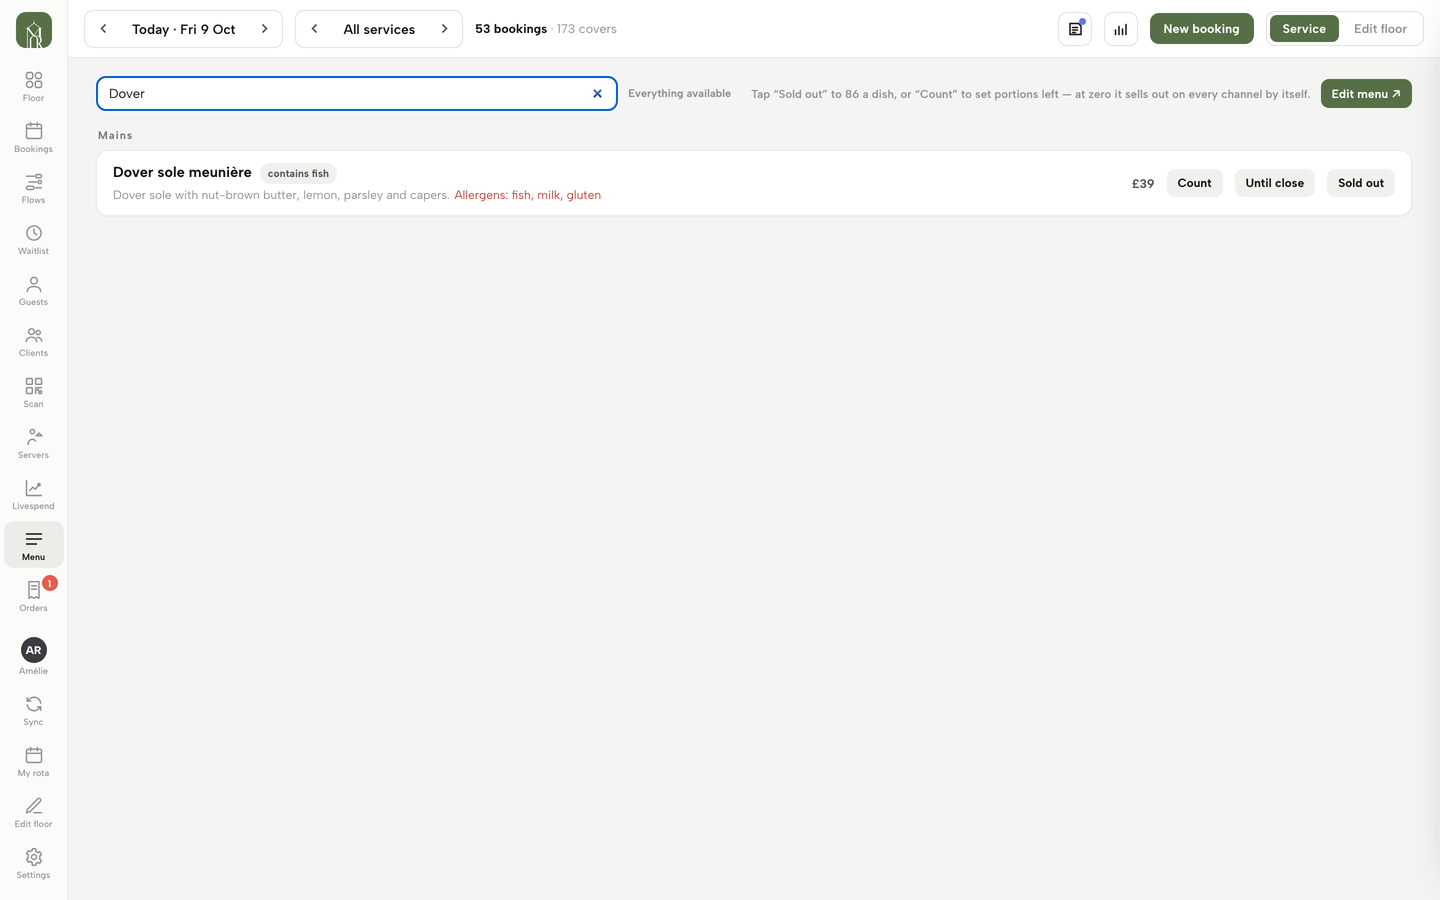
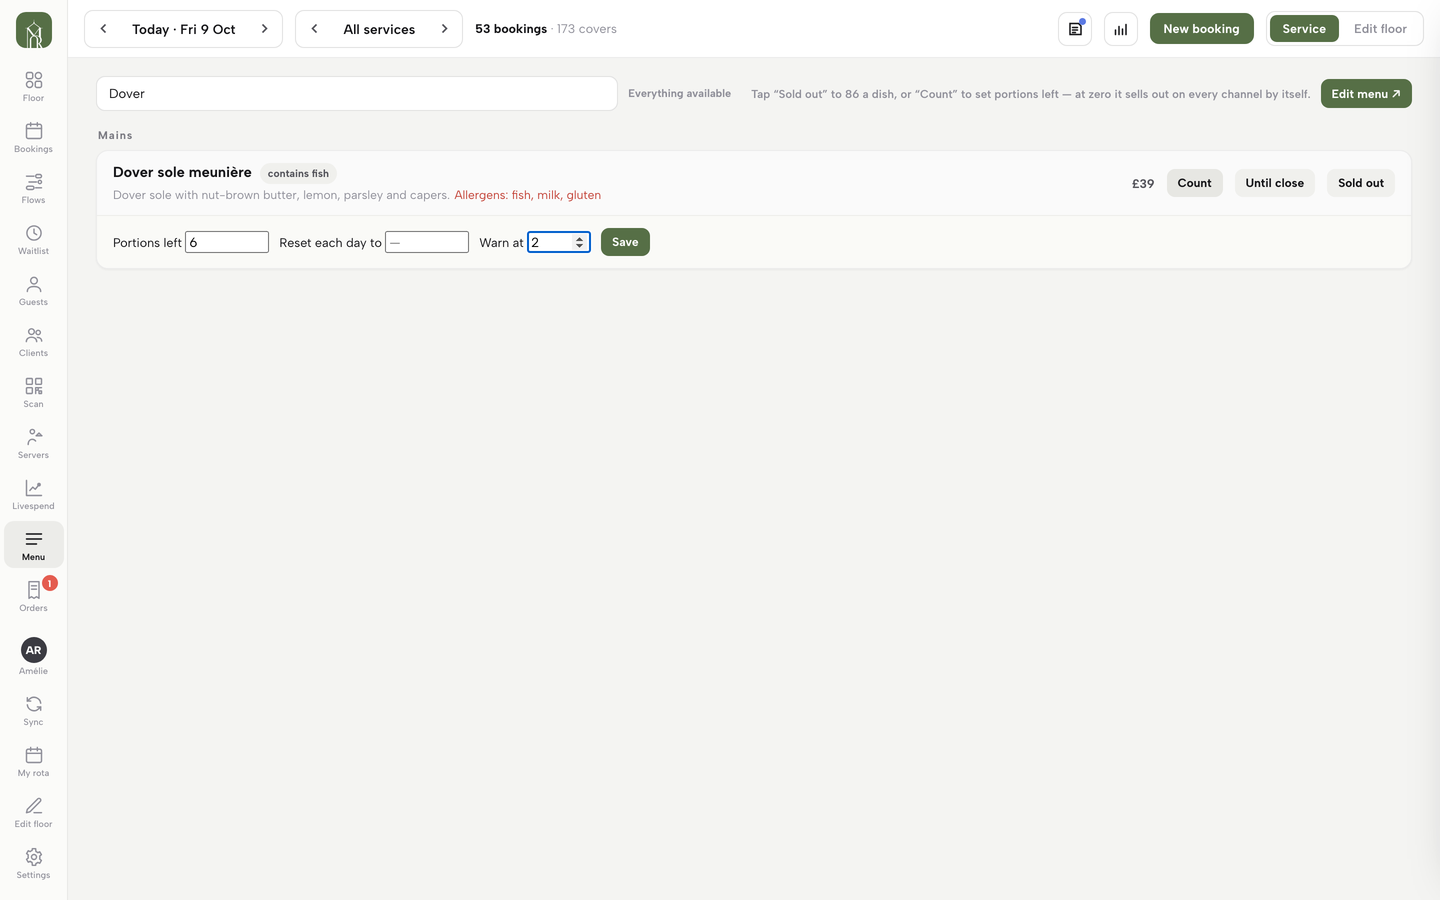
Some dishes come in a fixed number: the Dover sole that arrived this morning, the last of the lamb. In Service, click Menu in the left rail. Every dish is listed by section with three buttons: Count, Until close and Sold out. Use the search box to find a dish, then click Count.
Type the Portions left. If the dish has the same number every day, fill Reset each day to, and the count starts again each business day. Warn at turns the count amber when it falls to that number. Click Save; the dish shows a small 6 left label.
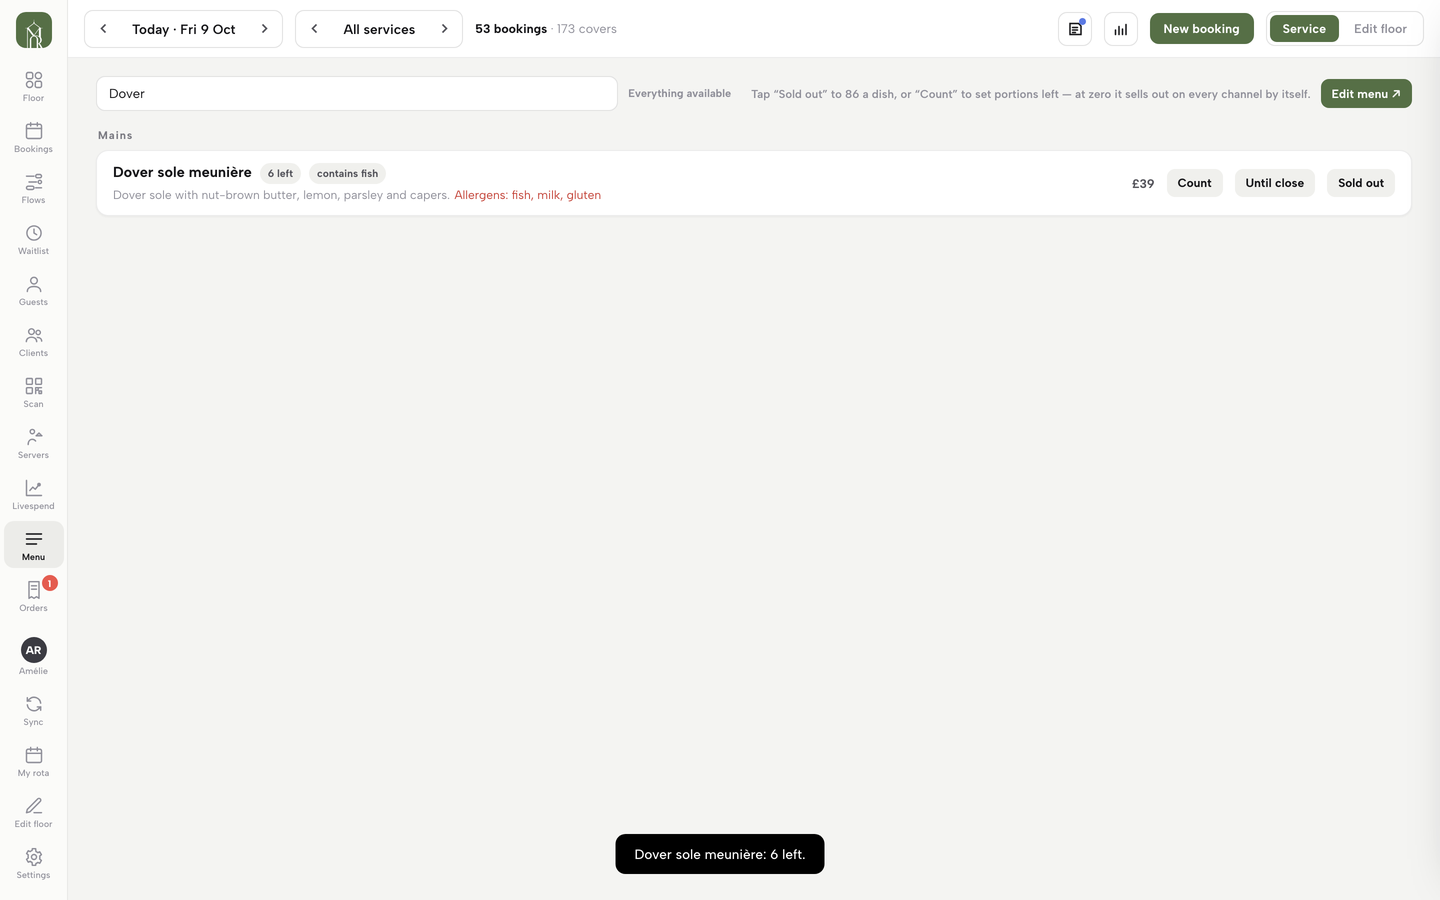
From then on, every order for the dish takes a portion off, whether it comes from the website, the table QR menu, the order pad or the till, so everyone works from one count. At zero the dish sells out on every channel by itself. Cancelling a dish or a whole order gives its portions back. Online guests are stopped at zero, while your team can still ring in one more if a count was wrong. Stop counting on the same editor returns the dish to uncounted.
Sold out, or sold out until close
Two buttons on the same row sell a dish out without a count. Until close takes the dish off for the rest of today’s service: it shows a Sold out label and an Until close label, and it comes back on its own when the business day ends. Sold out takes it off until you click Back on yourself, which is the one to use for a dish you will not have tomorrow either.
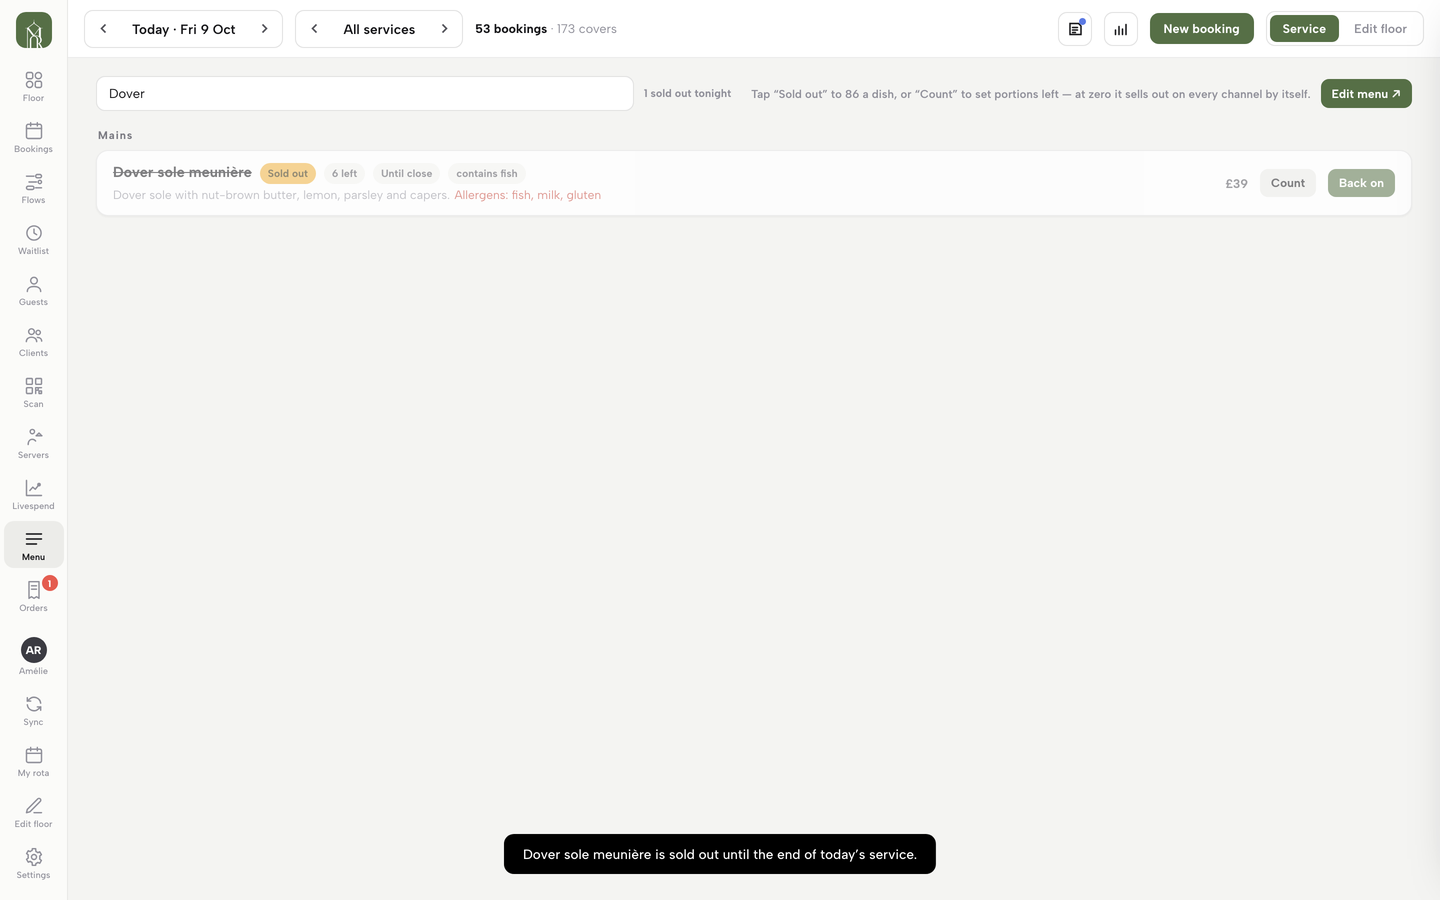
A sold-out dish is struck through for guests on your website and QR menu, and is no longer offered on new orders. Use it the moment the kitchen says “86 the sole”, and the front of house stops selling it without a word being passed along.
Name your stations, route each section once, hold the mains and fire them when the table is ready, bump what is plated, and keep your counts honest. The kitchen reads its own dishes on its own screen, and the pass sees the whole table.
Next · run tonight’s kitchen
Next: open the kitchen
The board is live as soon as the first order is sent. Open it on the screen in the kitchen and send a starter.